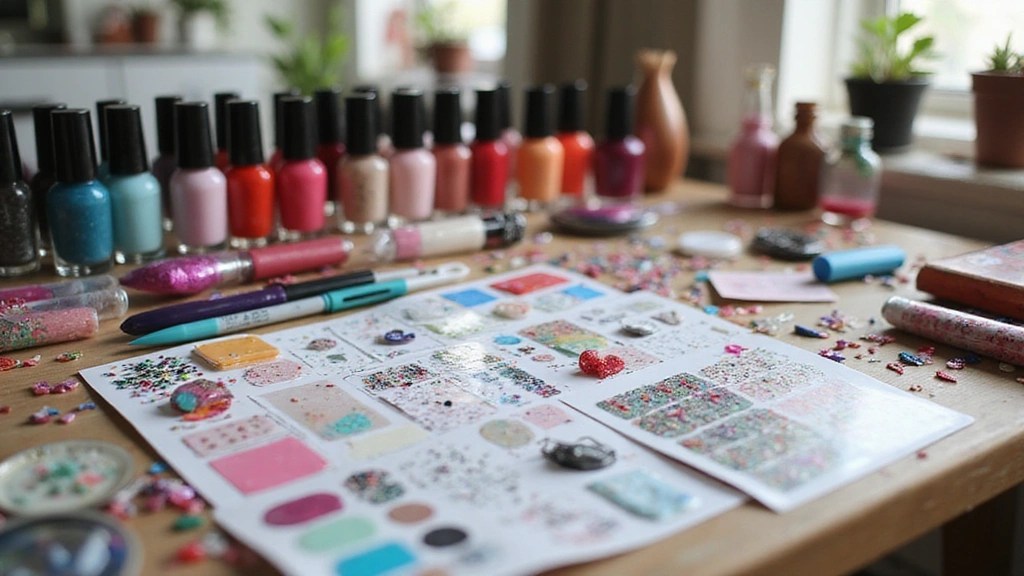
Scrapbook-style nail art is all about creativity, fun, and self-expression. It’s like creating a mini artwork right on your fingertips!
With scrapbook-style nails, you can mix different colors, patterns, and even embellishments to tell your unique story. Imagine having a tiny scrapbook on each nail, bursting with personality and charm. This trend is perfect for those who love DIY projects and want to show off their artistic side.
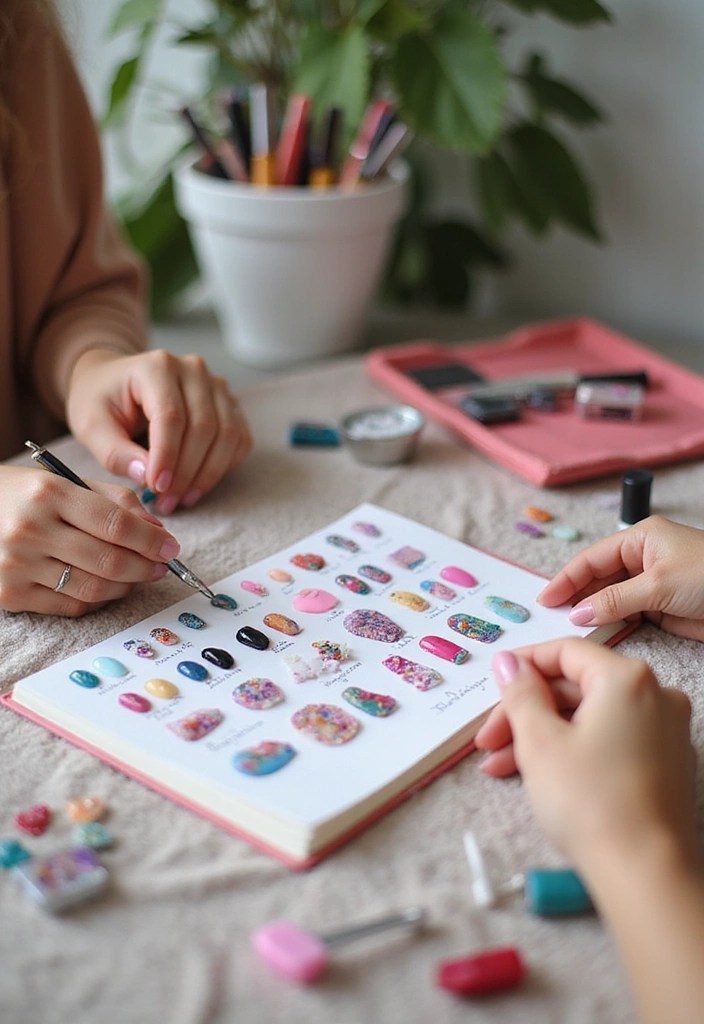
In this blog, we’ll share ten fabulous scrapbook-style nail art ideas that will definitely make your friends envious. Let’s get ready to unleash your inner artist!
Contents
- 1. Floral Fantasy
- 2. Geometric Glam
- 3. Vintage Postcard
- 4. Whimsical Watercolor
- 5. Celestial Dreams
- 6. Polka Dot Party
- 7. Ombre Overload
- 8. Animal Print Craze
- 9. Glitter Galore
- 10. Seasonal Splendor
1. Floral Fantasy
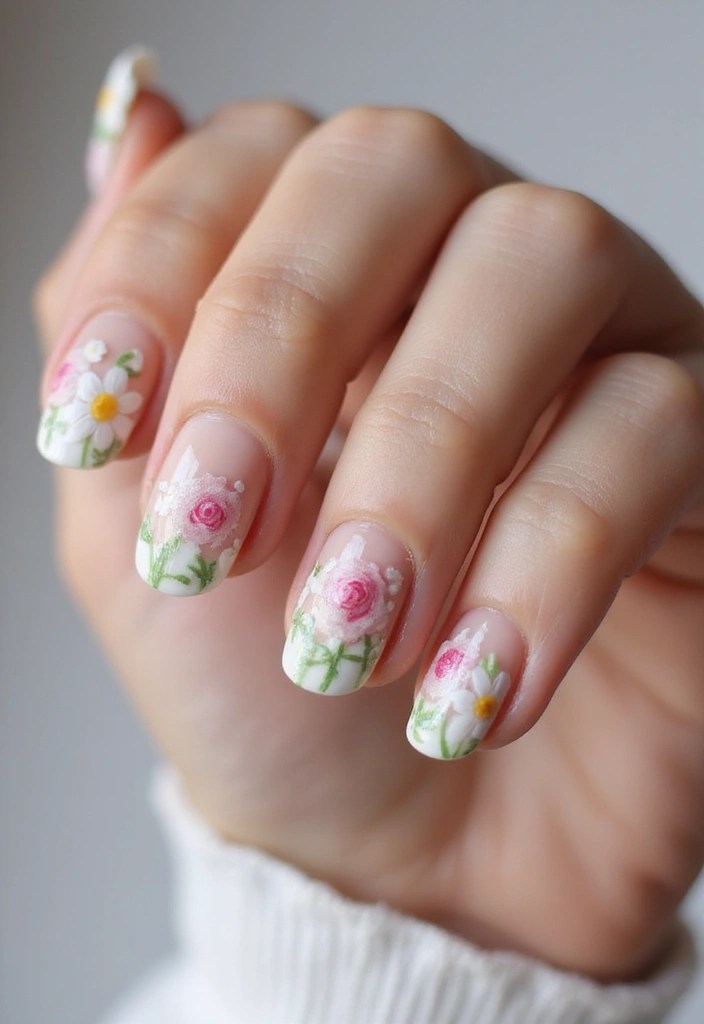
Imagine delicate flowers blooming on your nails! Floral designs are timeless and can be easily crafted using a few simple techniques. You can paint tiny roses, daisies, or even more exotic flowers using nail art brushes.
To achieve this look, start with a pastel base color—think soft pinks or baby blues. Once dry, use a fine brush to create flower designs in contrasting colors. Add some green for leaves and maybe a touch of glitter for that extra sparkle.
For those who prefer a quicker option, floral nail stickers can be a fantastic shortcut. Just apply them on top of your base color and seal with a topcoat.
Tip: Consider using a matte topcoat for a unique texture that will make your floral art pop even more!
Product Recommendations:
• pastel nail polish collection
2. Geometric Glam

Geometric designs bring a modern twist to your nails and can be as simple or complex as you like. Start with a neutral base color like white or nude, and then use tape to create angular shapes.
Once the base is dry, apply different colors in the sections created by the tape. This will give you crisp lines and a professional finish. You can experiment with triangles, squares, or lines for a chic look.
For added flair, consider using metallic colors or even a matte versus glossy finish to create depth. This design not only stands out but is also quite versatile, matching almost any outfit!
Pro tip: Make sure to remove the tape while the polish is still wet to avoid peeling.
Product Recommendations:
• matte and glossy nail polish set
3. Vintage Postcard
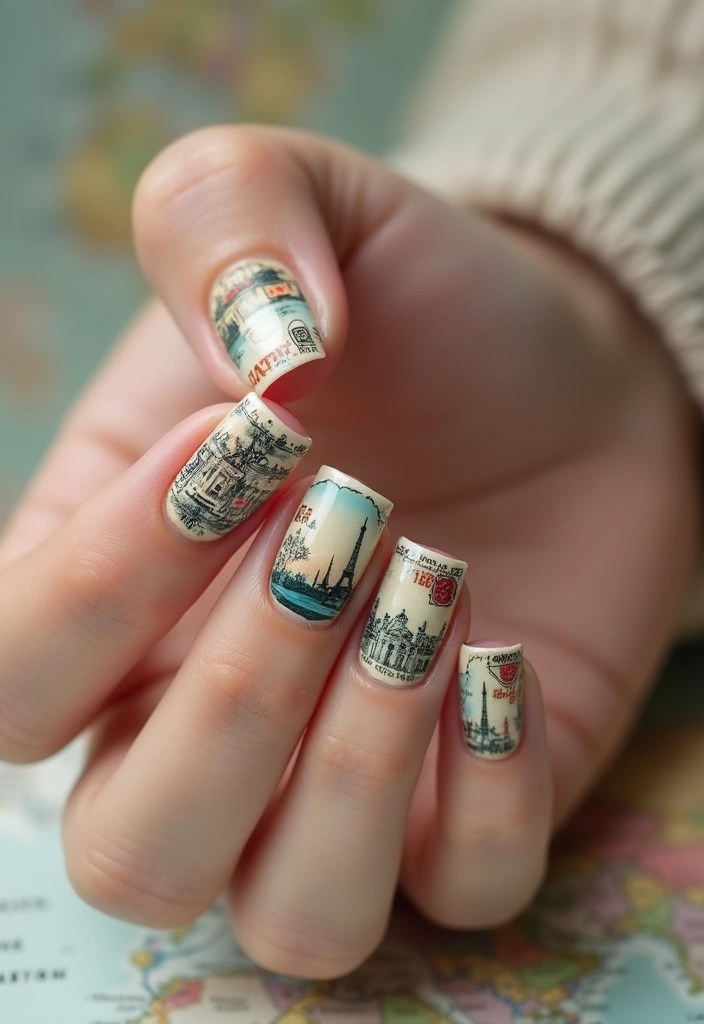
Take a trip down memory lane with a vintage postcard-inspired nail art design. This style captures the essence of classic postcards, complete with travel stamps and faded pictures.
Start with a soft beige or pale blue base color. Then, using a fine brush, paint vintage-style postcards with tiny images of places you’ve visited or want to visit. Add stamps, postmarks, and even a touch of gold for that authentic vintage feel.
If you’re not confident in your painting skills, vintage nail stickers can come to the rescue! Just place them onto your base, and seal with a topcoat.
This style perfectly expresses your love for travel and nostalgia. Plus, it’s a great conversation starter!
Product Recommendations:
4. Whimsical Watercolor
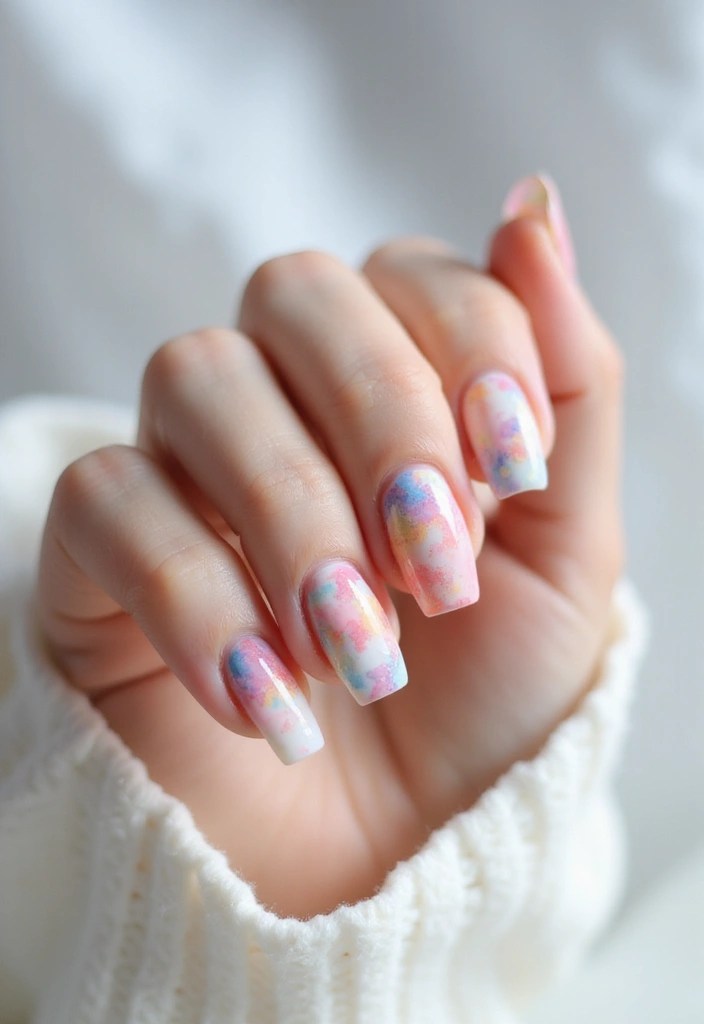
Watercolor nail art is all about blending colors to achieve a soft, dreamy effect. This technique gives your nails an artistic flair reminiscent of watercolor paintings.
Start with a white or light-colored base coat. Next, use a small brush to dab on your favorite colors, blending them slightly to create a gradient effect. You can use a sponge for a more diffused look, which mimics the flow of watercolor.
To finish, seal your design with a glossy topcoat to enhance the colors and add shine. This technique is perfect for those who love a more abstract and artistic style.
Tip: Experiment with different color combinations for every season—pastels for spring, vibrant colors for summer, and deeper tones for fall!
Product Recommendations:
5. Celestial Dreams
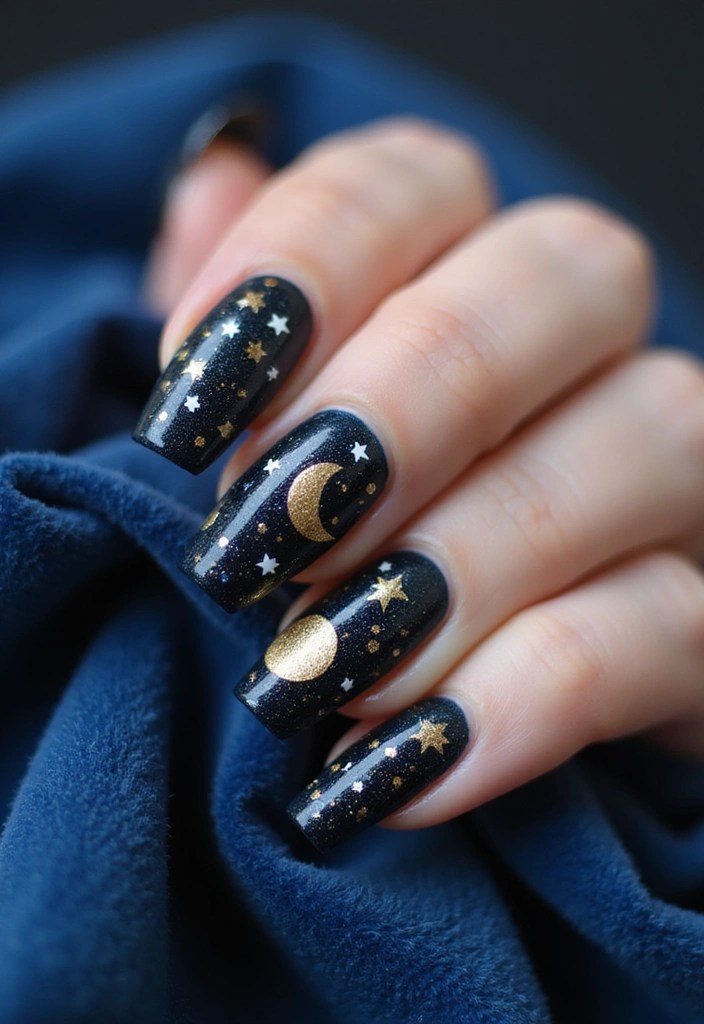
Bring the night sky to your nails with celestial-themed nail art! This design can feature stars, moons, and planets, making your nails a mini galaxy.
Start with a deep navy or black base to resemble the night sky. Then, using a dotting tool or a fine brush, create stars and moons in white or gold. You can even add tiny dots of glitter to represent distant stars.
For those who want a more dramatic effect, consider using glow-in-the-dark nail polish for the stars. This way, you can shine bright even in the dark!
This design is not only visually stunning but also encourages creativity and imagination, perfect for any astrology lover!
Product Recommendations:
• Glow-in-the-dark nail polish
6. Polka Dot Party
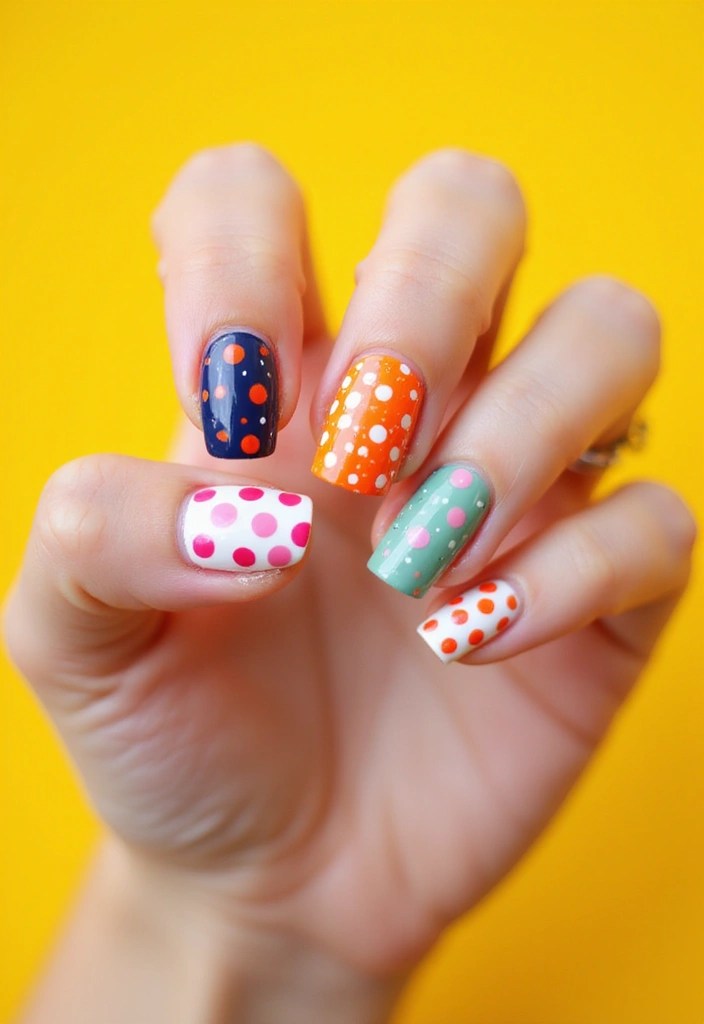
Polka dots are simple yet playful, making them a perfect choice for scrapbook-style nail art! They can be done in various colors, sizes, and patterns, allowing for endless creativity.
Start with a solid base color of your choice. Once dry, use a dotting tool to add dots in contrasting colors. You can create a uniform pattern or mix up the sizes for a more eclectic look.
To elevate this design, consider adding some stripes or even tiny hearts between the dots. This adds an extra layer of fun and whimsy.
This look is easy to achieve and perfect for beginners while still providing a cute and playful vibe that’s sure to impress your friends!
Product Recommendations:
7. Ombre Overload

Ombre nails are a classic that never goes out of style! This technique seamlessly blends two or more colors for a beautiful gradient effect.
To achieve this look, start with a base coat of your lightest color. Then, using a sponge, dab on your second color, blending it into the base. Experiment with colors like pink and purple for a sunset vibe or blue and green for a cool ocean feel.
Finish with a glossy topcoat to give your ombre nails a salon-quality shine. Ombre nails are versatile and can be customized for any occasion, making them a go-to choice for nail art enthusiasts!
Pro tip: Try using glitter as your top layer for an extra touch of glam!
Product Recommendations:
8. Animal Print Craze
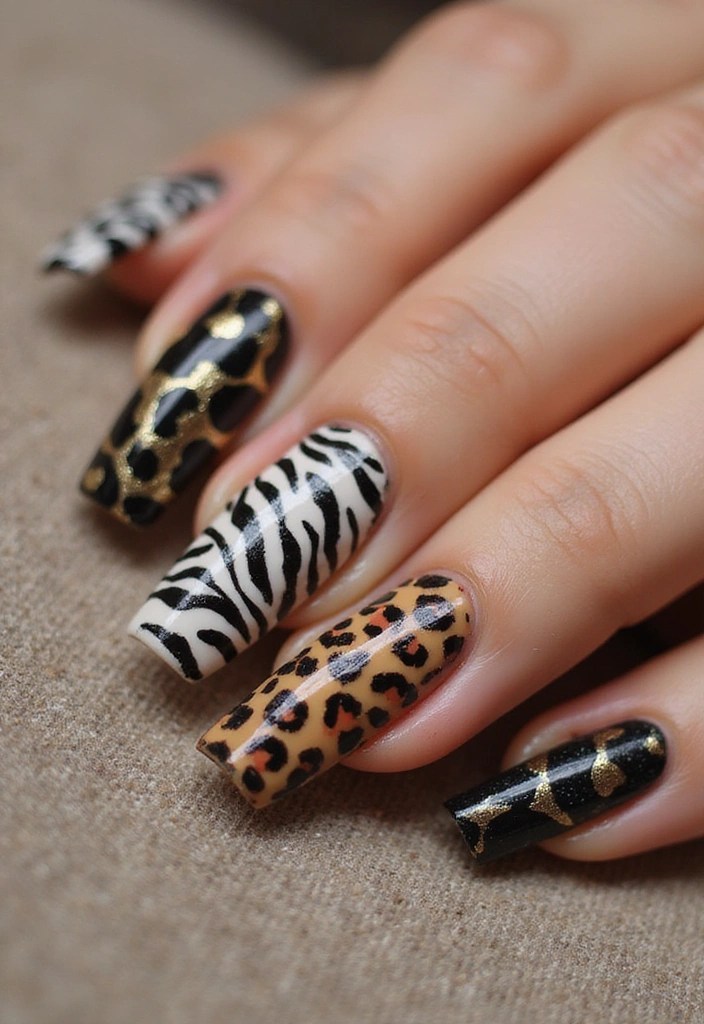
Get wild with animal print nail art! From leopard spots to zebra stripes, animal prints are bold and eye-catching.
Begin with a neutral base color, such as beige or white, to mimic the animal’s fur. Then, using a fine brush, add spots or stripes in contrasting colors. For a leopard print, use gold and brown; for zebra, classic black and white work best.
Consider mixing different animal prints on each nail for a fun, eclectic look! Seal your design with a topcoat for durability. This style is perfect for those who want to make a statement and show off their love for the wild side of fashion!
Product Recommendations:
• Animal print nail polish collection
9. Glitter Galore

Who doesn’t love a little sparkle? Glitter nail art is all about adding that extra bling to your nails. You can either use glitter polish or loose glitter for this design.
Start with a base coat of your choice. Once dry, apply a layer of glitter polish or use a top coat and sprinkle loose glitter over it. Focus the glitter near the cuticle for a gradient effect or spread it evenly for full coverage.
For an even more glamorous look, consider adding rhinestones or gems to your glitter design. This style is perfect for parties, special occasions, or anytime you want to shine bright!
Tip: Make sure to seal your glitter with a topcoat to prevent it from chipping off too quickly.
Product Recommendations:
10. Seasonal Splendor
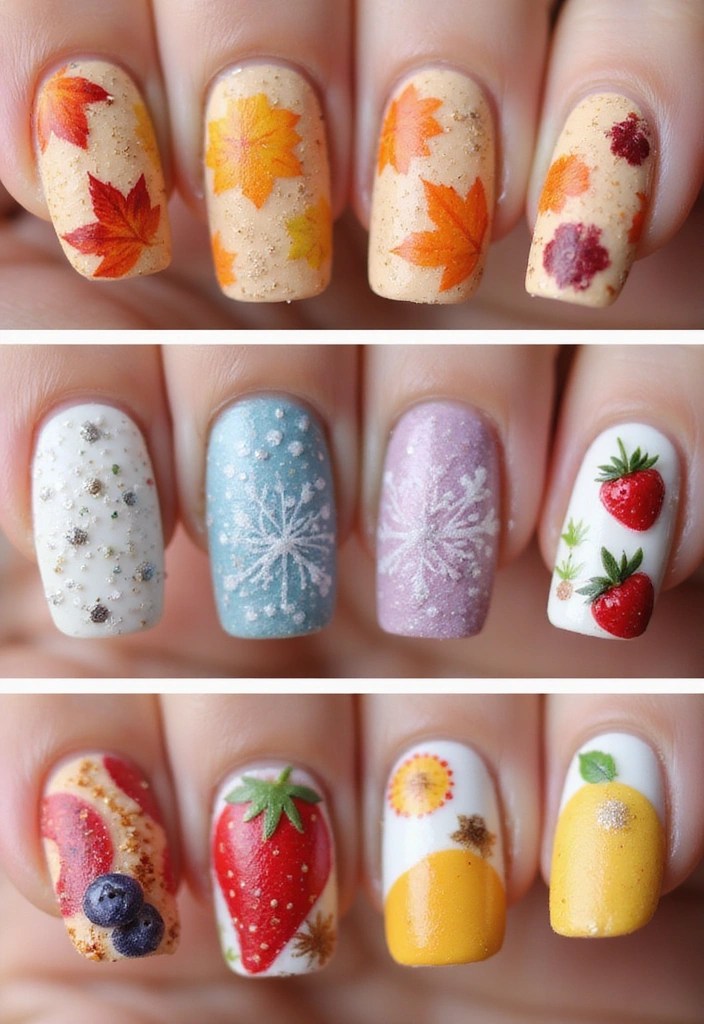
Celebrate the seasons with themed nail art! Whether it’s autumn leaves, winter snowflakes, spring flowers, or summer fruits, seasonal designs let you express your love for each time of year.
Start with a solid base color that represents the season—like deep orange for fall or bright yellow for summer. Then, using stickers or hand-painting, add seasonal elements like leaves, snowflakes, flowers, or fruit designs.
This technique allows you to change your nail art with the seasons, keeping it fresh and exciting. Plus, it’s a fun way to get into the spirit of each holiday or season!
Suggestion: Create a mini scrapbook of your seasonal nail art for inspiration and memories!
Product Recommendations:
• Acrylic paint set for nail art
Conclusion
Scrapbook-style nail art is a fantastic way to express your personality and creativity! With endless possibilities, you can mix and match styles and colors to create unique designs that truly reflect who you are.
So grab your nail supplies, unleash your imagination, and get ready to impress your friends with your stunning nail art! Remember, practice makes perfect. Don’t be afraid to experiment and make these designs your own!

Leave a comment