Summer is the season of bright colors, sunshine, and bold expressions, making it the perfect time to flaunt some fierce nail art!
This year, summer shape nail art is taking center stage, becoming an essential trend for those who want to unleash their inner baddie.
From trendy geometric designs to sassy summertime motifs, there’s a world of creativity to explore on your fingertips.
Get ready to turn heads and make a statement with these 8 must-try nail art techniques that will keep your summer vibes alive and your style on point!
Contents
- 1. Geometric Glam
- 2. Tropical Paradise
- 3. Summer Ombre
- 4. Fruit Inspired Fun
- 5. Floral Fantasy
- 6. Swirl It Up
- 7. Beachy Waves
- 8. Glittery Sunshine
1. Geometric Glam
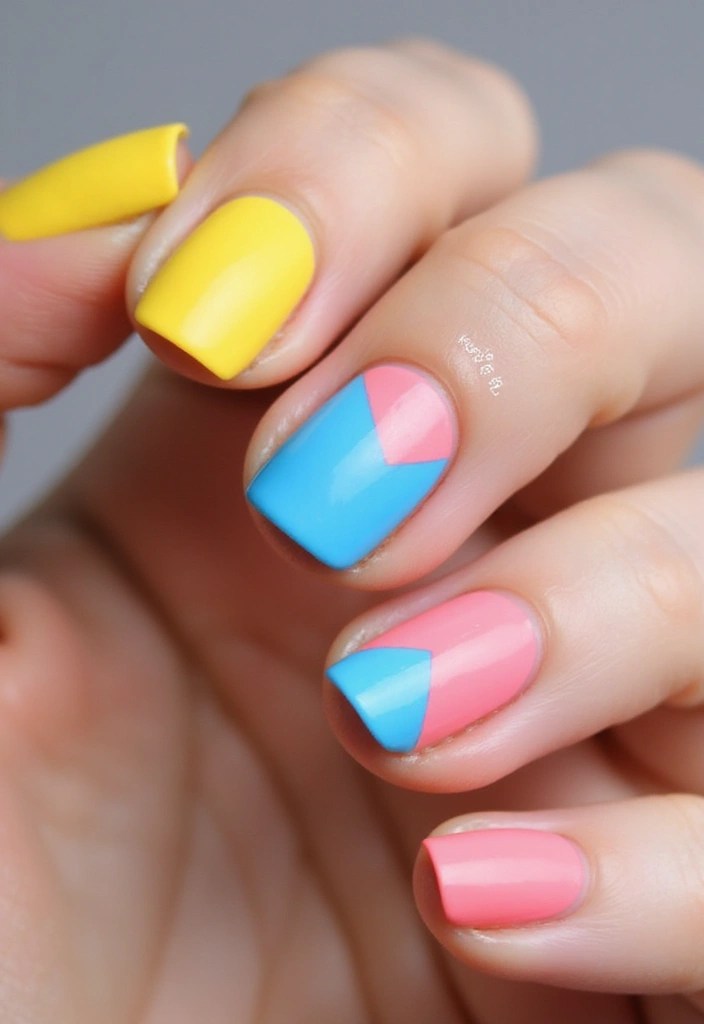
Geometric designs are all the rage this summer, and for a good reason. These shapes can be anything from triangles to hexagons, allowing for an infinite combination of colors and patterns.
To achieve this look, start by painting your nails a solid color—think bright yellows or deep blues for that summer vibe. Once dry, tape off sections with nail art tape and alternate colors to create stunning geometric patterns. The tape makes it easy to section off areas and ensures clean lines, giving your design that polished finish.
For a chic overall look, don’t forget to finish with Barry M Cosmetics matte nail paint, top coat. This top coat not only enhances your design but also gives it a modern matte finish that is super trendy right now.
Feel free to mix and match contrasting colors for a bolder statement and to experiment with different shapes to add your personal twist! For those intricate details, consider using a nail art brush set. With various brushes at your disposal, you’ll be able to perfect those fine lines and details that make geometric designs truly stand out.
This trend is versatile enough to suit any occasion, making it a must-try for all baddies.
2. Tropical Paradise
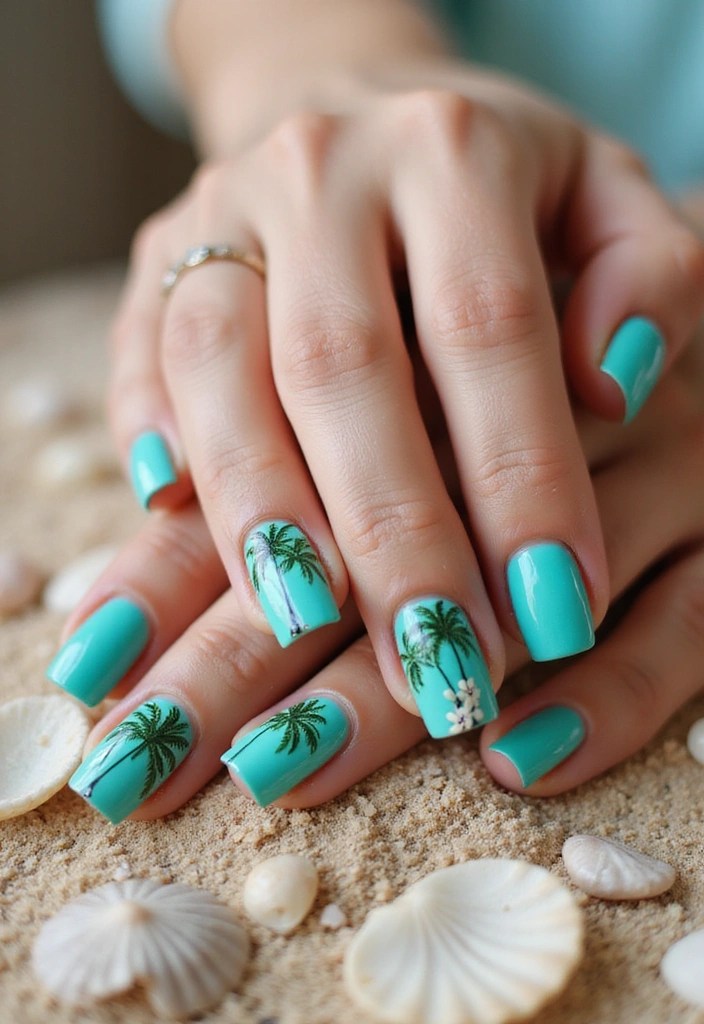
Bring the summer vibes to your nails with tropical-themed nail art! Palm trees, pineapples, and bright flowers can instantly transport you to a sunny beach getaway.
Begin with a light base color, like a soft pastel or a vibrant turquoise, then use nail art pens set to add detailed tropical designs. These 3D nail art pens allow for precision, making it easier to create intricate patterns that truly pop.
Be sure to incorporate some bold colors like electric pinks and neon greens for that true baddie flair. For finer details, such as palm fronds or flower petals, a set of fine detail nail art brushes is a must-have. These brushes are double-ended, providing versatility in your designs and making it simple to achieve the look you want.
Lastly, don’t forget to seal everything with glossy top coat nail polish to keep those vibrant designs fresh and eye-catching. Your nails will scream summer, and they are sure to get compliments!
Here are some tips:
– Practice your designs on paper before applying them to your nails.
– Use the fine brush for intricate details.
– A glossy top coat will help maintain that salon-fresh finish.
3. Summer Ombre
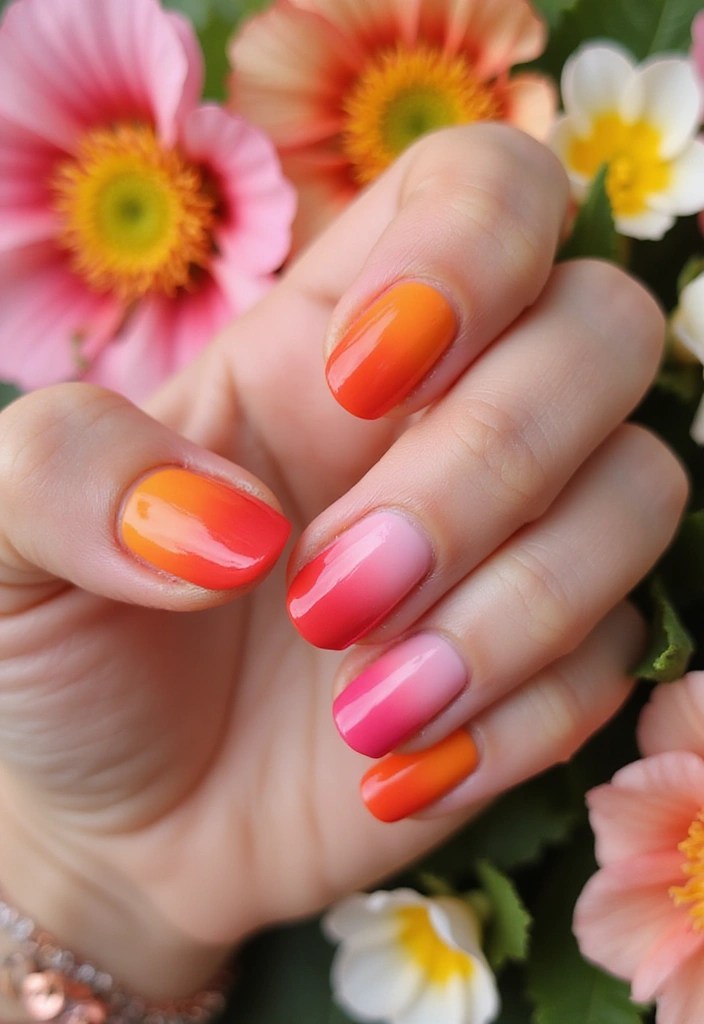
Ombre nails are always a stylish choice, and summer is the ideal time to play with this technique! You can blend colors that reflect the sunset or even create a fun rainbow effect. Start by choosing two or three shades that complement each other and apply them vertically or horizontally on a makeup sponge. For this, you can use makeup sponges for ombre nail art, which are perfect for achieving that seamless gradient effect.
Then, gently dab the sponge onto your nails to achieve that beautiful ombre look. Each nail can have a different color scheme or follow a pattern; it’s all up to your creativity! Some of the best combinations for summer include:
– Pink to orange for a sunset vibe.
– Blue to teal for a refreshing ocean look.
– Yellow to green for a citrusy feel.
To make your chosen colors truly pop, finish with a glossy top coat for nails. This will not only enhance the vibrancy of your design but also provide a protective layer to ensure your stunning ombre stays intact.
If you’re looking for the perfect shades to use, consider a nail polish set with summer colors. This set includes a selection of lively hues that can bring your summer nail art dreams to life.
The beauty of ombre is the freedom to express yourself while still looking put-together!
4. Fruit Inspired Fun
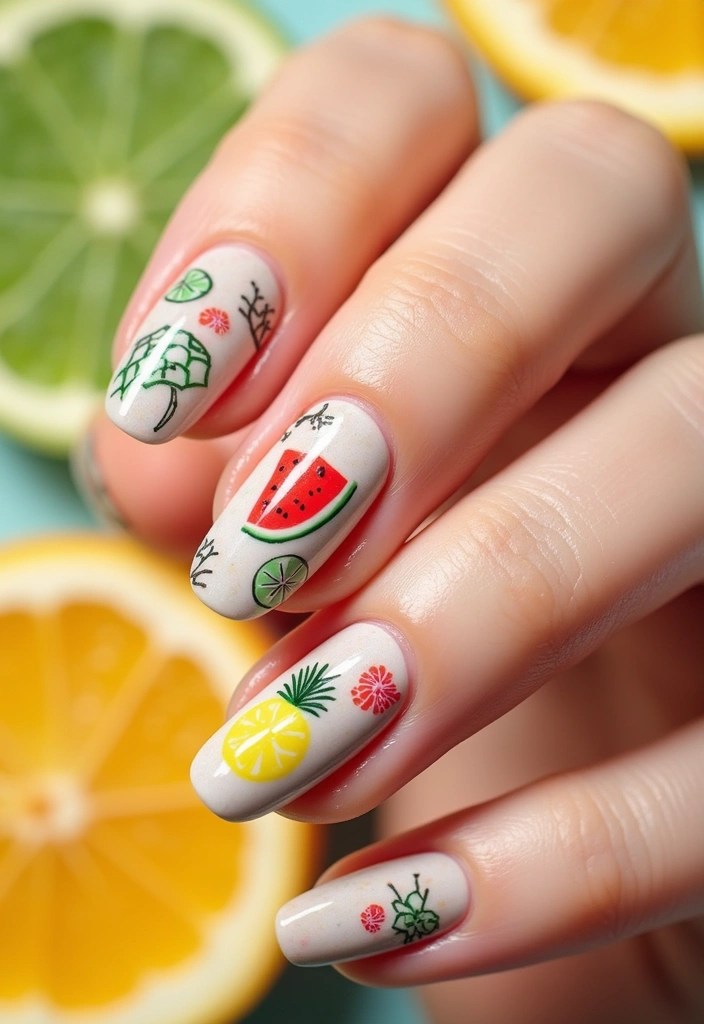
Summer is all about juicy fruits, and what better way to celebrate than by incorporating them into your nail art? From watermelon slices to lemons, there’s a plethora of fruity designs to choose from.
Start with a bright base color like green or yellow, and then use nail art brushes set to create fruit designs. For watermelon, paint the base pink and add green rinds. For lemons, a simple yellow base with white and green accents works wonders. The variety of brushes in the set will help you achieve intricate details that make your designs pop.
Here are some tips:
– Keep it playful; you can mix and match different fruits on each nail!
– Use dotting tools for nail art to make perfect little seeds or sprinkles. These tools are great for adding those tiny details that can elevate your nail art from basic to fabulous.
– Seal everything with high-gloss top coat to make your fruity designs shine and last longer. A top coat not only enhances the vibrancy of your colors but also protects your artwork from chips and scratches.
These fun designs not only look cute but also keep you feeling fresh all summer long!
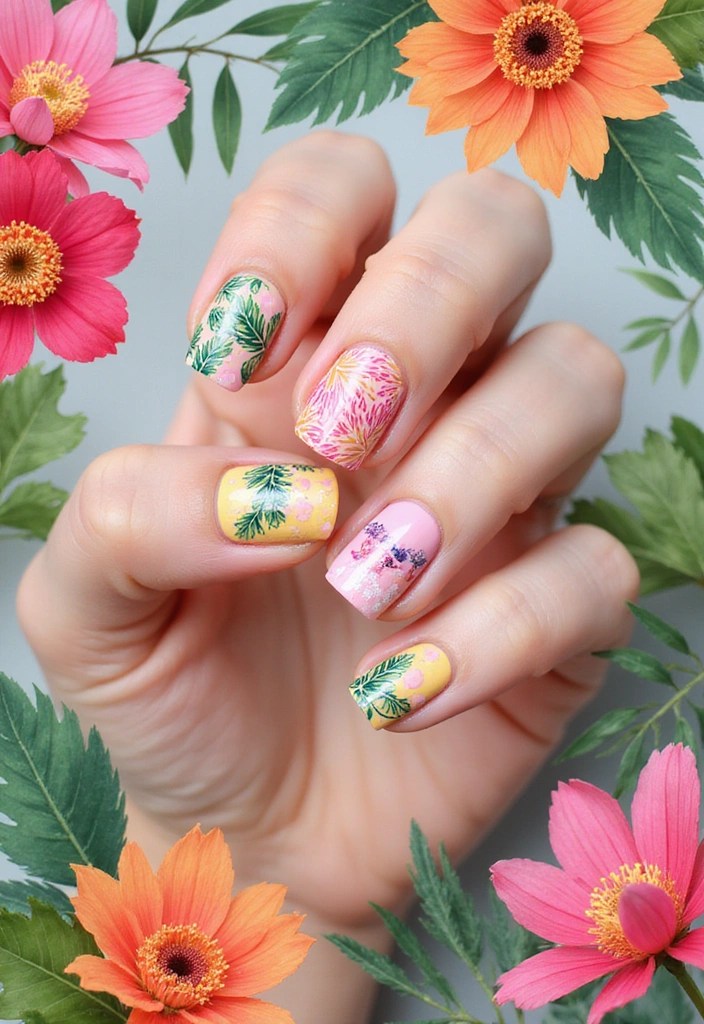
5. Floral Fantasy
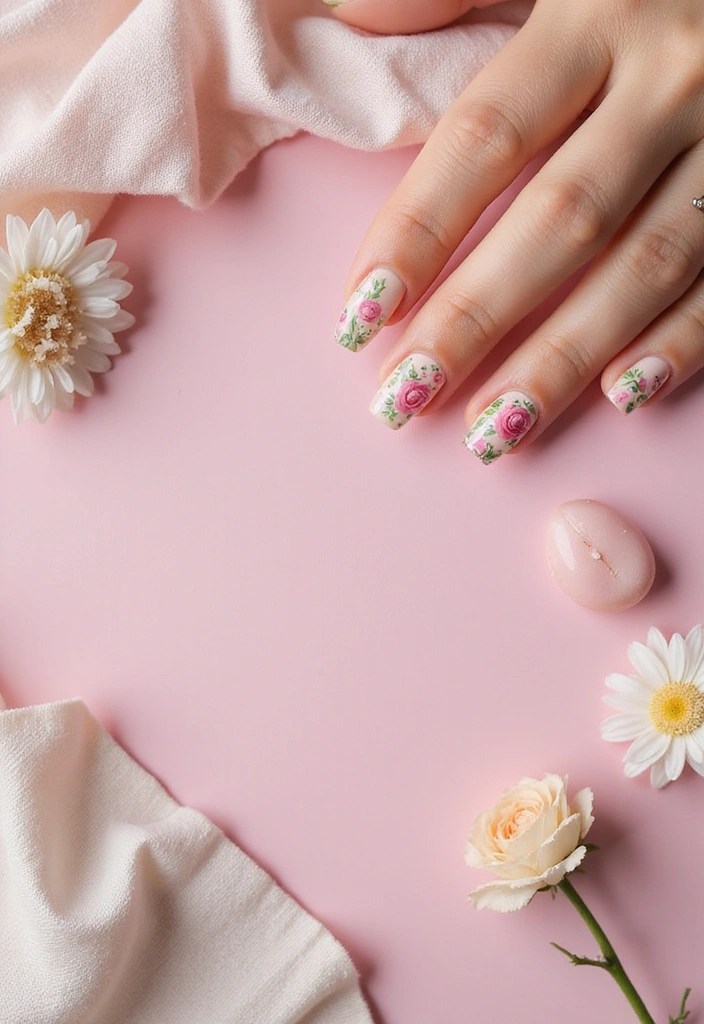
Summer blooms are perfect for nail art, and floral designs can add a touch of elegance and femininity to your baddie style.
Start with a base of soft pastels or bold, bright colors for your nail polish. A great option is the nail polish set (pastels and brights), which provides a variety of shades to choose from. Use a thin brush, like those found in the nail art brush set, to create delicate petals and leaves.
You can opt for a single large flower on one nail or tiny clusters scattered across all nails. To achieve stunning floral designs, layer your colors to create depth; use darker shades for the centers and lighter shades for the petals. Sticking with a cohesive color palette will help maintain a stylish look.
Finally, don’t forget to add a top coat, such as top coat nail polish, to enhance the shine and durability of your floral art! This trend beautifully captures the essence of summer and can be perfect for any occasion.
6. Swirl It Up
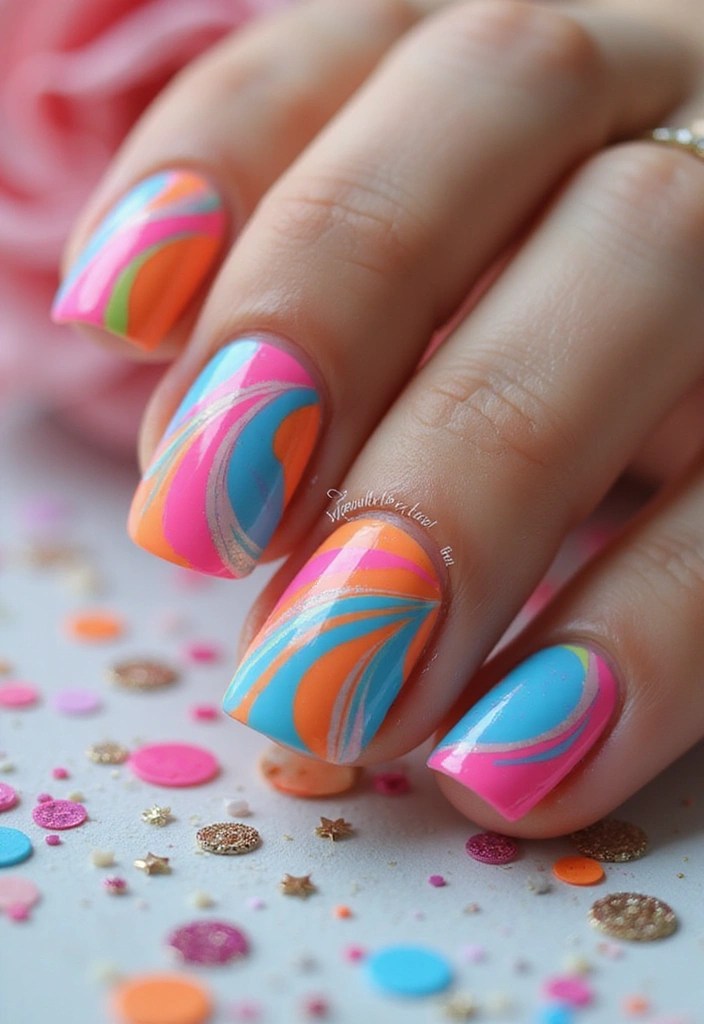
Swirly designs are not only playful but also incredibly easy to create! Using two or more contrasting colors, you can achieve a mesmerizing effect that’s perfect for summer.
Start by applying a base coat of your first color. For the swirling patterns, grab a nail art brush set to help you craft those intricate designs. A thin brush from the set allows for precision, making it easy to swirl in your second color. If you prefer a more versatile approach, consider using the dotting tools for nail art. These tools can create both fine swirls and more defined dots, giving you the freedom to experiment.
When creating your swirls, remember to work quickly to ensure the paint doesn’t dry out before you finish. Experiment with different color combinations for various vibes—think neon for parties or pastels for a softer look. To really make your swirls pop, finish off with a coat of glossy top coat nail polish. This will not only enhance the shine but also bring your designs to life!
This technique is especially fun for festivals or summer nights out, making your nails a standout part of your look.
7. Beachy Waves

Capture the essence of the beach right on your nails with wave patterns! Using shades of blues and whites, you can create a serene ocean-inspired look that perfectly represents summer.
Start with a base coat in a light sandy beige or soft blue. Then, using a thin brush, draw wave patterns with white or darker blues. For this, a great tool is the Nail Art Brush Set, which includes 15 pieces designed for precise nail art application. This set will help you achieve those delicate wave patterns with ease.
For added depth, layer your waves with different shades of blue to create a more realistic look. To enhance your beach-inspired design, consider combining your wave patterns with tiny seashell decals. The Nail Art Decals – Seashells offer a charming ocean theme that can elevate your nail art and provide that perfect finishing touch.
If you want a more textured beach feel, finish off with a matte top coat. The Matte Top Coat Nail Polish is perfect for achieving this look while keeping your design fresh and summery.
Remember to clean up around the nail after creating the designs for a polished look! These waves can convey your love for the sea, creating a refreshing and calm vibe.
8. Glittery Sunshine
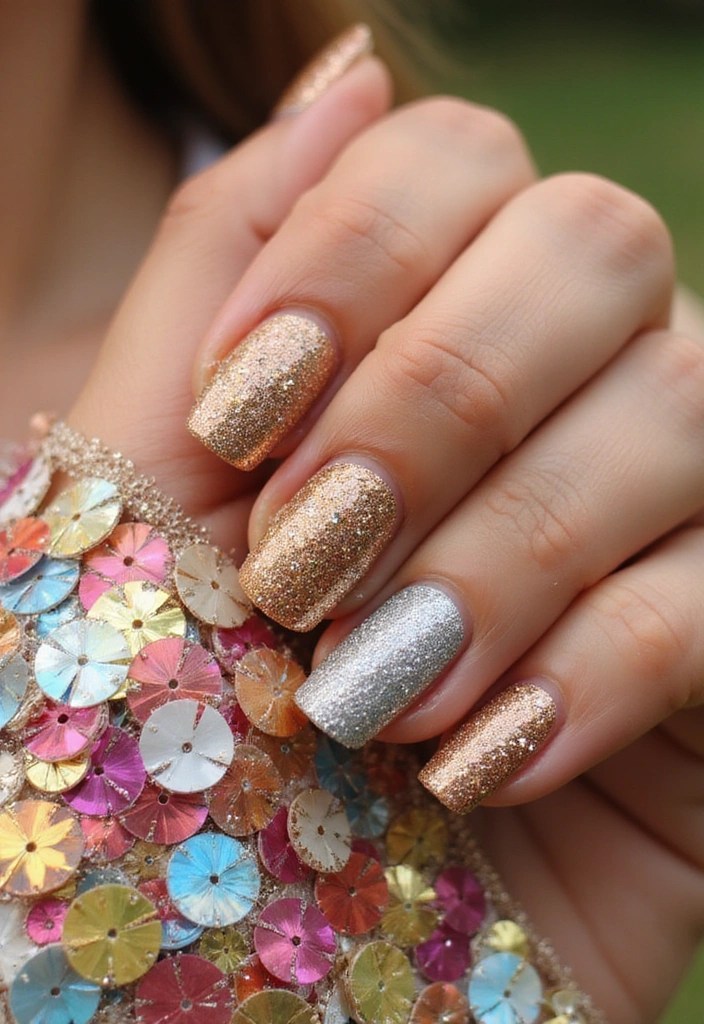
Nothing says summer like a pop of glitter! Using glitter in your nail art can add glam and sparkle, making every baddie feel fabulous.
Start with a solid color base, and once dry, use glitter polish like the glitter nail polish set to accentuate tips or create a glitter gradient effect. This set features quick-dry and long-lasting formulas, perfect for achieving that dazzling look without the wait. For those who want to go all out, consider full glitter nails for a mesmerizing appearance!
Here are some tips:
- Use a makeup sponge applicator to apply glitter polish for a more blended look—these latex-free sponges make it easy to create a seamless finish.
- Combine different colors of glitter from the set for a unique twist that reflects your personality.
- Seal with a strong top coat like Barry M nail paint, a 3-in-1 formula that acts as a base coat, top coat, and nail hardener to ensure the glitter stays in place!
With this trend, you’ll light up any summer gathering and be the center of attention.
Conclusion
Summer shape nail art is the perfect way to express your personality and creativity while embracing the season.
Whether you prefer bold geometric designs or delicate floral patterns, these techniques will have you feeling like the ultimate baddie.
So, grab your nail art supplies and get ready to unleash your inner artist—this summer, your nails can be as fun and fabulous as you are!
Note: We aim to provide accurate product links, but some may occasionally expire or become unavailable. If this happens, please search directly on Amazon for the product or a suitable alternative.
This post contains Amazon affiliate links, meaning I may earn a small commission if you purchase through my links, at no extra cost to you.

Leave a comment