
As spring unfolds and the world bursts into bloom, why not let your nails reflect that fresh energy?
Cherry blossom nail art is the perfect way to bring a touch of nature to your fingertips. With soft pastel colors, delicate floral designs, and a hint of whimsy, these nail ideas capture the essence of spring beautifully.
Let’s explore fifteen enchanting cherry blossom nail art ideas that will undoubtedly inspire your next manicure, ensuring your nails are as vibrant as the season itself.
Contents
- 1. Soft Pink Petals
- 2. Watercolor Wonders
- 3. Negative Space Blossoms
- 4. Ombre Blossom Delight
- 5. Glittery Blossom Burst
- 6. Classic French with a Twist
- 7. 3D Cherry Blossoms
- 8. Cherry Blossom Galaxy
- 9. Cherry Blossom Stripes
- 10. Pastel Cherry Blossom Dots
- 11. Vintage Cherry Blossom
- 12. Cherry Blossom Minimalism
- 13. Cherry Blossom Mosaic
- 14. Botanical Cherry Blossom
- 15. Cherry Blossom Fusion
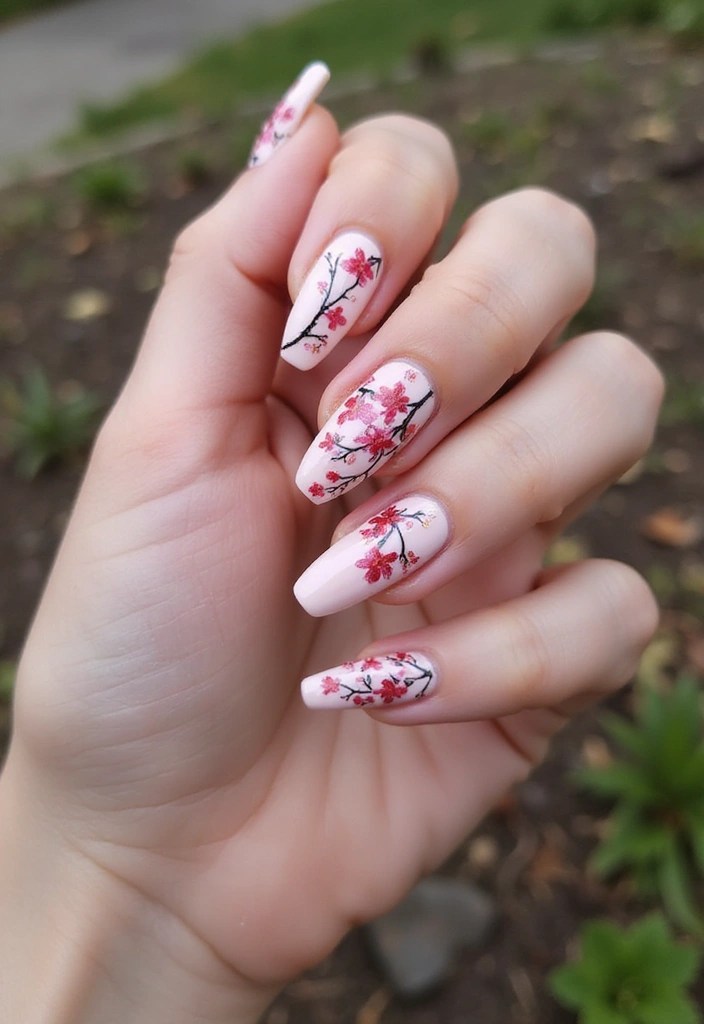
1. Soft Pink Petals
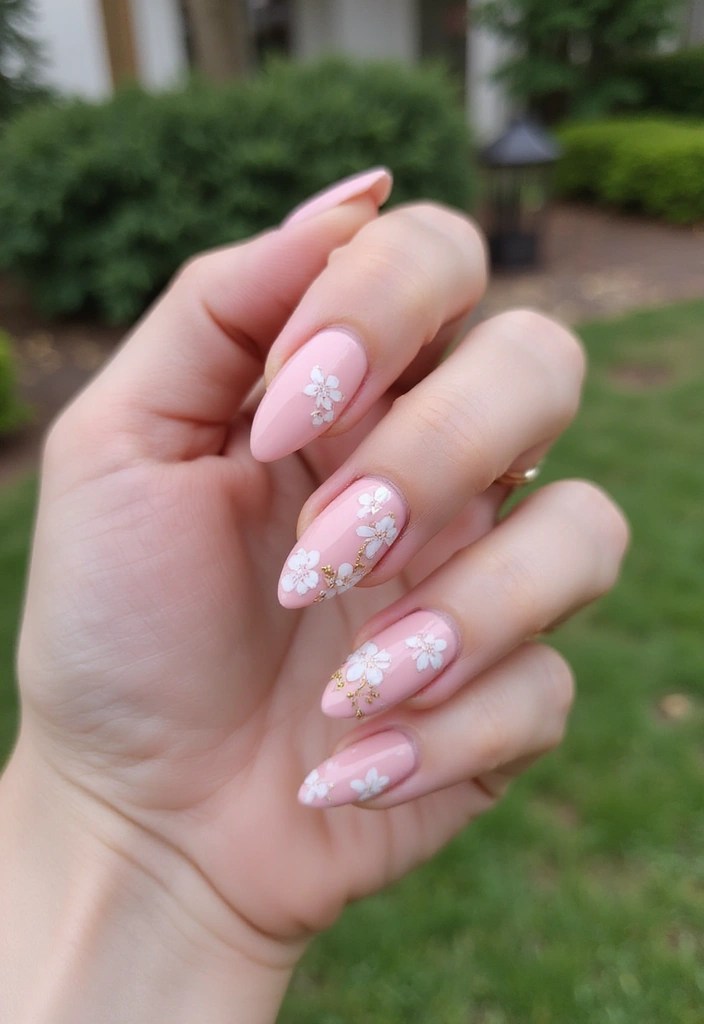
Nothing says spring like soft pink! This classic cherry blossom design uses a pale pink base and intricate white flowers, making it a perfect choice for welcoming the warmer season. To achieve this look, start with a base coat using a light pink polish, like the OPI Nail Lacquer Nail Polish, which offers a sheer light nude pink that is chip-resistant, vegan, and fast-drying.
Next, use a thin brush or nail art pen to create the flower shapes. The Nail Art Brush Set is ideal for this task, providing various brushes that allow you to craft those delicate petals with precision. To add a touch of glam, incorporate small dots or glitters in gold or white. The Nail Art Dotting Tools will make this part a breeze, helping you achieve the perfect accent dots.
This dreamy cherry blossom look is perfect for any occasion, whether it’s brunch with friends or a day at the park. The delicate petals evoke the feeling of a gentle spring breeze, making your nails a charming accessory.
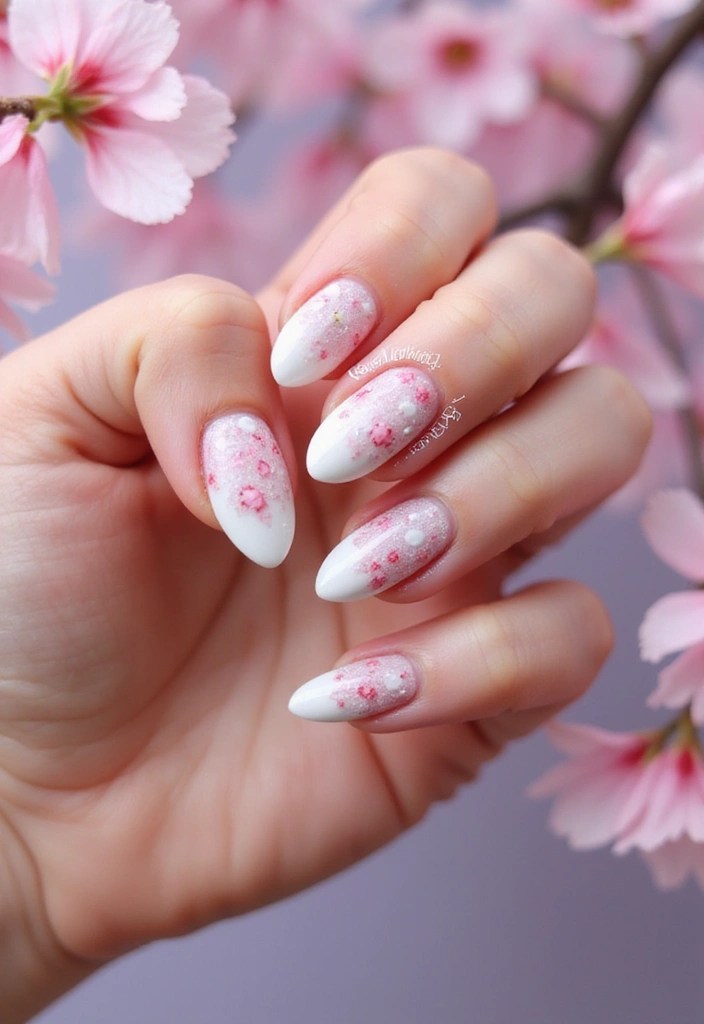
2. Watercolor Wonders
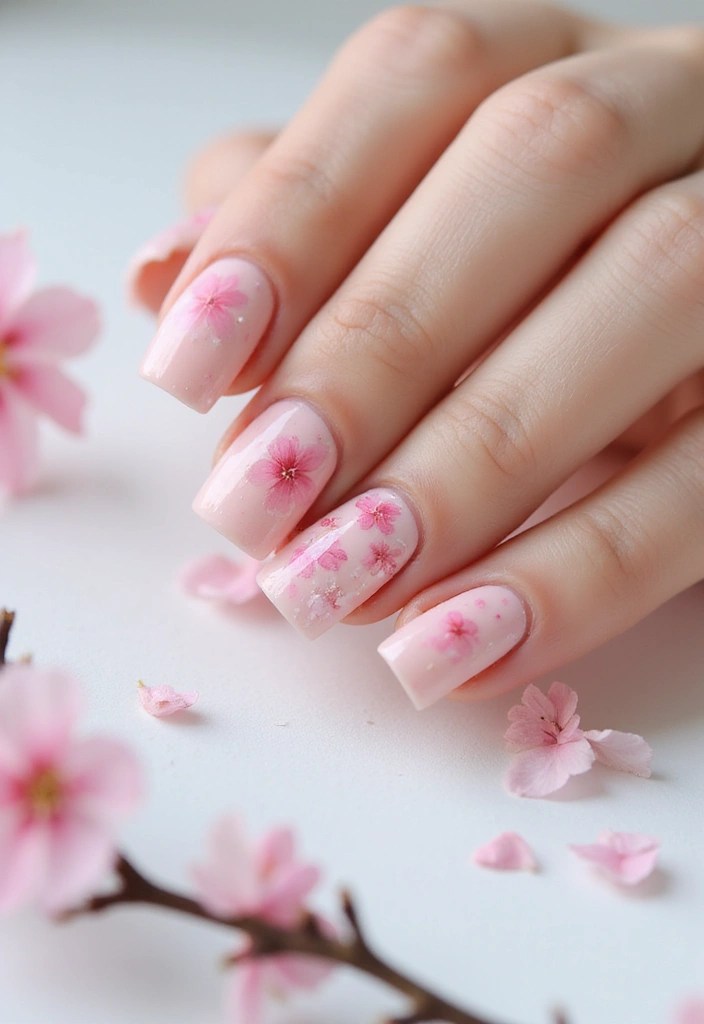
Embrace the dreamy side of cherry blossoms with a watercolor effect. This technique blends soft hues like pink, lavender, and light blue to create an ethereal look that mimics the gentle transitions seen in nature.
To achieve this beautiful watercolor effect, start by using sponge applicators for nail art. These handy tools allow you to dab on colors randomly, making it easy to create that soft, blended appearance. Once the base colors are dry, you can add delicate cherry blossom details with a fine brush, such as the nail art watercolor brush set. These brushes are designed to maintain a fine tip, perfect for intricate designs.
To finish off your dreamy nail art, apply a glossy topcoat with glossy top coat nail polish. This will enhance the soft, blended colors and provide a beautiful, protective layer. This style captures the light and airiness of spring, making it feel like you have a piece of a blooming garden right at your fingertips.
3. Negative Space Blossoms
For a modern twist on cherry blossom nail art, consider a negative space design. This trend involves leaving parts of your nail unpainted for a chic minimalist effect. Start by applying a base color such as soft beige or nude using a quality base coat, like OPI Nail Lacquer Base Coat to protect your nails and ensure your polish lasts longer while preventing discoloration.
Next, paint cherry blossoms at the tips or sides of your nails, leaving the center bare. For this, a good nail art brush set, such as the Nail Art Brush Set, will be invaluable for precision and creativity in your design. The various brushes will help you create delicate floral accents that stand out beautifully.
Finally, add a layer of clear polish, like Sally Hansen Double Duty top coat, to seal the design and give it a streak-free shine. This step not only enhances the overall look but also provides quick-dry convenience and long-lasting wear.
This design pairs well with any outfit and is perfect for someone who likes a clean yet stylish look. The negative space creates a unique contrast that draws attention to the delicate floral accents, making your nails a stunning spring statement.
4. Ombre Blossom Delight
Ombre nails have taken the nail art world by storm, and adding cherry blossoms creates a stunning combination! For this look, choose a color gradient that reflects the beauty of cherry blossoms, transitioning from a deep pink at the tips to a soft white at the base.
To create the ombre effect effortlessly, use makeup sponges for ombre nails. These cosmetic foam wedges are perfect for blending colors seamlessly. Once the ombre is dry, add delicate cherry blossoms using a small brush from the nail art brush set, which provides precision for those intricate designs.
Finish your masterpiece with a top coat, and you can choose between a glossy or matte finish depending on your style. The matte top coat nail polish is ideal for a sophisticated look that protects your color and nails while ensuring longevity.
This look is eye-catching, beautifully intricate, and ensures that your nails are the center of attention wherever you go.
5. Glittery Blossom Burst
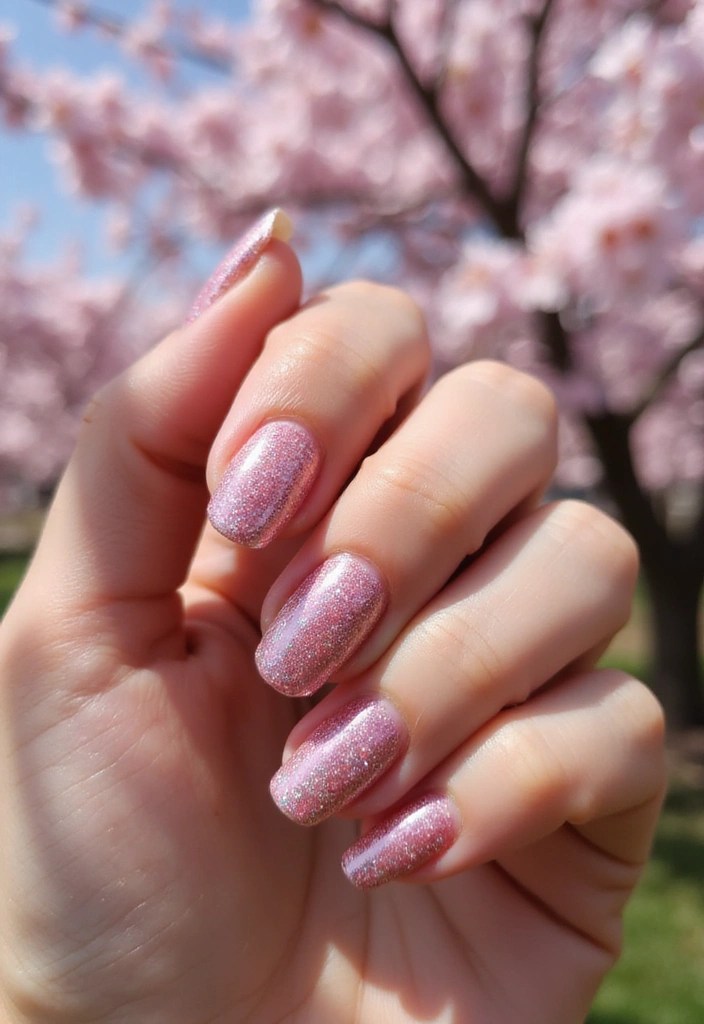
For those who love a bit of sparkle, a glittery cherry blossom design is a must! Combining glitter with floral designs creates a dazzling effect that’s perfect for special occasions or simply to brighten your day.
Start with a base color that complements your glitter, such as light pink or clear. For this, you can use the OPI Nail Lacquer Base Coat, which helps protect your nails and prevents discoloration, ensuring a smooth foundation for your artwork.
Apply glitter where the blossoms are placed to create a stunning burst effect. A perfect choice for this is the Nail Glitter Set, which comes with various glitter options to help you achieve that sparkling look.
Finally, use a topcoat to seal in the sparkle and prevent chipping. The OPI Nail Lacquer Top Coat is an excellent option; it provides a high-gloss finish and ensures your design lasts longer.
This design radiates joy and festivity, making it a perfect choice for spring weddings or celebrations.
6. Classic French with a Twist
Mixing the classic French manicure with cherry blossoms adds a fresh twist to this timeless style. Instead of the usual white tips, create wonderfully subtle pink tips adorned with small blossoms for a fun yet sophisticated look.
Start with a base of nude or light pink using a quality product like OPI Nail Lacquer Base Coat, which not only protects your nails but also prevents discoloration. Next, paint the tips in a pastel pink shade, such as Essie Nail Polish in Free to Roam, to achieve that delicate, spring vibe.
For the cherry blossoms, a fine brush is essential. Using a versatile set like Artdone’s fine nail art brush set will help you create intricate designs with ease. Finally, seal your masterpiece with a top coat to ensure longevity.
This design remains perfect for those who appreciate traditional styles while adding a hint of fun and personality, making it suitable for both professional environments and casual outings.
7. 3D Cherry Blossoms
Take your nail art to the next level with 3D cherry blossoms! This design uses nail art charms or acrylic paints to create a textured effect that adds dimension to your nails.
– Start with a base coat in a soft color for a smooth foundation. You can use Sally Hansen Double Duty™, Base and Top Coat, which not only serves as a base but also provides a protective layer when your design is complete.
– Use 24pcs professional painting gel nail art manicure painted gel polish or 3D nail charms to create raised blossoms. The acrylic paint allows for detailed, vibrant floral designs, while the charms enhance the three-dimensional look of your nails.
– Finish with the same top coat to protect the 3D elements and ensure your nails stay stunning longer.
This style is not only unique but also interactive, inviting compliments and conversations. It’s ideal for someone looking to make a bold statement this spring!
8. Cherry Blossom Galaxy
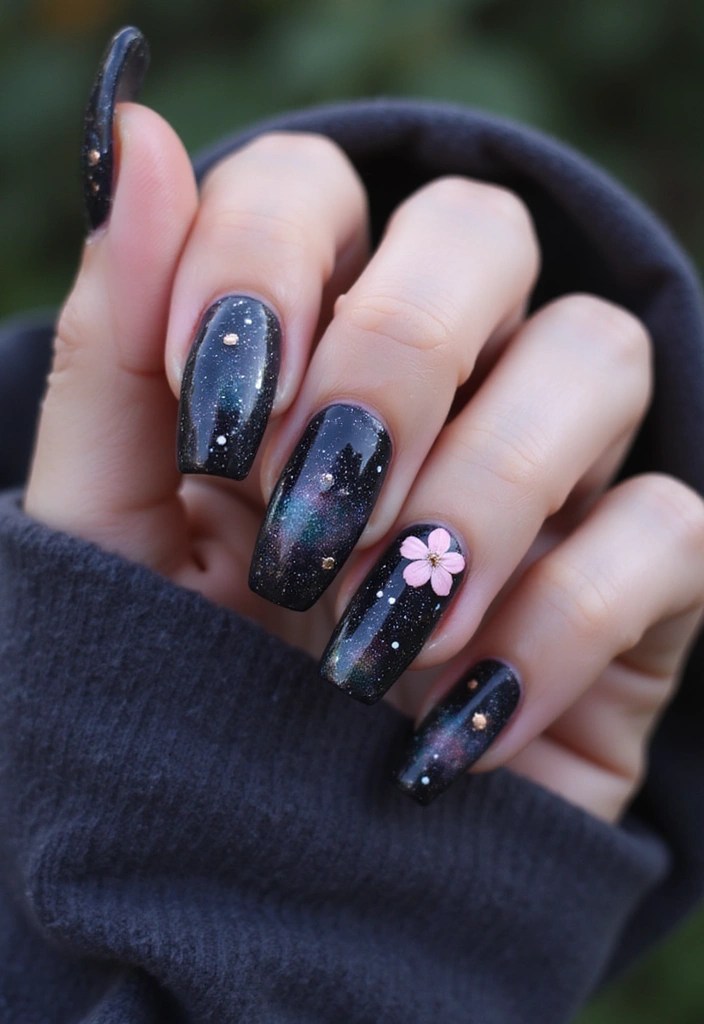
Blend celestial themes with cherry blossoms for a truly out-of-this-world nail design! Using dark colors as a base, create a galaxy effect with bursts of pink cherry blossoms for contrast.
Start with a black or dark blue base, and for this, consider using a gel nail polish from the Gel Nail Polish Set (dark colors) that features various shades perfect for a striking base.
Next, use a sponge to dab on lighter colors like purple and pink to achieve the galaxy effect. The Nail Art Sponge Applicators are ideal for this task, allowing you to blend colors seamlessly and create that stunning ombre look.
Finally, add cherry blossoms for a floral touch among the stars. The Cherry Blossom Nail Art Stickers are a wonderful way to easily incorporate these beautiful designs without the need for intricate painting. This design is perfect for night outs or showcasing an adventurous spirit, merging two unexpected elements in an eye-catching way.
9. Cherry Blossom Stripes
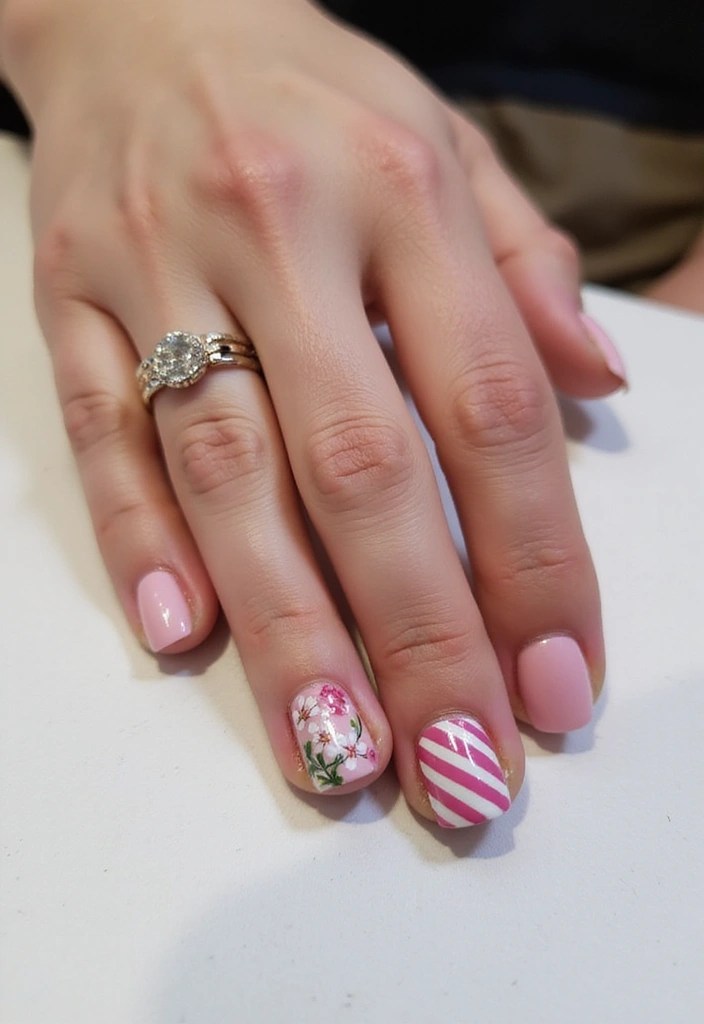
For a more structured look, try cherry blossom stripes. This design combines clean lines with floral accents, providing a modern aesthetic that’s both chic and playful.
Start by choosing a solid base color, like white or pale blue, using a set such as the modelones nail polish set (white and pale blue). This will ensure your foundation is vibrant and ready for the design.
Next, use striping tape, like the striping tape for nail art, to create straight lines. This product is perfect for achieving that clean, defined look, making it simple to section off areas for your design.
Between the stripes, place tiny cherry blossoms for a pop of color using cherry blossom nail art stickers. These decals add the floral detail without the fuss of painting intricate designs by hand, making your nails look polished without being overly complicated.
This approach is fantastic for those who enjoy a blend of simplicity and design, ensuring your nails capture the essence of spring effortlessly.
10. Pastel Cherry Blossom Dots
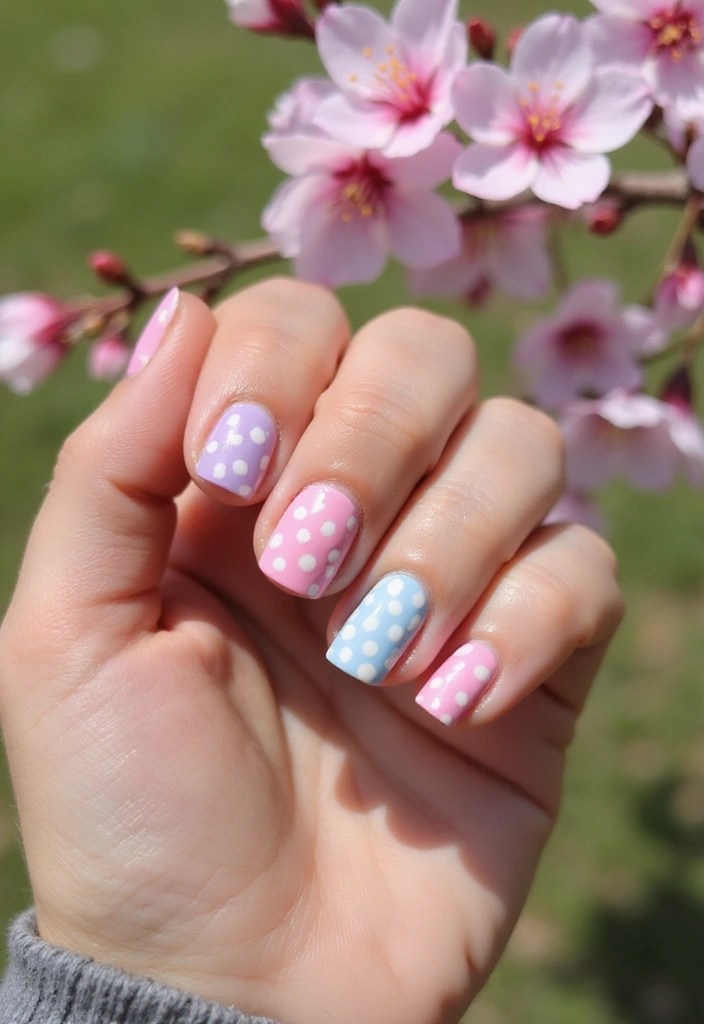
This design is charming and playful, featuring polka dots and cherry blossoms. It’s a fun way to showcase your love for florals while keeping things light and jovial.
Start with a pastel base color of your choice using a pastel nail polish set, which offers a variety of delightful hues perfect for spring. Then, create polka dots using a dotting tool, like the dotting tool set for nail art, which includes multiple sizes for all your nail art needs. Finally, to add the cherry blossoms, consider incorporating cherry blossom nail stickers. These stickers make it easy to achieve that floral look without the hassle of painting intricate details by hand.
This playful design is perfect for casual outings or days when you want your nails to reflect a joyful mood, combining whimsy with elegance.
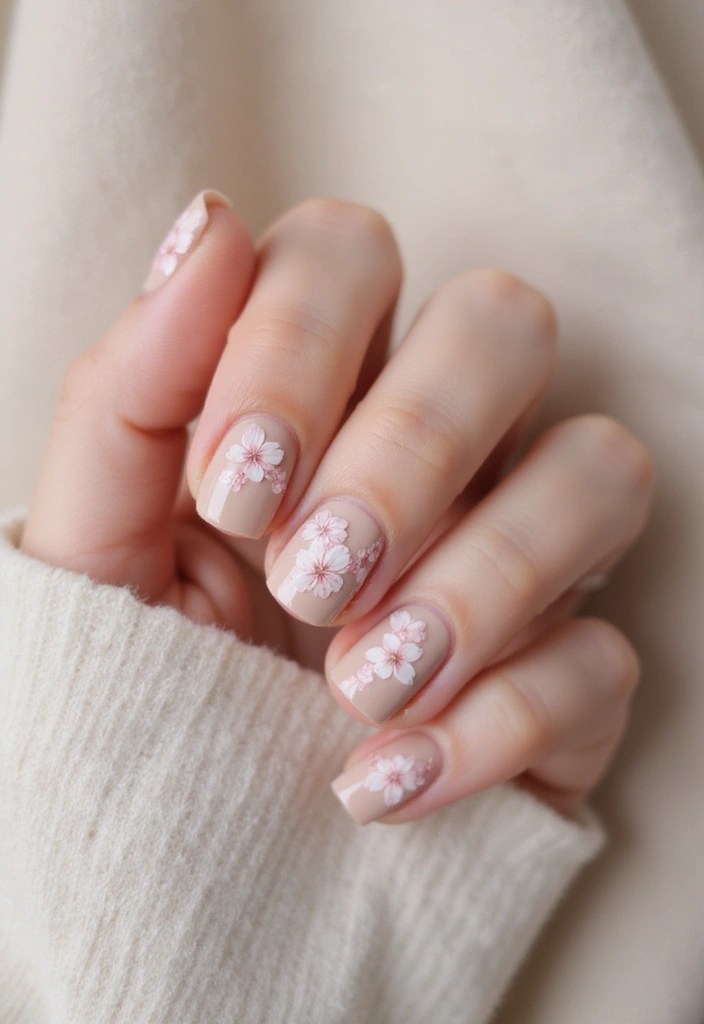
11. Vintage Cherry Blossom
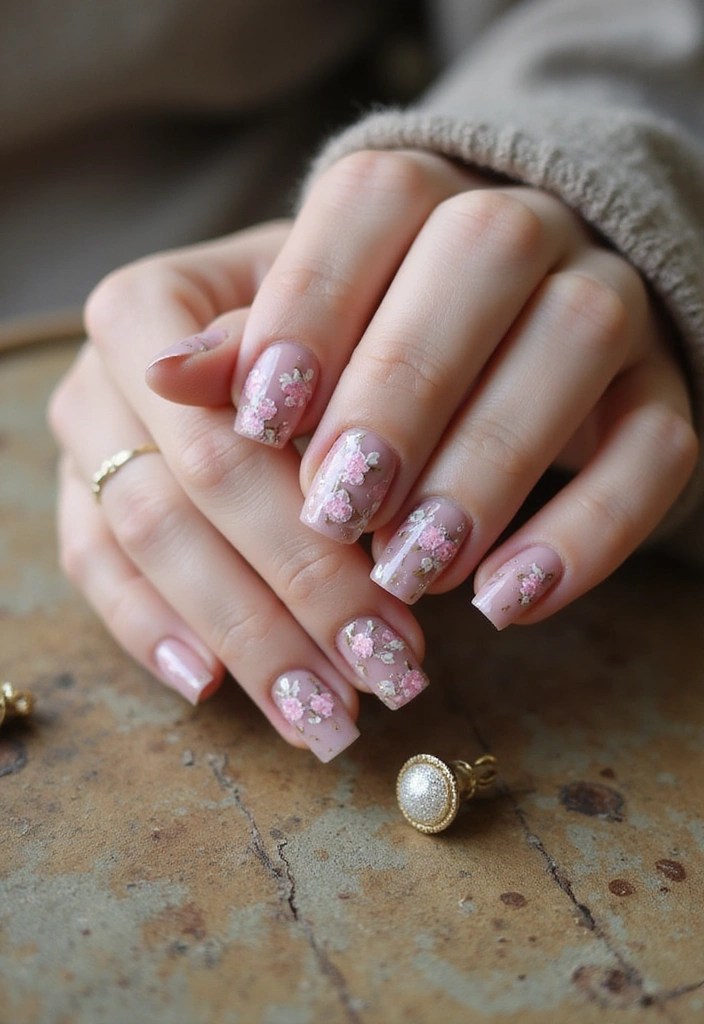
Channel a vintage vibe with this design that merges muted colors and intricate details, reminiscent of traditional Japanese art. Start with a light base color like cream or pale peach to create a soft backdrop. For adding those delicate cherry blossoms, consider using the nail art brush set. This set includes various brushes that are perfect for fine detailing, allowing you to create depth and dimension in your floral designs.
To complete your look, finish with the matte top coat nail polish, which gives a sophisticated matte finish that enhances the vintage feel of your manicure. This elegant style is ideal for a sophisticated evening or brunch with friends, ensuring you always look chic and on-trend.
If you’re looking to explore more nail art options, the nail art stamping kit can be a fun addition to your nail art supplies, providing various designs to mix and match with your cherry blossom theme. This kit can help you achieve intricate patterns effortlessly, making your nails the center of attention.
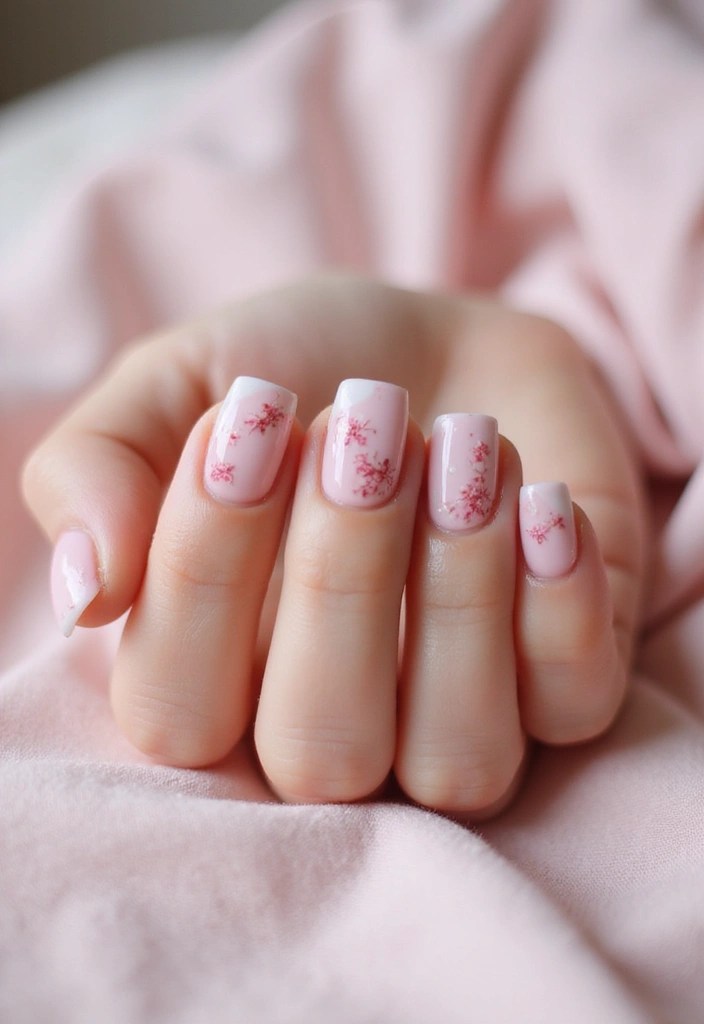
12. Cherry Blossom Minimalism
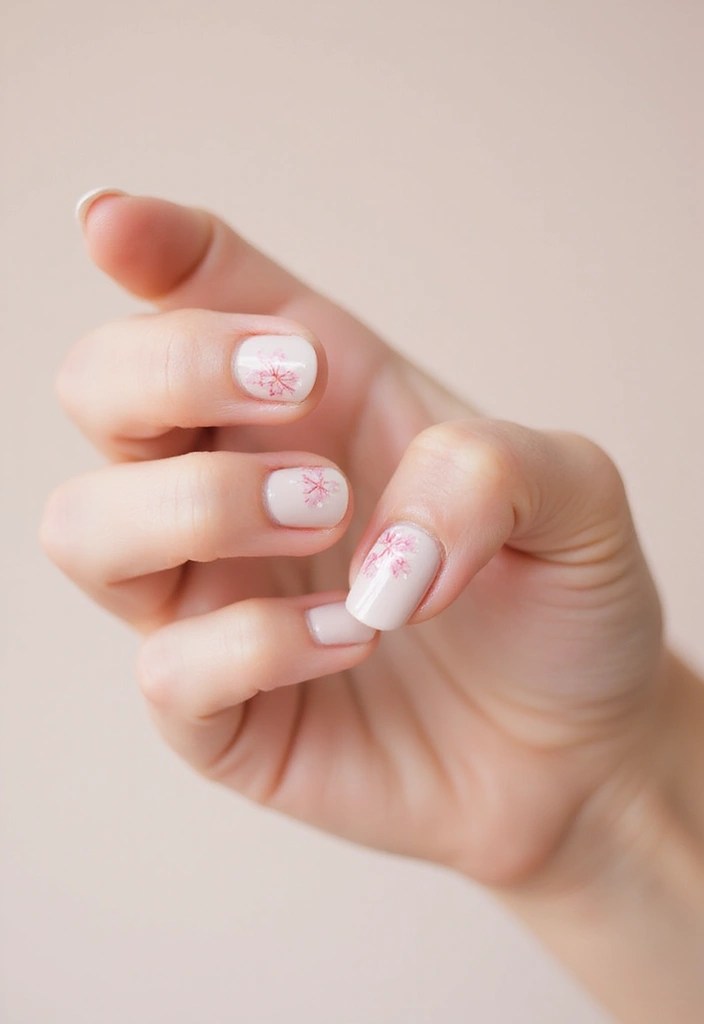
Less is more with this minimalist design that focuses on simplicity and elegance. To achieve this chic look, start with a clear or nude nail base using Nude Nail Polish. This polish offers a quick dry, long-lasting finish, perfect for a clean backdrop that highlights your cherry blossoms.
Next, add one or two cherry blossoms on each nail to create balance. You can easily achieve this with the Cherry Blossom Nail Art Stickers, which provide elegant floral designs and have a strong adhesive for a seamless application.
To enhance the minimalist aesthetic, consider finishing with a matte look using Matte Top Coat. This product delivers a powder-resist matte finish, adding a subtle sophistication to your nail art.
This look is perfect for any occasion, offering just the right amount of floral flair without being overpowering. It’s chic, effortless, and ideal for any season.
13. Cherry Blossom Mosaic

Create a unique mosaic effect using various shades of pink and white for your cherry blossom nails. This design is all about creativity and can turn your nails into a piece of art!
To help you achieve this look, start with the nail polish in various shades of pink. Using different shades allows you to paint small shapes representing cherry blossoms, giving your design depth and dimension.
Incorporate negative spaces between the colors for that stunning mosaic effect. For this detailed artwork, consider using an nail art brush set. This set includes various tools, such as dotting and striping brushes, which will help you create precise shapes and lines.
Finish with a glossy top coat to add depth and shine to your design. This top coat not only enhances the colors but also helps to protect your art, ensuring it lasts longer.
This artistic approach is sure to grab attention and is perfect for someone looking to express their individuality through their nail designs.
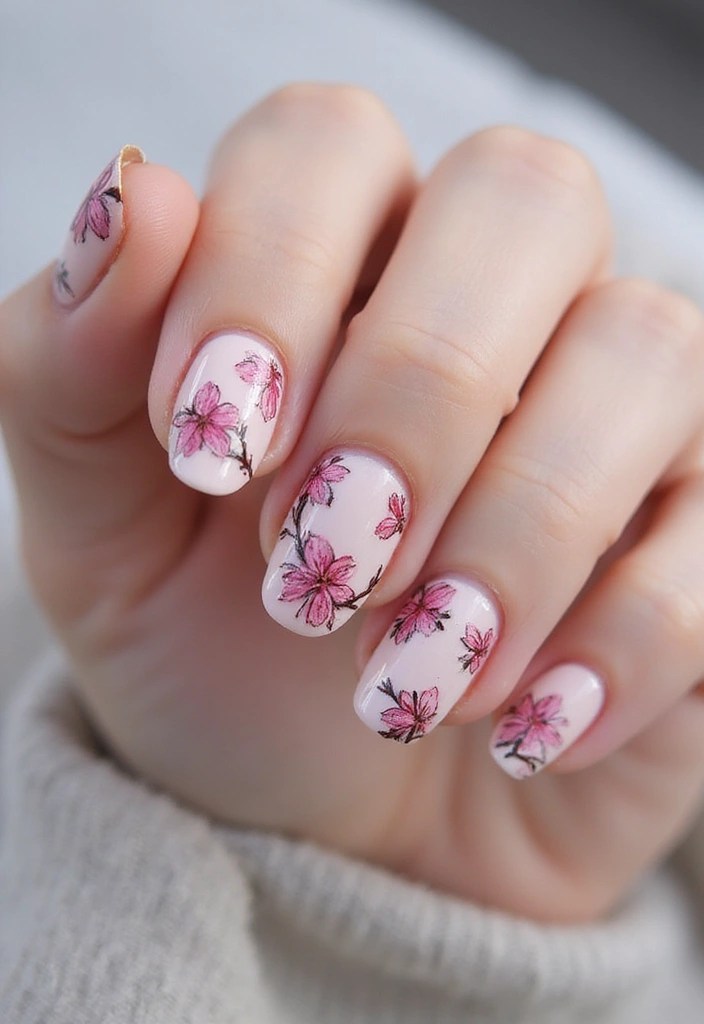
14. Botanical Cherry Blossom
For a more nature-inspired approach, you can incorporate leaves and branches with your cherry blossoms. This design creates a full scene reminiscent of blooming trees.
– Start with a soft base color. A great option to achieve that perfect finish is the glossy top coat nail polish, which provides a chip-resistant, high-shine finish that enhances the overall look of your design.
– Paint branches and leaves using a fine brush from the nail art brush set. This set includes various tools like striping brushes and drawing pens, making it easy to create intricate details.
– Add cherry blossoms along the branches, and if you prefer a quicker method, consider using cherry blossom nail art stickers. These decals can effortlessly elevate your design with beautiful, embossed flower patterns.
This design is perfect for nature lovers and adds a beautiful, artistic touch to your nails, making them look like a mini garden!
15. Cherry Blossom Fusion
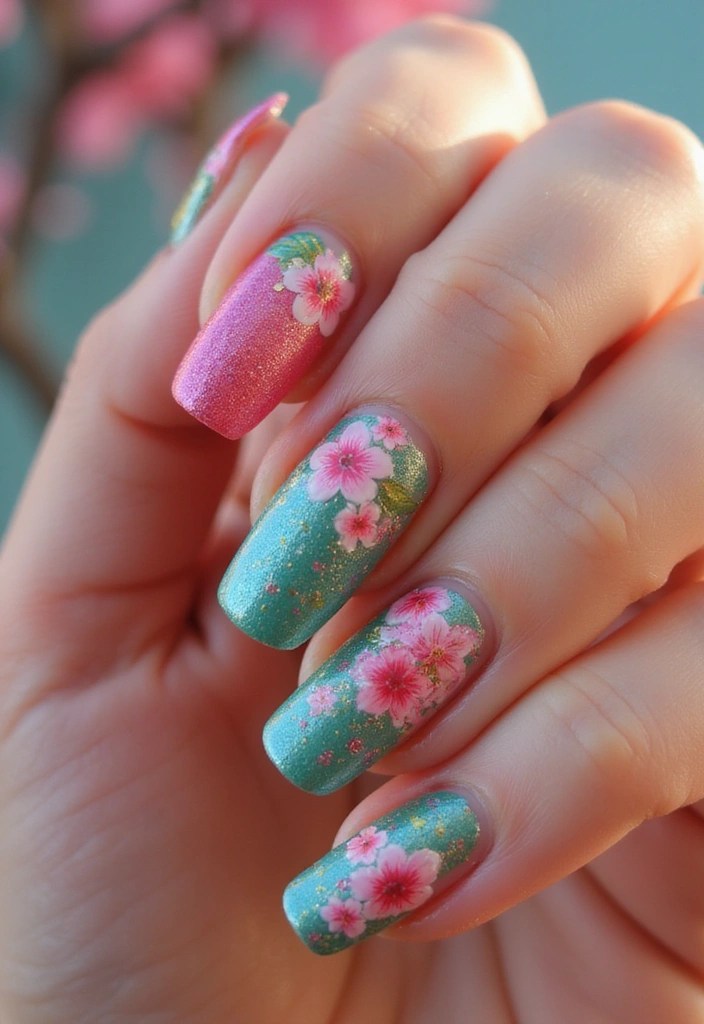
Mix and match different styles for a fusion design! Combine elements like stripes, dots, and blossoms for a playful and eclectic look.
Start by deciding on a base color, and for a touch of elegance, consider using the gel nail polish set, which includes a variety of colors to choose from. Then, select two or three designs to incorporate. To add intricate details, the nail art brush set is perfect for creating fine lines and dots, making it easier to achieve the look you want.
For a speedy and stylish addition, incorporate cherry blossom nail stickers. These decals can effortlessly enhance your manicure with beautiful floral designs, ensuring you save time without sacrificing style.
Finish your design with a top coat to unify the look and add shine. This fun and trendy approach allows for endless customization, making each manicure unique and exciting. It’s perfect for those who love to experiment and express their personality through art.
Conclusion
Cherry blossom nail art is undoubtedly a beautiful way to embrace the essence of spring.
With these 15 dreamy designs, there’s a style for every personality, mood, and occasion. Whether you prefer soft pastels, vibrant colors, or minimalist designs, these cherry blossom nail ideas ensure that your nails will blossom this season.
So, which design will you try first?
Note: We aim to provide accurate product links, but some may occasionally expire or become unavailable. If this happens, please search directly on Amazon for the product or a suitable alternative.
This post contains Amazon affiliate links, meaning I may earn a small commission if you purchase through my links, at no extra cost to you.

Leave a comment