
Pink gold nails have taken the beauty world by storm, merging elegance with a touch of sparkle that feels like a warm embrace.
This trend has beautifully captured the hearts of nail art lovers, making it the go-to choice for anything from casual outings to glamorous galas.
With the perfect blend of soft pink hues and shimmering gold accents, these designs promise to add a touch of sophistication to any look.
From intricate patterns to simple elegance, there’s something for everyone in this roundup of stunning pink gold nail designs that will have you double-tapping all the way through.
Contents
- 1. Glamorous Ombre Effect
- 2. Glittering Geometric Designs
- 3. Floral Fantasy
- 4. Classy French Tips
- 5. Mesmerizing Marble Effect
- 6. Playful Polka Dots
- 7. Stunning Stripes
- 8. Edgy Snake Skin
- 9. Sparkling Studs
- 10. Abstract Art
- 11. Dazzling Rhinestones
- 12. Chic Negative Space
- 13. Heartfelt Designs
- 14. Gradient Glitter
- 15. Classic Metallic Foil
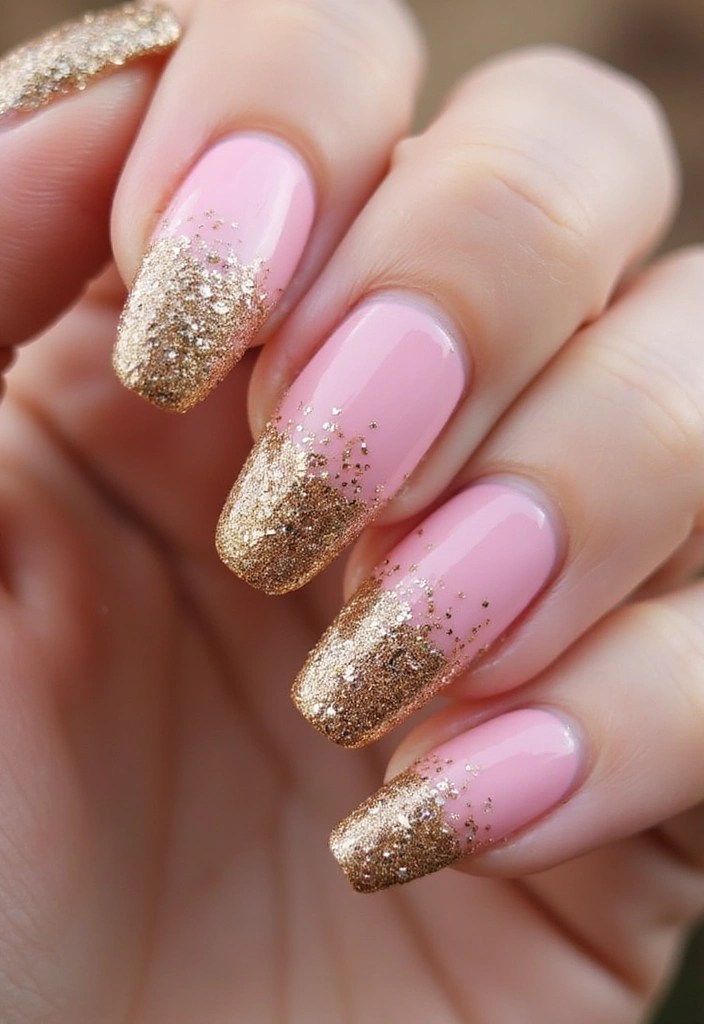
1. Glamorous Ombre Effect
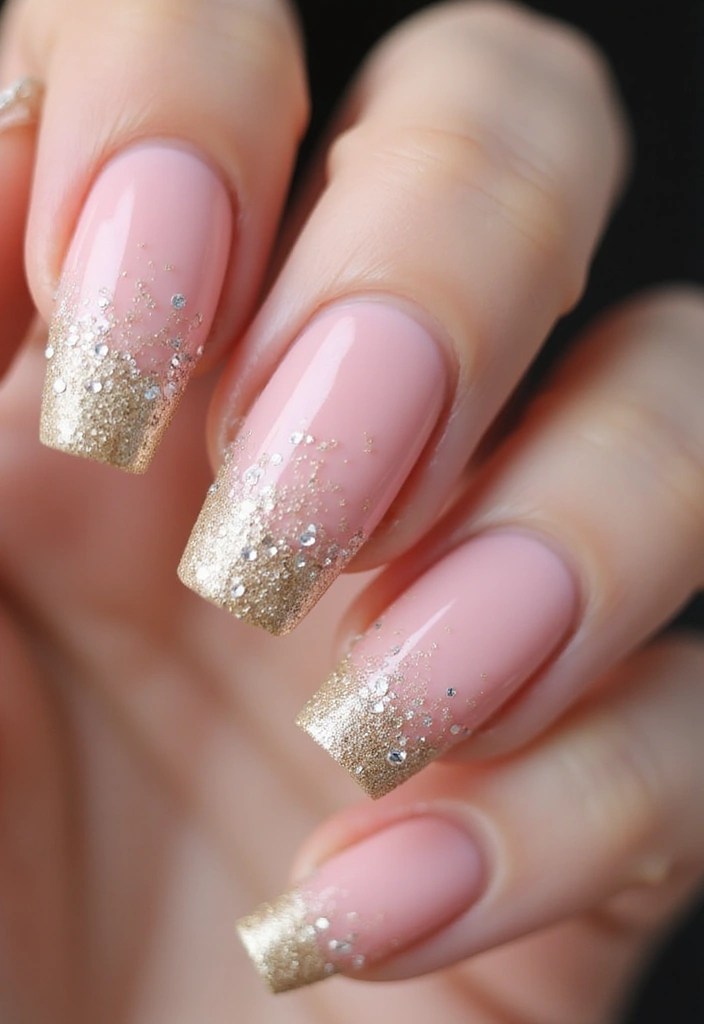
Ombre nails are all the rage, and when melded with pink gold, the effect is downright enchanting. Start with a light pink base and gradually transition to a rich gold tip, ensuring a seamless blend that catches the eye. For added flair, consider embellishing the tips with tiny rhinestones to create a shimmering effect that dances in the light. This style not only enhances the length of your fingers but also introduces a playful yet sophisticated vibe.
For achieving the perfect ombre, a great tool to have is a nail art ombre sponge. This double-headed sponge helps you blend colors smoothly for that dreamy gradient look. Once you’ve created your design, sealing it with a high-shine topcoat like Barry M Cosmetics – high-shine topcoat will amplify the glam and keep your mani looking fresh.
To add that extra touch of sparkle, sprinkle some tiny rhinestones using tools such as the rhinestones for nail art. This set comes with a variety of sizes and includes tweezers and a dotting pen, making it easy to apply the gems just where you want them. Don’t hesitate to experiment with color contrast; trying a deeper pink for a bolder statement can elevate your look even further.
2. Glittering Geometric Designs
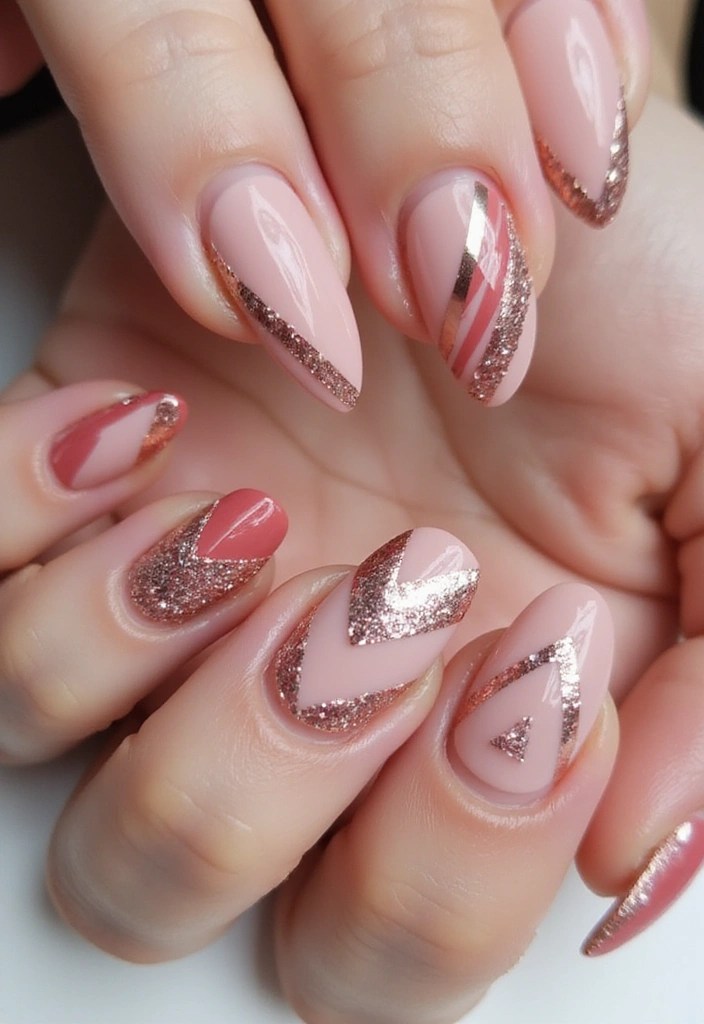
Geometric nail art is perfect for those who love a modern twist on traditional styles. Pink gold lends itself beautifully to sharp lines and bold shapes, making it an ideal choice for this design. To create a stunning look, try a design featuring triangles or chevrons by using gold polish to form the shapes over a pink base.
For precise and clean lines, consider using striping tape for nail art. This handy tool helps to ensure your geometric shapes are flawlessly defined. To take your design to the next level, add a layer of fine glitter within the shapes. You can achieve this with fine glitter for nail art, which will add a touch of sparkle and glam.
If you’re aiming for a chic, minimalist vibe, consider alternating shapes with negative space. Additionally, experimenting with a matte finish can elevate your design. A great option for this is the matte top coat nail polish, which gives a stylish designer finish that truly stands out.
3. Floral Fantasy
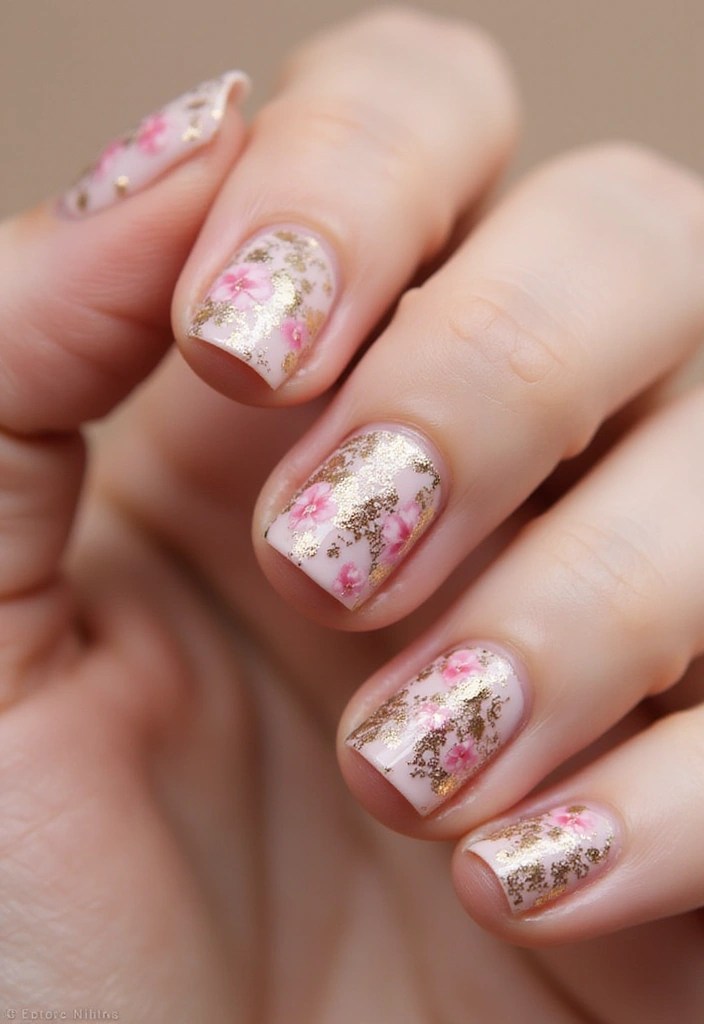
Floral nail art is timeless, but when you add pink gold to the mix, it transforms into a glamorous masterpiece.
Imagine delicate pink flowers with gold accents, painted on a soft nude base that perfectly complements the pink gold theme. To achieve this look, starting with a nude or light pink base coat is essential. You can use 60 Seconds Super Shine Nail Polish for a smooth and vibrant backdrop that enhances the overall design.
Next, use a fine brush for painting intricate flowers, ensuring they’re varied in size for depth. The Fine Detail Nail Art Brush Set is perfect for this step, as it includes a variety of brushes that allow for precision and creativity in your designs.
Top it off with a glossy finish to give an extra layer of shine. Consider Barry M Cosmetics – Gelly Hi Shine Nail Paint – Plumpy Top Coat to achieve that glossy effect, ensuring your floral art looks polished and eye-catching. For added contrast, you might also consider a matte finish for the leaves, which will beautifully highlight the flowers.
This design balances elegance and femininity, making it ideal for weddings or special events, and with the right tools, you’ll be set to create a floral fantasy that truly dazzles.
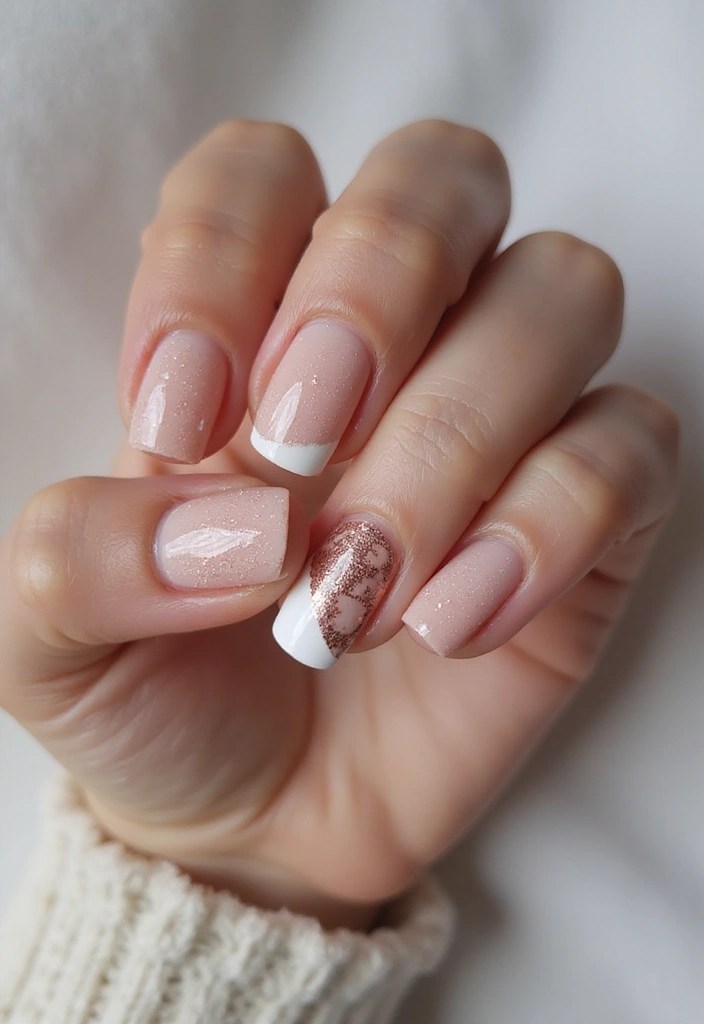
4. Classy French Tips
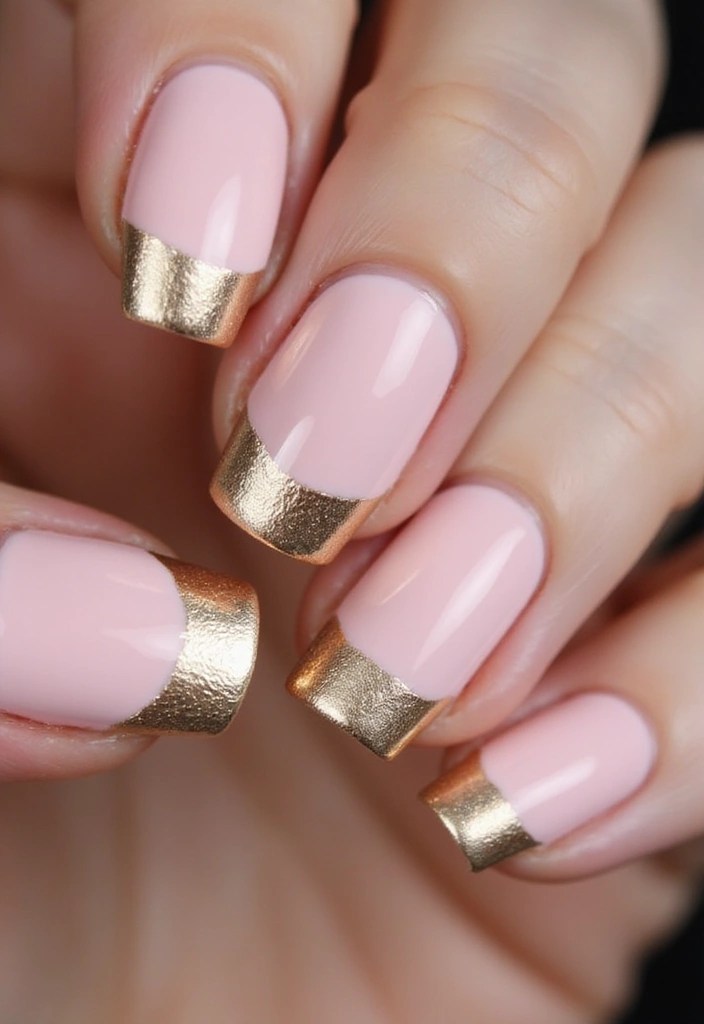
French tips get a luxurious upgrade with pink gold, transforming this classic style into modern day chic. Instead of stark white, opt for a light pink base and finish with gold tips that beautifully catch the light. This look is perfect for the office, brunch, or even a night out—it’s versatile and effortlessly classy.
For the best results, consider using a nail art brush set for precision at the tips. This set includes a collection of brushes that helps you create clean and sharp lines, ensuring your gold tips look impeccable. For a twist, think about adding a thin line of glitter where the pink meets the gold for a little extra bling. A great option for this is the pink gold nail polish, which adds sparkle and depth without overwhelming the elegance of the design.
To complete your look, seal it all in with a high-gloss top coat for that salon-fresh finish. This top coat not only enhances the shine but also protects your manicure, keeping it looking flawless longer. Try varying the length of the tips for a personalized touch, and enjoy your chic, updated French tips!
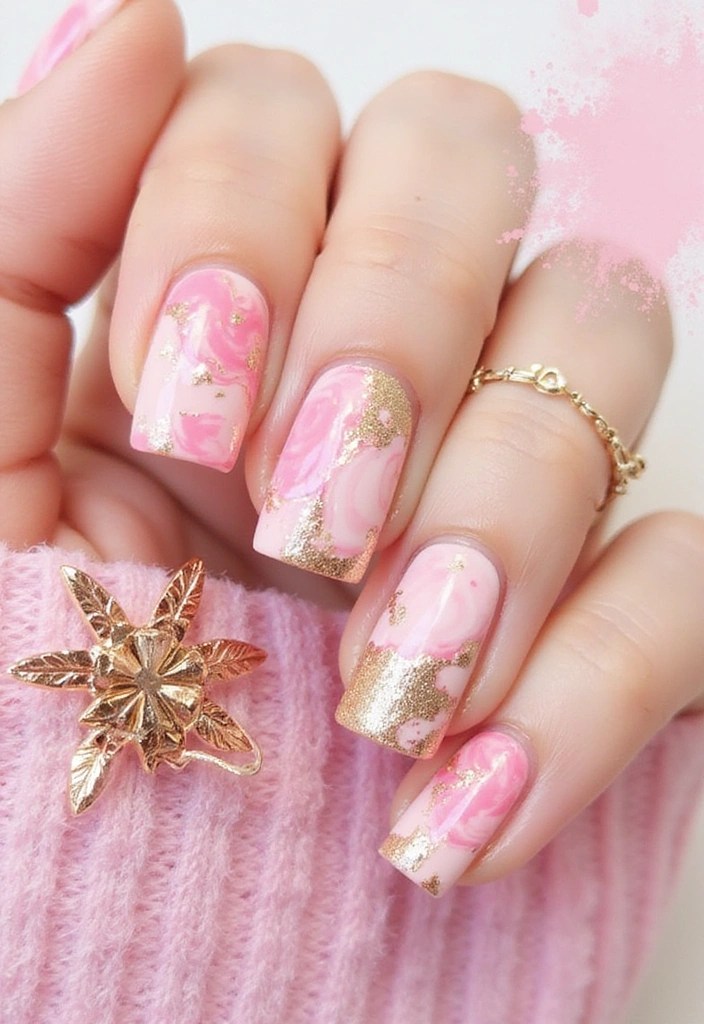
5. Mesmerizing Marble Effect

Marble nails are captivating, and adding pink gold elevates the look to pure glam. This design mimics the natural veining found in marble, using white, soft pink, and gold to create that luxurious stone effect. To achieve this authentic look, try using a marbling tool like the marbling tool set, which includes double-ended brushes perfect for swirling the colors together.
This style not only looks stunning but is also surprisingly easy to achieve. To make your marble nails last, start with a good base coat. The base coat nail polish from Barry M will help prevent staining and create a smooth foundation for your colors. Finish off your design with a gel top coat for longevity and shine. The gel top coat nail polish by Beetles provides a high gloss, long-lasting finish that seals everything in beautifully.
Feel free to mix in other colors like soft gray or a hint of champagne for added depth, and you’ll have marble nails that truly stand out!
6. Playful Polka Dots
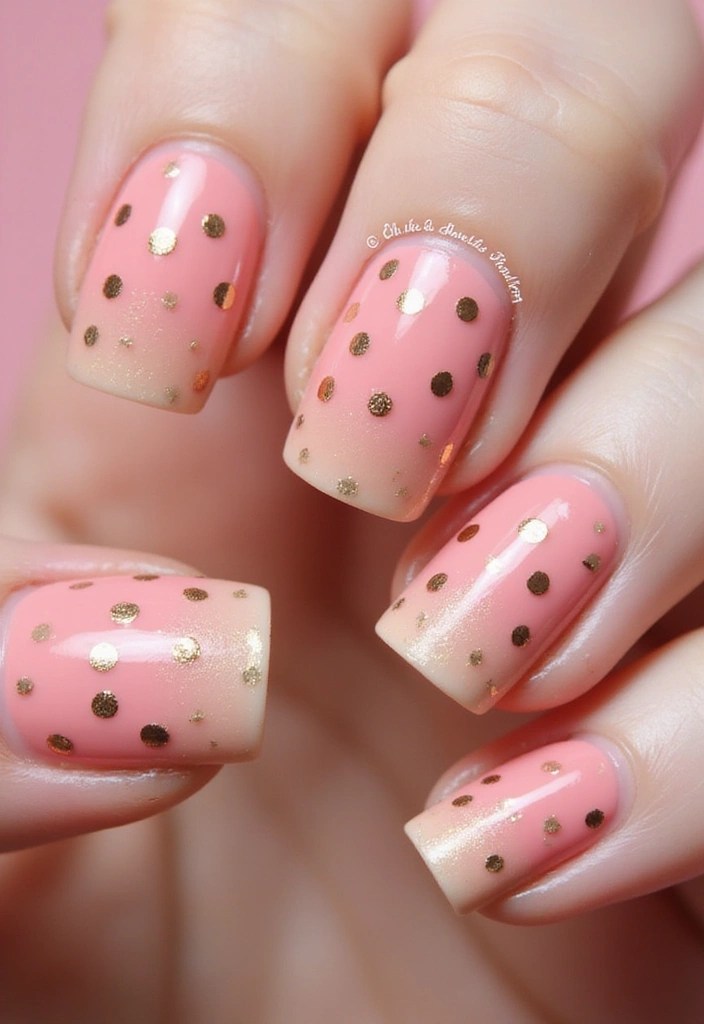
Polka dots are playful and fun, and they become even more chic with a pink gold twist. Imagine a base of soft pink with gold dots scattered across your nails—it’s adorable yet sophisticated. You can customize this design by varying the size of the dots or alternating colors.
For a more dynamic look, consider using a contrasting background, like white or dark pink, to make the gold pop. To achieve perfect dots, a dotting tool is essential for precision—consider picking up the Nail Dotting Tools Set for versatility in sizes. Experimenting with different sizes will create interest and depth in your design.
To add that final touch of shine and protection to your nail art, seal your design with a glossy topcoat. The Glossy Top Coat Nail Polish from Barry M is a great choice to achieve that professional finish.
For those looking to elevate their nail art game further, consider the Nail Art Brush Set. This set includes both brushes and dotting tools, making it perfect for DIY and professional use alike. With the right tools, your playful polka dot design will surely turn heads!
7. Stunning Stripes
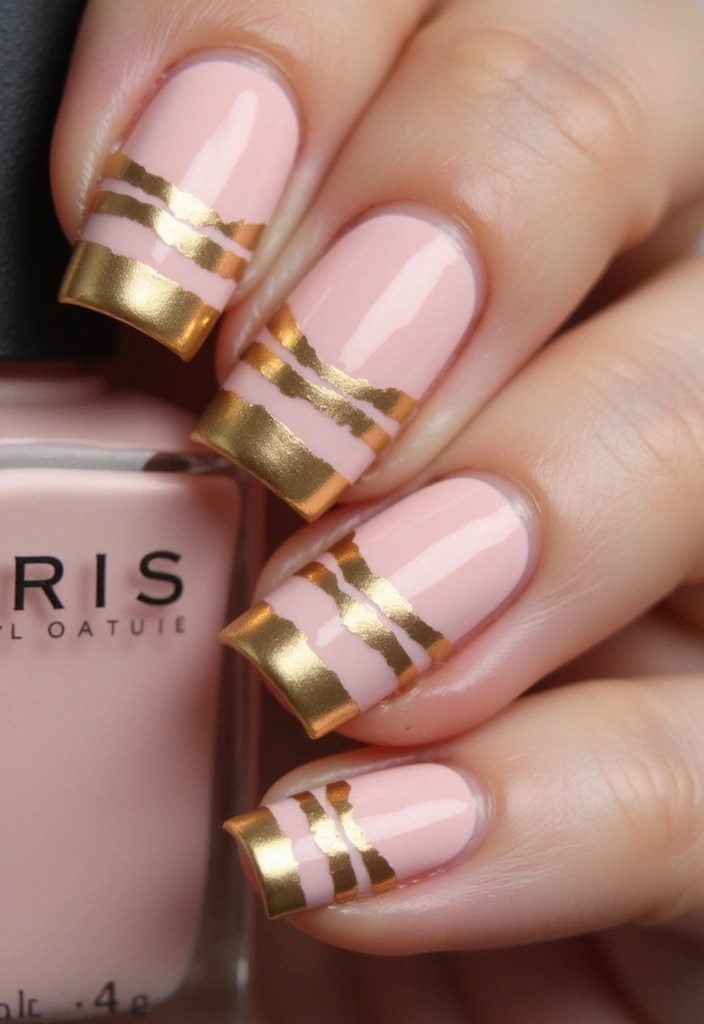
Stripes are a classic design choice, but when paired with pink gold, they take on a whole new level of glam.
Consider long, sleek stripes in shiny gold layered over a pink base for a striking effect. You can mix up the width of the stripes to add variation or opt for diagonal lines for a trendy twist. A glossy finish will enhance the luxe feel of this design.
For achieving those perfect stripes, using nail striping tape will help you create clean lines effortlessly. Simply lay the tape down before painting over it to achieve a professional look. You might also want to grab a nail art brush set for more intricate designs and detailing.
To really nail the pink gold color, consider using gel nail polish in pink gold. This polish offers long-lasting wear and a beautiful glittery finish, ensuring your stripes look stunning and chic. Mixing in some matte stripes with your glossy ones will also create an interesting contrast that elevates the whole design.
8. Edgy Snake Skin
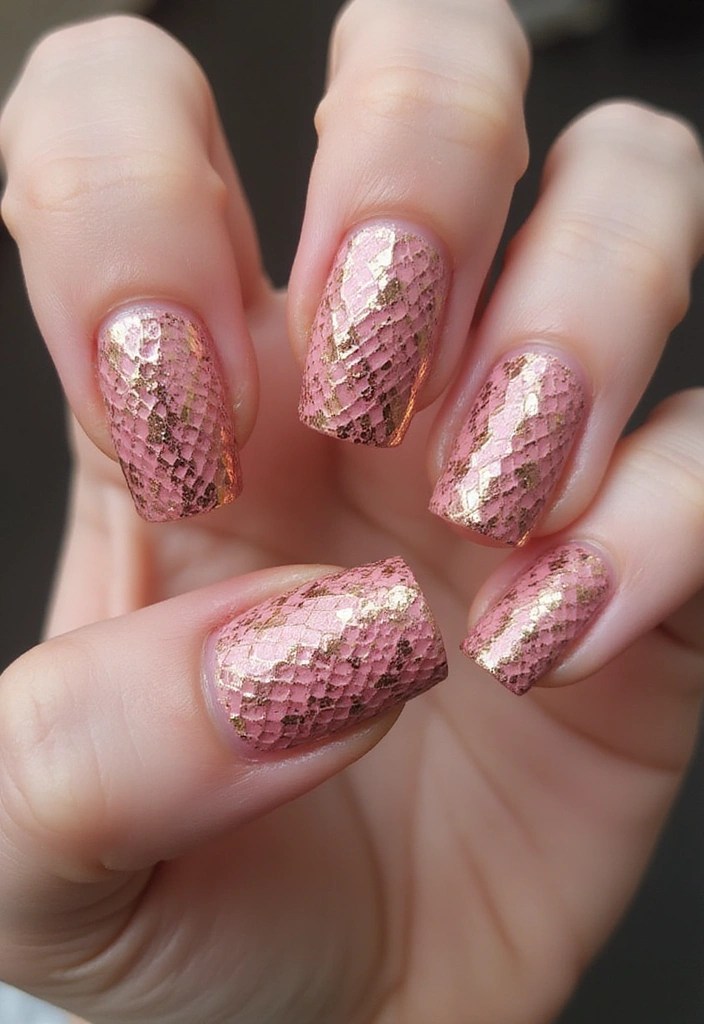
Taking a walk on the wild side, snake skin nail art is not just for the daring anymore, especially in pink gold! This design features a textured look reminiscent of snake skin, using pink as the base and gold details to mimic the unique patterns. It’s edgy and glamorous, perfect for a night out or a daring day look.
For the best results, consider using Nail Stamping Plate to achieve that intricate texture. Stamping plates allow you to create detailed patterns that are difficult to achieve freehand, ensuring your snake skin nails are as striking as possible.
Additionally, you might want to grab Nail Vinyls, which can help you create precise designs and will add an extra layer of sophistication to your manicure. These vinyls feature various designs that can complement the snake skin effect and save you time on intricate artwork.
To finish off your look, adding tiny gems for an extra pop of glam is essential. Consider using Nail Gems/Studs, flat back crystal rhinestones that can elevate your design. The included pick-up tweezer makes it easy to position them perfectly on your nails.
For creating snake skin nails, start with a matte pink base for a striking contrast. Layer a clear topcoat after stamping for depth. With these tips and products, your nail art will surely stand out!
9. Sparkling Studs
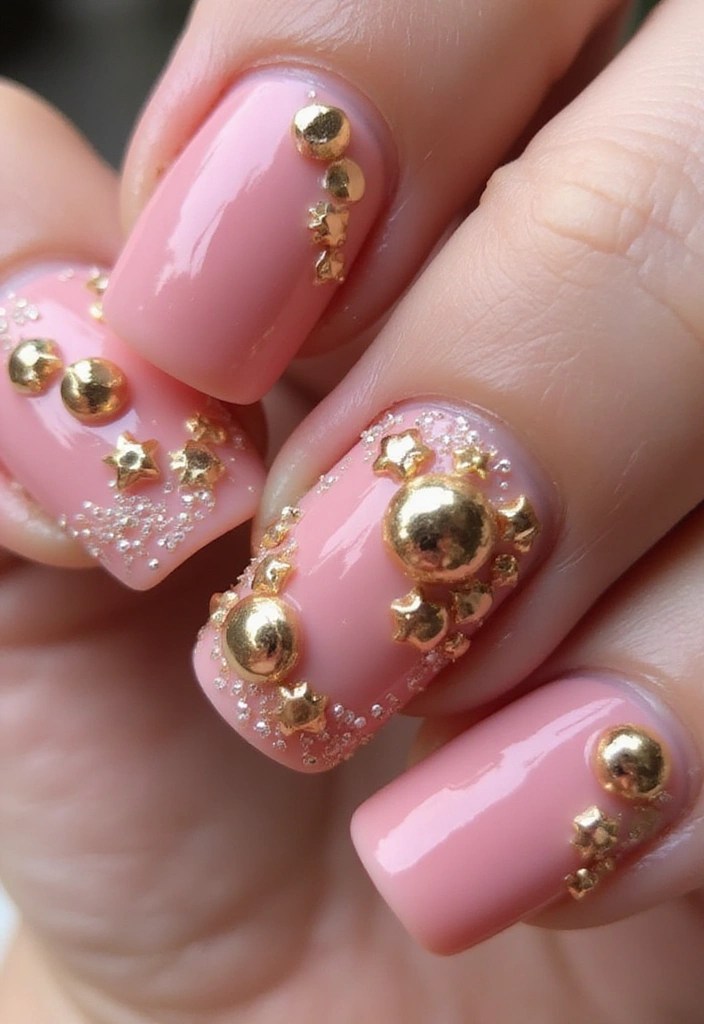
Nail studs are the perfect accessory for those who love to add a bit of bling to their nails. Incorporating pink gold into this look brings a touch of luxury. Consider a solid pink base while accenting with tiny gold studs or even larger statement pieces for a glamorous effect. This trend is all about balance, so mix and match sizes for a trendy look.
To keep your studs in place, start with a strong nail glue like Nail Glue. This glue ensures a secure application, allowing you to confidently flaunt your stunning nail design. Once your studs are applied, seal everything with a topcoat using Barry M Nail Paint, a versatile 3 in 1 base coat, top coat, and nail hardener that guarantees longevity for your dazzling design.
Don’t forget to play with placement; clustering some studs while scattering the rest creates a curated look that’s very much in vogue. For a complete design experience, you can explore options like the Nail Studs Set, which provides a variety of metal punk cone nail art charms that will enhance your manicure game with ease.
10. Abstract Art
Abstract nail art allows for creativity to flow freely, and with pink gold, the outcome can be stunning. Think of swirls, splashes, and splatters in shades of soft pink and gold creating a masterpiece on your nails. This design is perfect for the artistic soul who loves to express individuality through nail art.
To create your abstract design, you’ll want to start with a good set of tools. A nail art brush set can be invaluable, as it includes a variety of brushes that are perfect for swirling and splattering techniques. For the color palette, try a pink gold nail polish set to achieve those beautiful hues. Combining multiple shades of pink not only adds depth but also enhances the overall look of your design.
Once you’re satisfied with your artwork, don’t forget to finish with a glossy top coat. This will give your design a polished look and protect your masterpiece, ensuring it stays vibrant and stunning for longer. Don’t hesitate to layer colors for a richer design; it’s all about expressing your unique style!
11. Dazzling Rhinestones
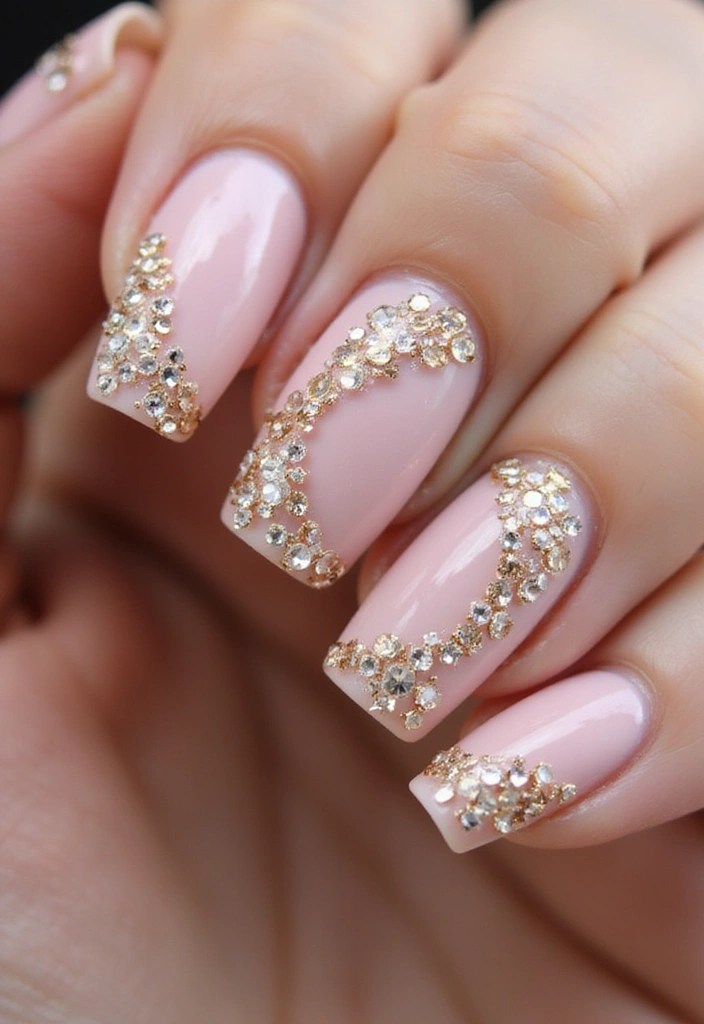
Rhinestones add an instant touch of glamour to any nail design, and when paired with pink gold, they create an eye-catching effect. Consider a simple pink base adorned with a swirl of gold rhinestones for added sparkle. For a more dramatic effect, you can create detailed designs, like a crescent moon or stars, using the stones.
To ensure your rhinestones stay put, start with a reliable adhesive like Nail Glue for Rhinestones. This super strong nail glue provides a long-lasting and mess-free application, ensuring your rhinestones don’t budge.
Once you’ve secured your rhinestones, it’s crucial to seal them in with a top coat to prevent chipping. The Top Coat Nail Polish from Barry M serves as an all-in-one base coat, top coat, and nail hardener, making it perfect for protecting your stunning designs.
To get started on your rhinestone art, you can use the Rhinestone Nail Art Kit, which includes 24 colors of flat back nail gems and comes with handy tools like tweezers and a pen for easy placement. Arrange the rhinestones in a unique pattern to make a statement, and you’ll have a glamorous nail look that truly stands out!
12. Chic Negative Space
Negative space designs are all about showcasing the natural nail while adding a twist. Using pink gold for this style can create a modern look that’s both elegant and fresh.
Consider a design where only parts of the nail are painted, such as the tips or a diagonal section, leaving the rest natural for contrast. This technique is not only trendy but also allows your nails to breathe.
To achieve the perfect negative space, planning your design carefully is essential to avoid mistakes, and using nail art tape can help you create clean lines and boundaries for a professional finish.
After painting your design, a matte top coat can enhance the negative space effect, giving your nails a chic look without the shine. For the pink gold polish itself, consider using Rimmel 60 Seconds Glitter Nail Polish in Fab, which adds that glamorous touch to your design.
With these products, you can easily create a stunning negative space manicure that stands out!
13. Heartfelt Designs
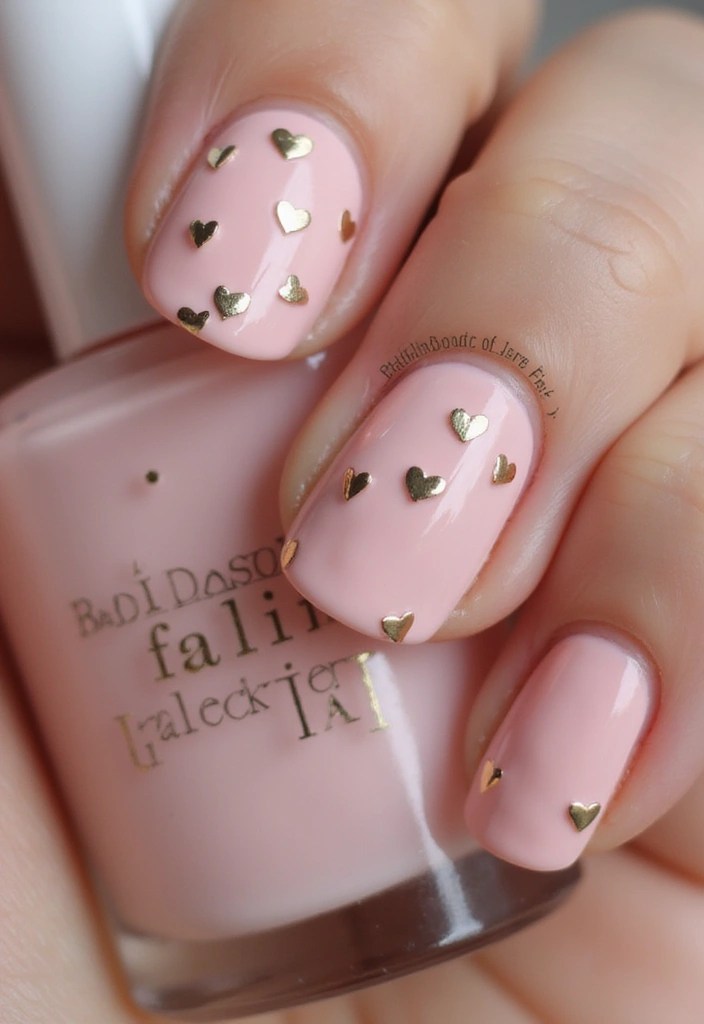
Perfect for special occasions, heart designs in pink gold are both sweet and chic. A base of soft pink with gold hearts placed at the tips or center can create an enchanting vibe. This style is great for Valentine’s Day, anniversaries, or anytime you want to spread a little love!
To achieve these beautiful heart designs, consider using heart-shaped nail stickers for an easy and effortless application. These self-adhesive stickers come in a set of six sheets, perfect for romantic nail art at home or in a salon setting.
For those who prefer a hands-on approach, a set of nail art dotting tools can help you hand-paint tiny hearts with precision. These tools allow you to create perfect heart shapes that add a personal touch to your designs.
Finally, to ensure your stunning artwork lasts and shines, don’t forget to finish with a reliable top coat nail polish. This 3 in 1 formula acts as a base coat, top coat, and nail hardener, providing durability and a glossy finish to your nails.
With these tips and products, you’ll create heartfelt designs that are sure to impress!
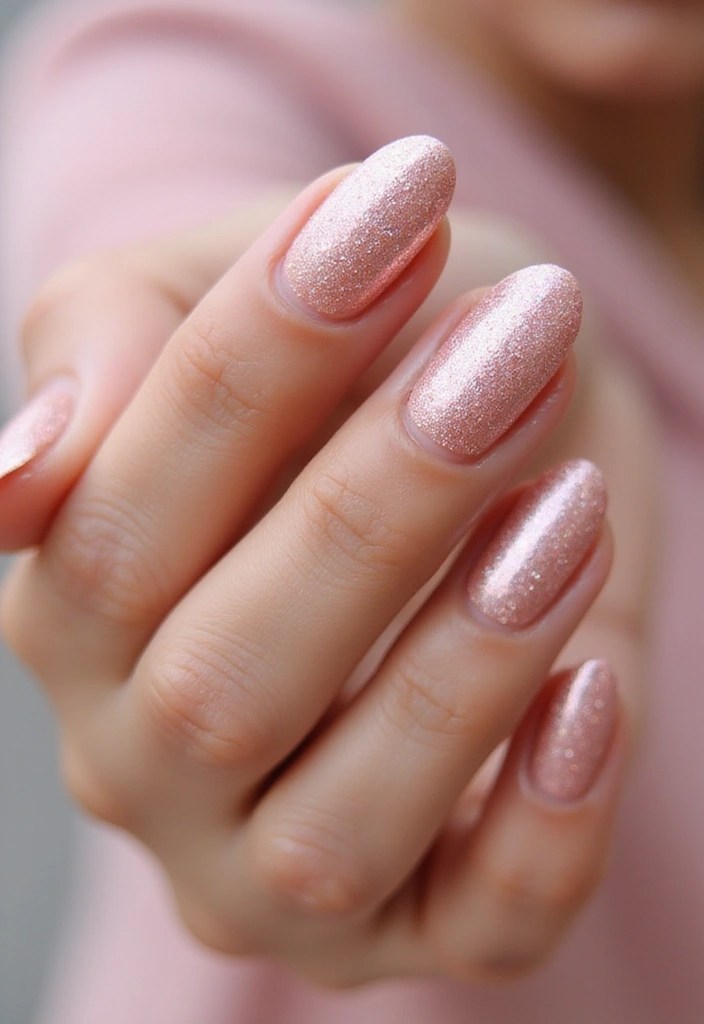
14. Gradient Glitter
Gradient glitter nails are a fun and sparkly way to incorporate pink gold into your nail art collection.
Start with a pink base and blend in gold glitter toward the tips for a dazzling, party-ready effect. This design is perfect for those who love to shine and stand out during celebrations. To achieve a smooth gradient, you can use makeup sponge applicators to dab on the glitter. These tools help create a seamless blend, making it easier to build up the glitter for the desired intensity.
Once you’re happy with your gradient, finishing with a high-gloss top coat, like Rimmel London Ultra Shine Nail Polish Top Coat, will give your nails a polished look and enhance the sparkle.
Don’t be shy to mix in other glitter colors for an even more eye-catching design! To get started, consider grabbing a nail art glitter set, which provides a variety of glitters and tools to elevate your nail art game. Happy decorating!
15. Classic Metallic Foil

Last but not least, metallic foil accents can elevate any pink gold nail design to the next level. To achieve this luxurious look, start with a soft pink base and add delicate strips or pieces of gold foil. This style strikes the perfect balance between simplicity and glamour.
To ensure your foil adheres properly, consider using a tacky base coat for nail foil. This product is specifically designed to create a sticky surface that makes it easy for the foil to cling to your nails.
When applying the foil, gently press it onto the nail for a seamless finish. For the best results, finish off your design with a clear layer like the clear top coat for nails from Barry M, which effectively locks everything in place while providing a glossy shine.
If you want to incorporate gold foil into your art, look for quality options such as gold foil for nail art. This versatile product can also be used in other crafting projects, making it a great investment for any DIY enthusiast. Feel free to mix in other metallic colors for a unique twist!
Conclusion
Pink gold nails are not just a trend; they’re a way to express your unique style and glamour.
From playful to sophisticated, these designs offer endless possibilities to match your personality and occasion.
So why not take a step into the world of pink gold nails? You might just find your new favorite nail look!
Note: We aim to provide accurate product links, but some may occasionally expire or become unavailable. If this happens, please search directly on Amazon for the product or a suitable alternative.
This post contains Amazon affiliate links, meaning I may earn a small commission if you purchase through my links, at no extra cost to you.

Leave a comment