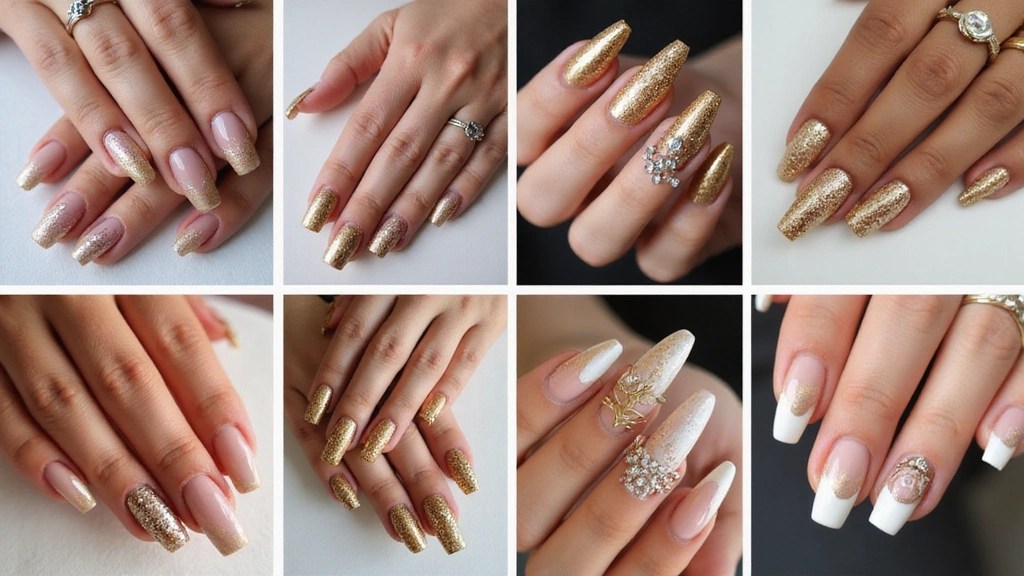
Gold and nude nails are the perfect blend of elegance and trendy flair.
These designs cater to every style, from chic minimalists to bold trendsetters, ensuring there’s something for everyone. With the right nail art, you can elevate your look whether you’re attending a gala or simply enjoying a night out with friends. Get ready to make your nails the star of the show!
Here are ten stunning designs that will have your friends drooling with envy.
Contents
- 1. Classic Gold Foil Accent
- 2. Geometric Gold Details
- 3. Glitter Gradient Magic
- 4. Minimalist Lines
- 5. Floral Elegance
- 6. Marble Effect
- 7. Ombre Charm
- 8. Artistic Splashes
- 9. Metallic Tips
- 10. Dazzling Rhinestones
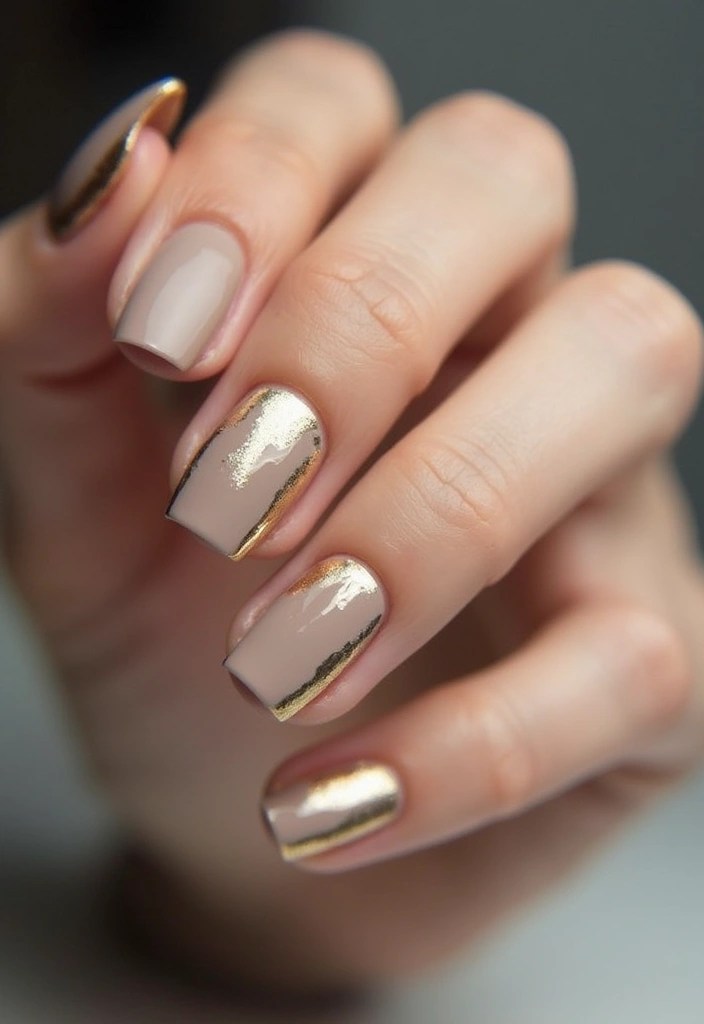
1. Classic Gold Foil Accent

Nothing says elegance like a classic gold foil accent nail. This design features a soft nude base with one or two nails adorned with thin gold foil, giving a luxe touch without overwhelming your overall look. The beauty of this design is its simplicity; it’s perfect for any occasion, whether it’s a brunch date or an evening gala.
To achieve this look, you can use the Gold Foil Nail Art Kit, which includes delicate gold leaf flakes that are easy to apply and perfect for creating that stunning accent. For a DIY-friendly approach, secure the foil in place with a clear topcoat, like the Base Coat Nail Polish. This product not only enhances adhesion but also ensures your nails stay pristine throughout wear.
To elevate your look further, consider finishing with a matte topcoat, such as the Matte Top Coat Nail Polish. This creates a trendy contrast against the glossy shine of the gold foil, adding sophistication without being flashy.
Try these tips:
– Use a good quality base coat to enhance adhesion.
– Experiment with different foil patterns for added uniqueness.
– Consider mixing in some shimmer for an extra pop!
This design exudes sophistication and is sure to make your friends a little envious!
2. Geometric Gold Details
Get trendy with geometric patterns combined with nude and gold elements. These designs can be as bold or as subtle as you like. Think triangle tips, horizontal stripes, or crisscross patterns. Start with a nude base, and then use a fine brush to paint in gold lines or shapes. A great option for achieving those precise gold details is the fine detail nail art brush set, which includes brushes of various sizes perfect for long lines and thin details.
Geometric designs are chic and modern, perfect for those who love to stand out. You can do them on all nails or as an accent on just one or two. To ensure your lines are clean and sharp, consider using nail art striping tape. This will help you create precise shapes like triangles and lines, which are super popular!
Once you’ve completed your design, don’t forget to seal it with a glossy finish. The glossy topcoat nail polish is perfect for adding that polished look while ensuring your beautiful geometric patterns last longer.
These nails are sure to turn heads!
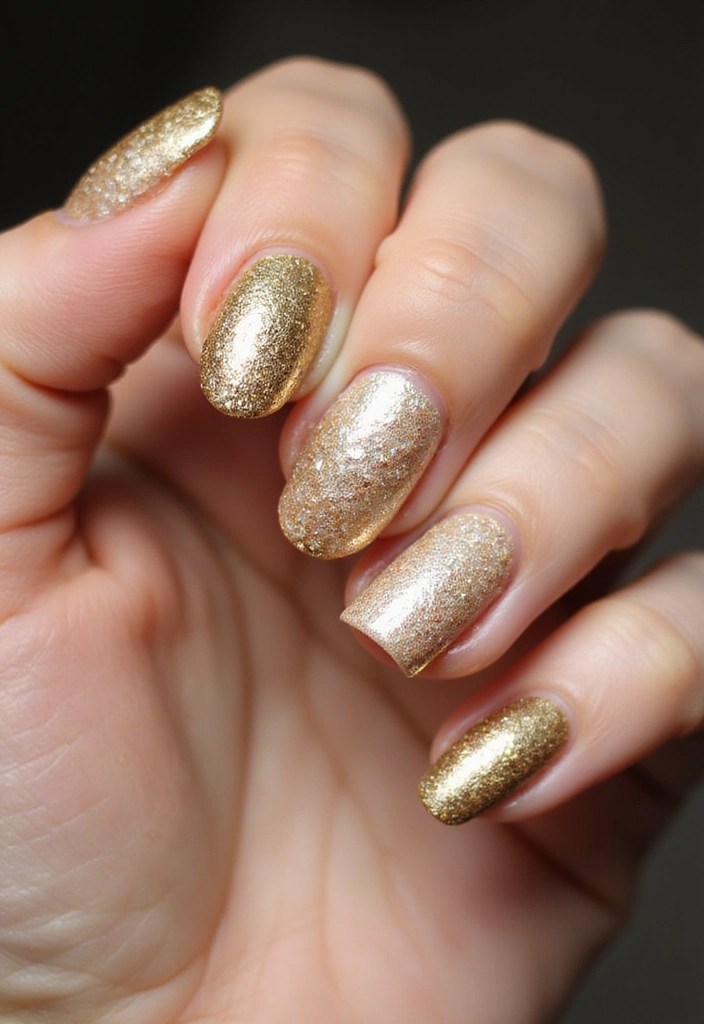
3. Glitter Gradient Magic
For those who love a little sparkle, the glitter gradient is a must-try!
This nail art trend blends a nude base with gold glitter that fades from the tips downwards. It’s like wearing a bit of magic on your fingertips. Start by applying your nude base using the 60 Seconds Super Shine Nail Polish for a smooth, even application. This polish ensures a beautiful nude backdrop to showcase your glitter.
Next, gently press gold glitter onto the tips using EONFAVE Glitter Nail Polish. Its fine glitter will help you achieve that delicate look as you blend it downwards. The quick-drying feature of this polish makes the whole process easier and less time-consuming.
To create a seamless blend, consider using a makeup sponge for nail art. This handy tool simplifies the blending process, allowing for a flawless gradient. Finish everything off with a topcoat to seal the glitter and add shine.
Pro tips for success:
– Apply a base coat for extra durability.
– Experiment with other colors to create a custom gradient.
Your nails will look like they’ve been kissed by the stars!
4. Minimalist Lines
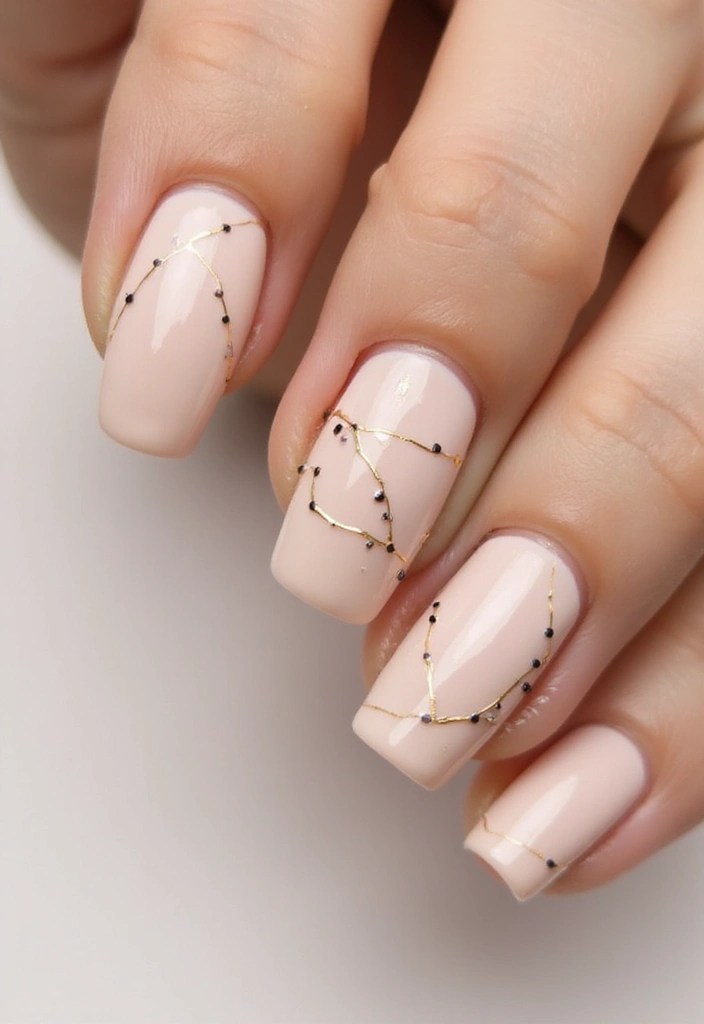
Less is more when it comes to minimalist nail designs!
With a nude base, simply add fine gold lines or dots for a chic look that speaks volumes. This design is all about subtlety and sophistication. Using a nail art brush, like the Nail Art Brush Set, allows you to create those perfect thin lines and accents that are evenly spaced across your nails. Alternatively, the Dotting Tool for Nail Art is great for adding delicate dots to enhance the minimalist look.
This style is perfect for the office or formal events, as it’s understated yet still eye-catching. To nail this look:
– Keep your lines thin for that sleek vibe.
– Don’t overcrowd the design; simplicity is key!
– A matte finish, achieved with Matte Top Coat Nail Polish, adds a modern twist.
These nails are perfect for those who love a clean aesthetic!
5. Floral Elegance
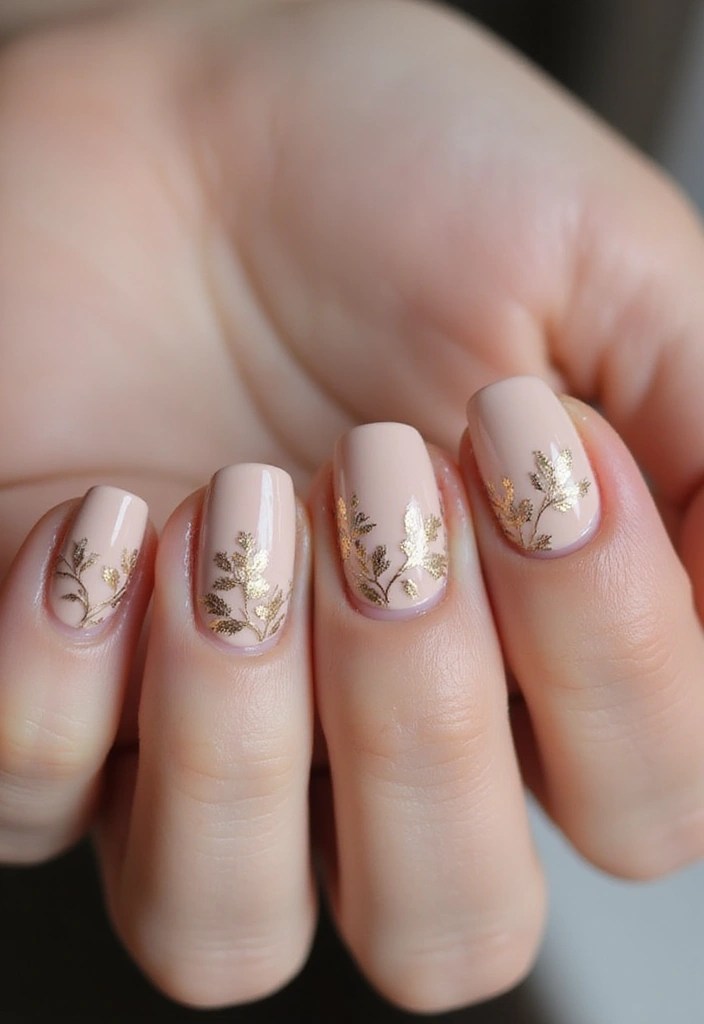
Bring a touch of nature to your gold nude nails with floral accents.
A nude base creates a soft canvas for delicate gold flowers or leaves. Using a thin brush, like the Nail Art Brush Set, you can easily paint tiny floral designs on one or two accent nails, leaving the others nude for balance. This design is perfect for spring and summer events, bringing a fresh and feminine feel. The gold adds that luxe touch that makes it stand out.
To master floral nail art:
– Use a light hand for detailed designs.
– Consider adding tiny pearls or gems from the Nail Gems and Pearls Kit for a 3D effect.
– Practice your flowers on paper first to get the shapes right.
For the perfect nude base, the Nude Nail Polish will provide a smooth finish that enhances your floral creativity.
Your friends won’t be able to take their eyes off your stunning floral nails!
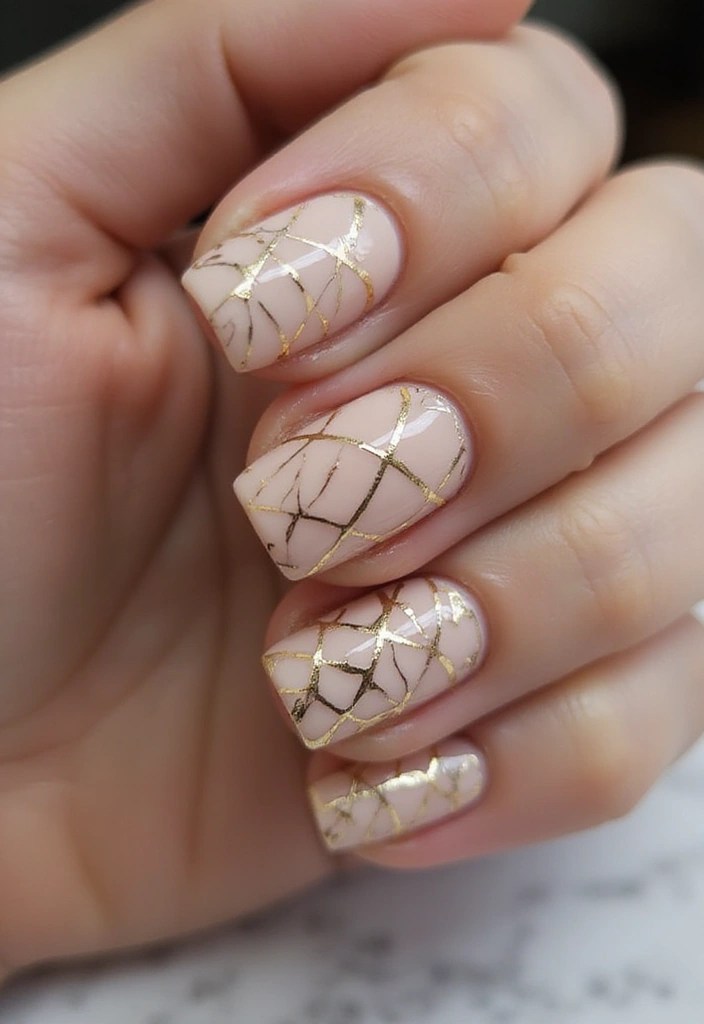
6. Marble Effect
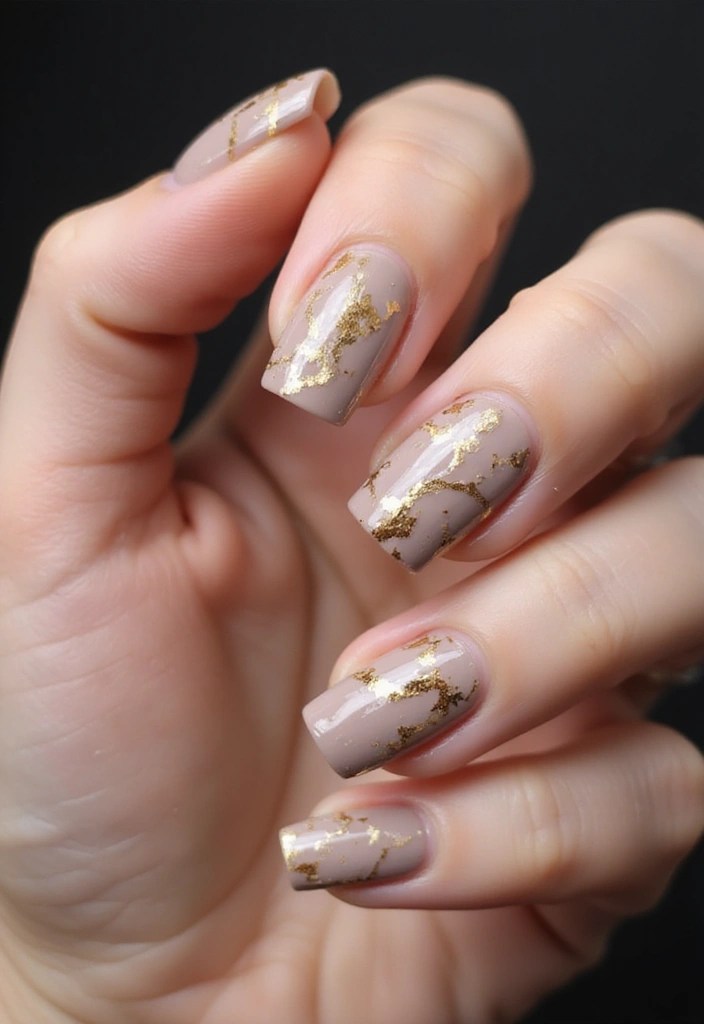
Marble nails are all the rage, and they look even better when paired with gold! This design mimics the look of luxurious marble, mixing shades of nude from a nude nail polish set with streaks of gold created using gold nail art polish. Begin with a nude polish as your base, then use a small brush to swirl in the gold polish in a marble pattern. The effect is sophisticated and versatile, making it perfect for any event. The best part? No two nails will look exactly the same, adding to the uniqueness of the design.
For perfect marble nails:
– Use a light hand to create softer swirls.
– Mix different shades of nude for depth, utilizing the varied tones in the nude nail polish set.
– Seal with a high-gloss topcoat for shine and a polished finish.
Your nails will radiate elegance with this stunning effect, and with these products, you’ll have everything you need to achieve the look!
7. Ombre Charm
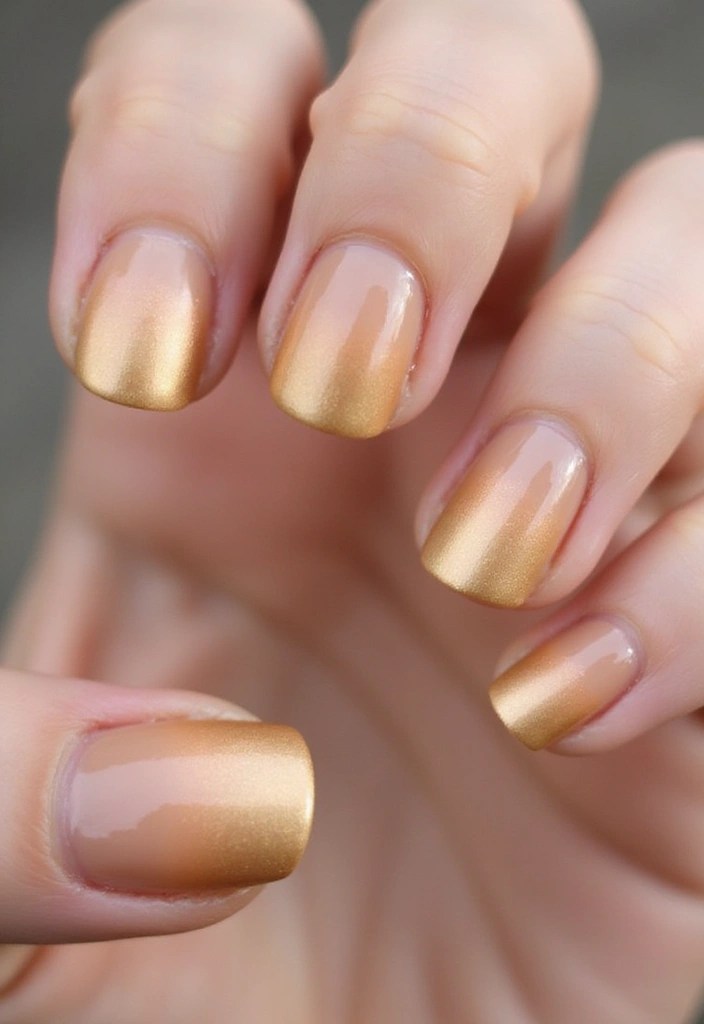
Ombre designs are not only for hair; they look fabulous on nails too!
A gold nude ombre transitions beautifully from a soft nude at the cuticle to a stunning gold at the tips. This blend creates a striking look that’s sophisticated yet playful. To achieve this, start with a solid base by applying a coat of base coat nail polish to prevent any staining on your nails.
Next, use a sponge to dab on the gold polish, blending it seamlessly into the nude base. The nail art sponge applicators are perfect for this technique, as they come with multiple replacement heads to help you practice getting the blend just right.
Finally, finish your look with a glossy topcoat, like the glossy top coat nail polish, to add that wow factor and ensure your nails shine.
These nails are sure to impress!
8. Artistic Splashes
If you’re feeling adventurous, try an artistic splash design!
This playful style combines random splashes or strokes of gold against a nude backdrop, making your nails a true reflection of your fun personality. To achieve this look, consider using the Nail Art Brush Set. This set includes 15 acrylic nail brushes along with dotting tools, perfect for creating abstract shapes or splashes in gold. With these tools, you can let your creativity flow, ensuring that no two nails need to be the same.
To achieve the stunning gold effect, you might want to use the Gold Nail Polish. This quick-drying glitter polish adds a vibrant touch to your design, enhancing the playful vibe of your nails.
Remember to keep a steady hand for cleaner edges, and you can even use contrasting colors for added depth. Once you’re finished, seal your masterpiece with the Top Coat Nail Polish. This versatile product acts as a base coat, top coat, and nail hardener all in one, enhancing the glossy finish that makes your artistic splashes pop.
With these products, your nails will truly look like a work of art, and you can take pride in your unique style!
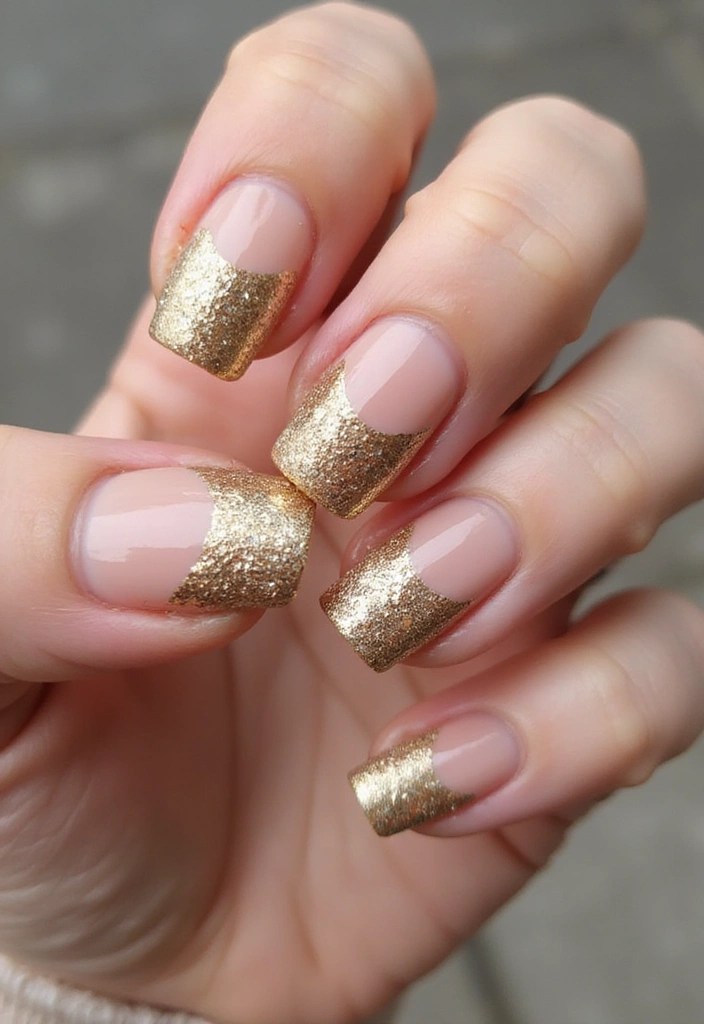
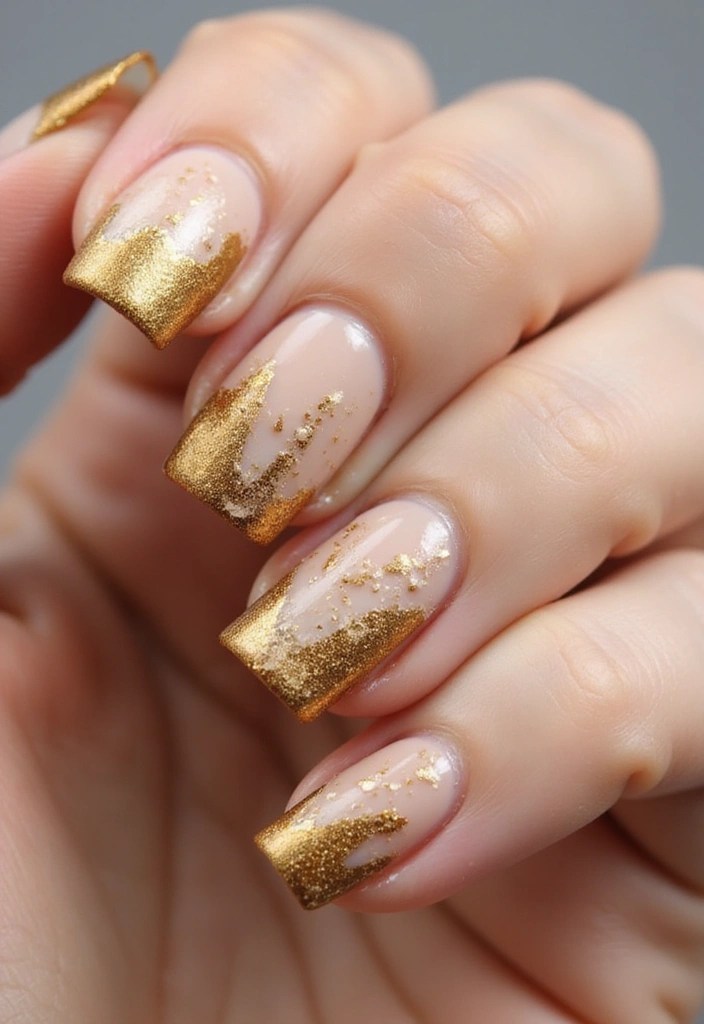
9. Metallic Tips
Metallic tips are a bold way to incorporate gold into your nude nails! This design features a nude base with gold tips that can be sharp or rounded. The contrast between the soft nude and shiny gold creates a modern and exciting look. For an edgy effect, you can even use a textured gold polish, like Rimmel 60 Seconds Glitter Nail Polish, 831 Oh My Gold, for the tips, adding dimension to your nails. This design works well for both casual and formal occasions.
To achieve this look, use a fine brush for precision with the Fine Detail Nail Art Brush Set, which includes a variety of brushes perfect for creating clean and sharp lines. Experiment with different shapes for the tip; trying almond or stiletto can give your nails a unique flair! Additionally, a matte finish on the nude can enhance the metallic shine of the tips, so consider finishing your look with Beetles No Wipe Matte Top Coat Nail Polish for that perfect touch.
You’ll love how effortlessly chic this design makes you feel!
10. Dazzling Rhinestones

Add some bling to your gold nude nails with dazzling rhinestones! This design incorporates tiny gold or clear rhinestones on your nude base, creating a glamorous look that will surely turn heads. You can place them randomly for a playful vibe or create patterns for a more structured design. The sparkle of the rhinestones paired with the nude and gold creates an eye-catching effect that’s perfect for parties or special events.
For easy application, consider using nail rhinestones set. This set includes 1500 pieces in various sizes, giving you plenty of options to mix and match. To help you place your stones precisely, grab a set of nail art dotting tools. These professional tools make it simple to pick up and position each rhinestone exactly where you want it.
Once your stones are in place, be sure to secure them with nail glue for rhinestones. This super gel is perfect for holding gems, crystal stones, and jewels securely, ensuring your design lasts. Just apply a topcoat carefully to avoid displacing the stones, and you’ll have nails that will be the talk of the town with this dazzling design!
Conclusion
Gold nude nails are a versatile and stylish choice for anyone looking to elevate their nail game.
From classic accents to bold artistic expressions, these designs offer something for every taste. Remember, creativity is key, and don’t hesitate to mix and match these ideas to create your own unique style. Get ready to show off your stunning gold nude nails and hear all the compliments from your friends!
Note: We aim to provide accurate product links, but some may occasionally expire or become unavailable. If this happens, please search directly on Amazon for the product or a suitable alternative.
This post contains Amazon affiliate links, meaning I may earn a small commission if you purchase through my links, at no extra cost to you.

Leave a comment