Spring is the perfect time to embrace bright colors, blooming flowers, and fresh styles, and what better way to celebrate the season than with stunning white spring nails?
Nailing the perfect spring look can be as easy as choosing the right design and color palette. White nails offer a timeless elegance and a clean canvas for creativity, making them the go-to choice for many nail art lovers.
In this article, we’ll share 10 easy tutorials that showcase fabulous white spring nail designs you can easily do at home. Whether you’re a nail art newbie or a seasoned pro, these ideas will inspire you to get your spring manicure on point!
Contents
- 1. Classic White with Floral Accents
- 2. White Ombre Effect
- 3. Geometric White Lines
- 4. White Marble Effect
- 5. White with Polka Dots
- 6. White French Tips with a Twist
- 7. White and Glitter Gradient
- 8. White with Leafy Accents
- 9. Whimsical Doodles on White
- 10. Minimalist White and Gold Stripes
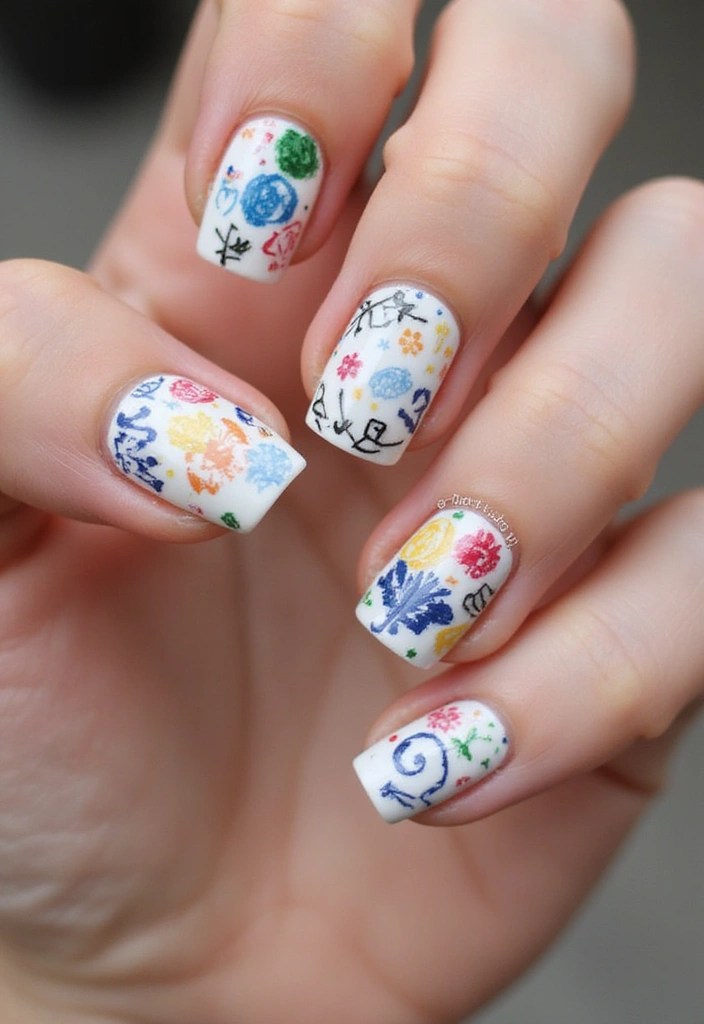
1. Classic White with Floral Accents
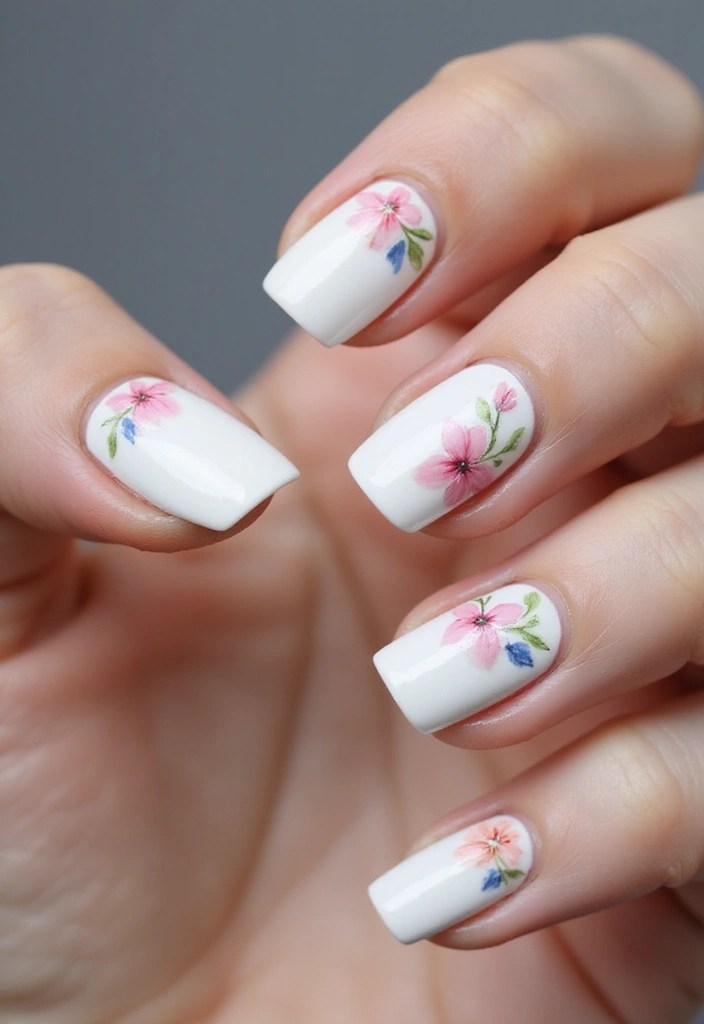
Nothing screams spring like flowers! This design combines a classic white base with delicate floral accents. To create the perfect backdrop, start with a base coat, followed by two coats of Barry M Cosmetics Gelly Nail Paint, Cotton, which provides a stunningly smooth and vibrant white finish.
Once your base is dry, use a fine brush or dotting tool to paint small flowers on a couple of nails. For this, the Nail Art Brush Set is perfect, as it includes a variety of brushes to help you create intricate floral designs with ease. Alternatively, you can use the dotting tools for nail art to add charming dots that mimic flower centers or enhance your floral accents.
Consider using a gold or metallic liner to highlight the petals for an elegant touch. Remember to finish with a top coat to seal your design, ensuring your spring nails stay flawless for any occasion, from brunch with friends to garden parties. Don’t worry if your flowers aren’t perfect; rustic looks are trendy! Experiment with different flower shapes and let your creativity blossom.
2. White Ombre Effect
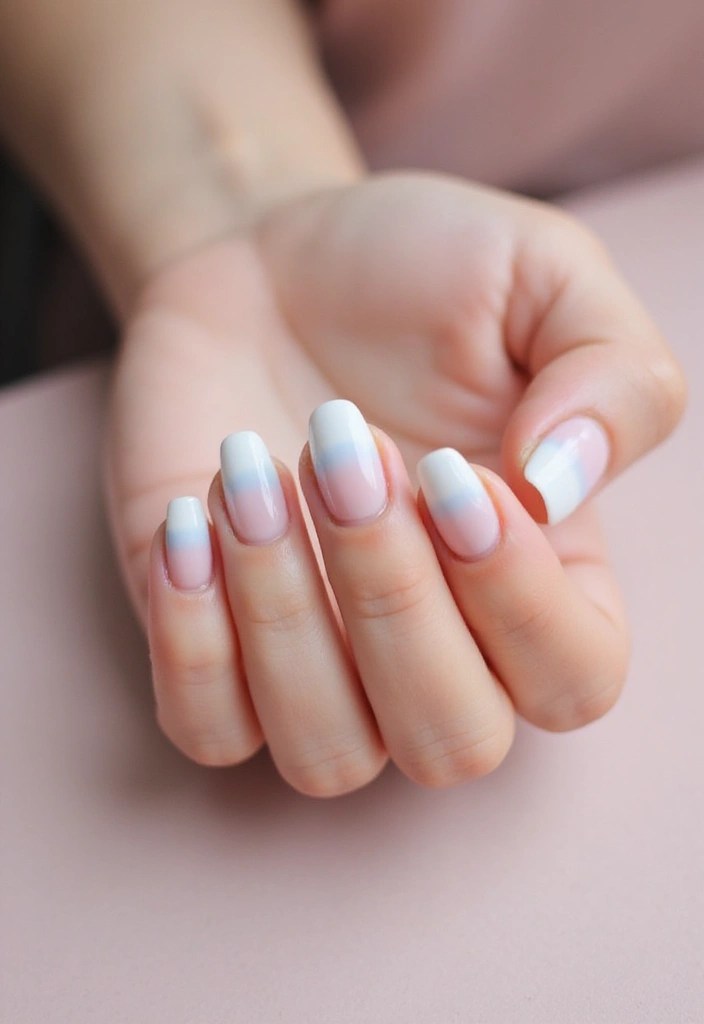
The ombre effect adds depth and dimension to your nails while keeping things chic. For a fresh spring look, opt for a soft white to light blue or lavender gradient.
Start with a white base and apply a latex barrier around your cuticles using AIMEILI liquid latex peel off tape cuticle guard for easy cleanup. This protective barrier makes it simple to remove any excess polish without damaging your skin.
Next, use a makeup sponge, like the 16pcs nail art sponges, to dab on your chosen pastel color, blending it towards the tip of the nail. The sponge technique allows for a smooth gradient effect, and you can repeat the process until you achieve the desired opacity. For a fun twist, try mixing different pastel shades for a multi-colored ombre or using glitter for added sparkle.
Finish your look with a glossy top coat, such as the Barry M super size all in one nail paint top coat. This top coat not only provides a smooth finish but also enhances the longevity of your manicure, ensuring it stays flawless.
This design is perfect for those looking for a modern twist on a classic white manicure!
3. Geometric White Lines
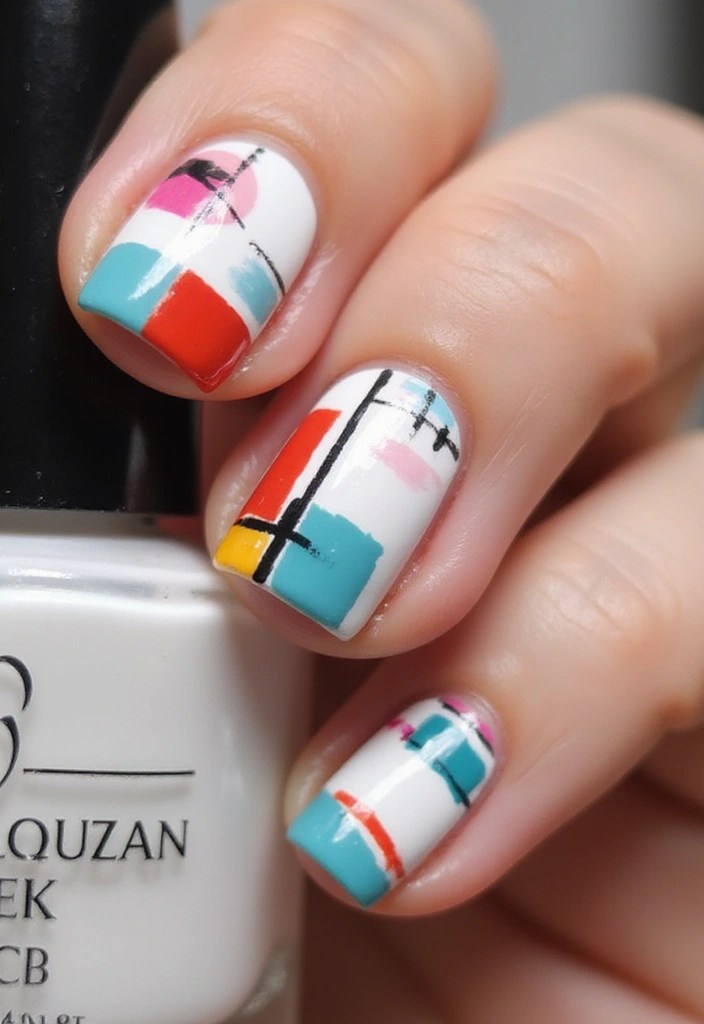
Geometric designs add a contemporary flair to any manicure. With white as your base, you can create clean lines and shapes using contrasting colors like gold, black, or even vibrant pastels.
To achieve these striking geometric patterns, start by using nail tape, such as the nail art tape. This 12-piece mixed colors set allows you to create various triangles, stripes, or shapes on your nails with ease. Simply apply the tape, paint over it with your chosen contrasting colors, and peel off while the polish is still wet for crisp, clean lines.
Don’t forget to seal your design with a top coat, like the top coat nail polish from Barry M. This 3-in-1 formula not only protects your art but also ensures a lasting shine.
For added precision, especially when working with intricate designs, consider the nail art brush set. This set includes 15 acrylic nail brushes and 5 dotting tools, making it perfect for both DIY enthusiasts and those looking to elevate their skills.
Mixing different geometric patterns on each nail can create an eclectic look, and don’t forget to experiment with negative space for a modern design. Just ensure that the tape adheres well to avoid any bleeding, and you’ll have a minimalist yet stylish manicure that’s sure to impress!
4. White Marble Effect
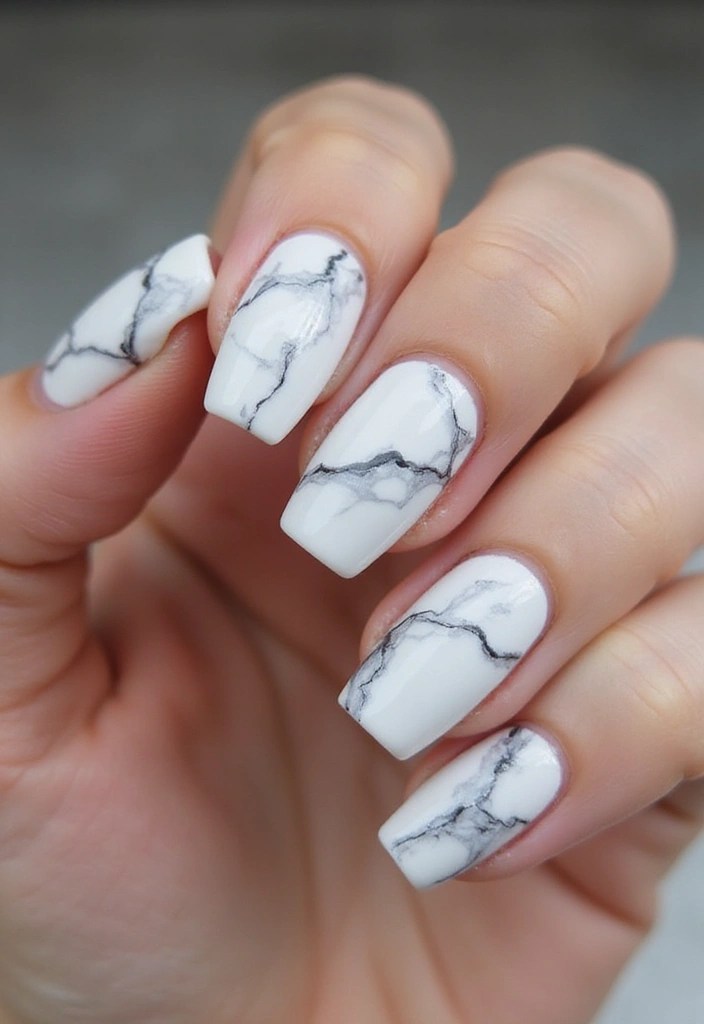
Marble nails are a sophisticated trend that can elevate your spring manicure, making it both chic and elegant. This design mimics the beautiful veining found in natural marble, and it starts with a white base coat. To achieve that stunning marble effect, you can use a thin brush from the nail art brush set to swirl in shades of gray or black. A dotting tool, like the ones found in this dotting tools for nail art kit, can also help create intricate details and patterns.
For a more organic look, consider using a small piece of plastic wrap to dab on additional colors. Once you’ve achieved your desired design, don’t forget to seal it with a top coat, such as Barry M’s top coat nail polish, for a polished finish that protects your art.
– Remember, don’t overdo the veining; less is more for this design.
– Feel free to experiment with colors; soft pastels can also create a stunning marble effect.
– Practice makes perfect; don’t hesitate to try it a few times!
This design is perfect for those looking to add a touch of elegance to their spring style.
5. White with Polka Dots
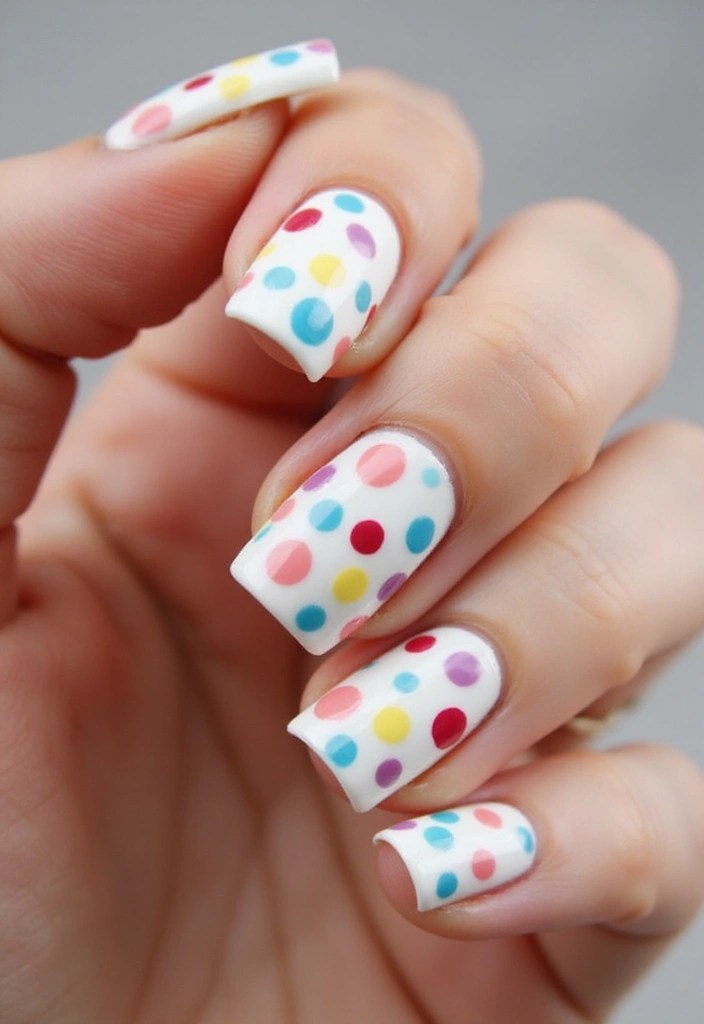
Polka dots are playful and perfect for the spring season! This easy design adds a lighthearted twist to your white nails and can be customized in countless ways.
Start with a plain white base, then use a dotting tool like the dotting tool set to add colorful dots in a variety of sizes. These tools are essential for achieving the perfect dot size and shape, making your nail art more precise and fun. You can create a pattern or scatter them randomly for a whimsical look. Finish with a clear top coat, such as the clear top coat nail polish, for a glossy shine that also protects your design.
Choose colors that match the spring vibe—think light pastels or bright colors. The pastel nail polish set offers a lovely range of shades that are perfect for this look. Don’t worry about making the dots perfect; the charm is in their uniqueness. Mixing sizes for a more dynamic design adds character and fun to your nails.
This nail art is perfect for casual outings or festive spring events, showing off your creativity and style!
6. White French Tips with a Twist
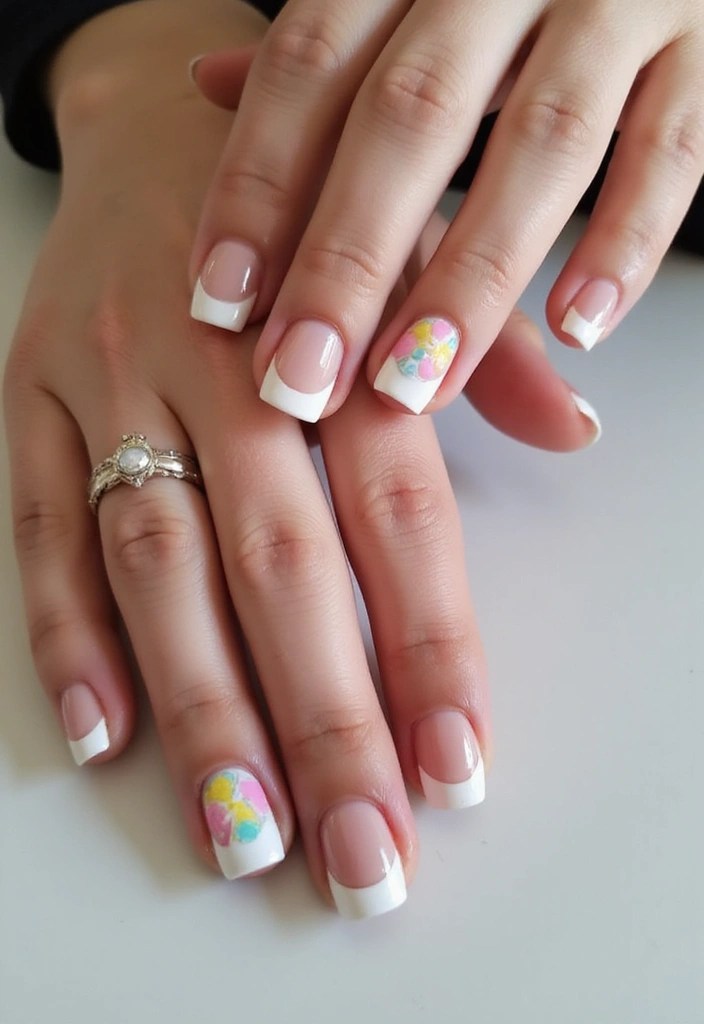
6. White French Tips with a Twist
French tips are timeless, and this spring, why not give them a fresh update? Instead of the classic nude base, paint your nails white using Barry M Cosmetics Gelly Nail Paint, Cotton for a smooth and clean base. This white polish ensures a flawless foundation for your design.
Next, using a small brush or nail tape, carefully paint your tips in a lovely pastel hue, like mint green or baby pink. A great option for this is the Beauty4Britain 6 x Pastel Nail Polish Set, which features a variety of modern pastel colors perfect for mixing and matching. This simple twist keeps the look sophisticated yet playful.
For added precision while painting the tips, consider using a fine detail nail brush. This tool provides more control, allowing you to achieve those sharp lines effortlessly.
Additionally, you can consider adding a small sparkle or glitter to the tips for an extra pop. This design is ideal for spring weddings or brunch dates, ensuring your nails look chic and stylish!
7. White and Glitter Gradient

Add some sparkle to your white spring nails with a glitter gradient! This design combines the elegance of white with the fun of glitter, making it perfect for any spring celebration.
Start off with a base coat of Barry M Cosmetics Gelly Nail Paint, Cotton for a flawless white finish. Then, apply a glitter polish, like the London Glitter Nail Polish Top Coat, Disco Diva, starting from the tip and fading down towards the cuticle. You can choose silver, gold, or even a colorful glitter for a more vibrant look. Seal everything in place with a top coat for lasting wear.
For an easy application, use the makeup sponge applicators to dab on the glitter. This technique helps achieve a smooth gradient effect. Layer the glitter until you reach your desired sparkle level and feel free to experiment with different colors for a personalized touch.
This glittery design is perfect for a night out or any festive occasion!
8. White with Leafy Accents
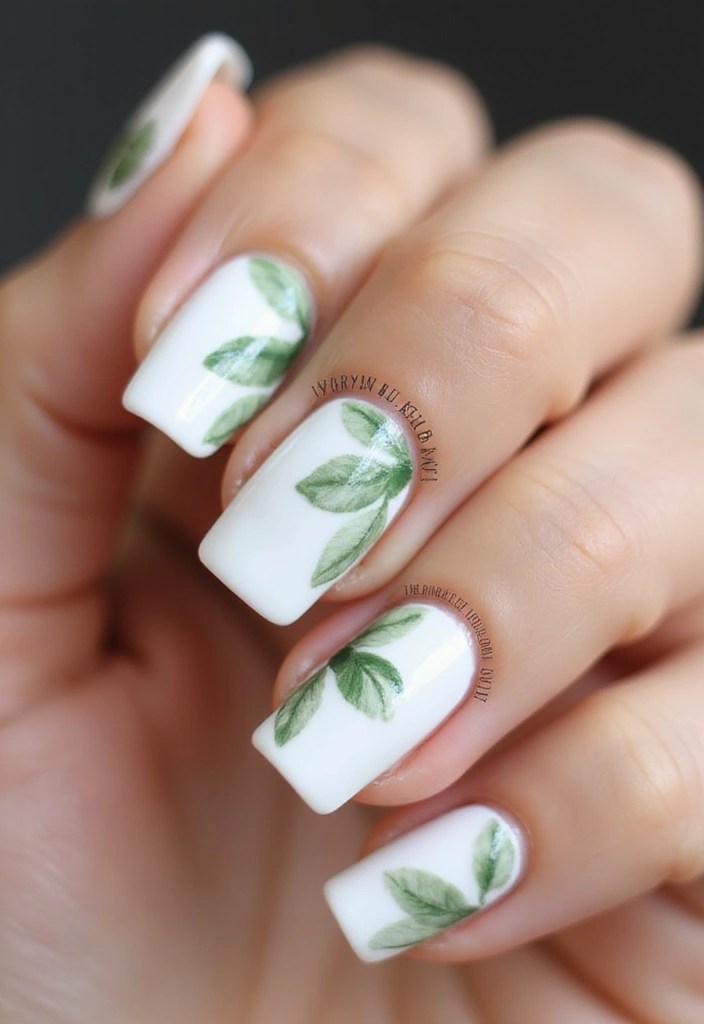
Embrace the fresh growth of spring with a leafy accent nail design. This look adds a touch of nature to your white mani, making it ideal for those who love botanical themes.
Start by painting your nails white. For the leafy design, select one or two accent nails. A fine brush is essential for this step, and you can achieve great results with the Nail Art Brush Set, which includes 15 different brushes to help you create intricate designs effortlessly. Using the brush, paint small green leaves across the nails, keeping the design simple and elegant. For added charm, consider incorporating tiny flowers, which can be easily achieved with the various shades of green from the Green Nail Polish Set. This kit features multiple green shades, giving your nails depth and a blend of natural hues.
To complete your look and ensure your design lasts, don’t forget to apply a top coat. The Top Coat Nail Polish serves as a protective layer, sealing your artwork and enhancing its shine.
This design is perfect for picnics in the park or any nature-inspired events, allowing you to showcase your creativity while celebrating the beauty of spring.
9. Whimsical Doodles on White
Unleash your inner artist with whimsical doodles on white nails! This fun design allows for complete creativity and personalization.
Start with a white base and use a fine tip nail art pen like the fine tip nail art pens to doodle fun patterns like hearts, stars, or waves. The quick dry formula ensures that your designs are ready in no time, allowing you to get creative without worrying about smudging. You can also incorporate black for contrast against the white for a chic look. Let your imagination run wild!
Before you start on your nails, it can be beneficial to practice your doodles on paper first. If you prefer using brushes, consider a small detail brush set for nail art. This set includes various sizes to help you create those intricate designs that really pop.
To finish off, don’t forget to seal your masterpiece with a clear top coat nail polish for longevity. This step will not only enhance the look of your art but also protect your designs from chipping.
This playful design is perfect for casual outings and everyday wear, making it a delightful way to express yourself!
10. Minimalist White and Gold Stripes
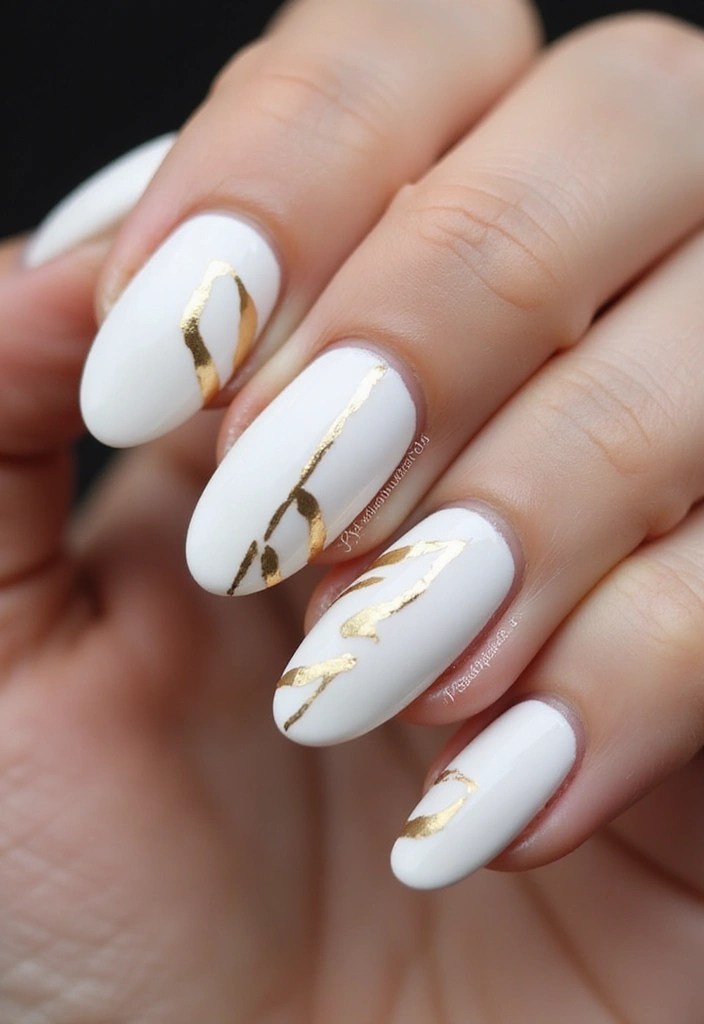
For a chic and sophisticated look, try minimalist white nails with gold stripes. This elegant design is simple yet striking, perfect for any occasion.
Begin by applying a white base coat to your nails. For the gold stripes, you can use striping tape for nail art, such as the LyDia 12pcs mixed colours pretty rolls striping tape. This will help you create thin, precise lines across your nails. You can opt for diagonal stripes, vertical lines, or even a criss-cross pattern for a unique effect.
To get that stunning gold finish, consider using a metallic gold nail polish like the Rimmel 60 seconds glitter nail polish in 831 Oh My Gold. This polish provides a striking contrast against the white and adds a touch of glamour to your design.
Finish your look with a top coat to bring everything together. The Barry M nail paint 3 in 1 base coat, top coat, nail hardener all in one will not only seal your design but also enhance its longevity and shine.
– Keep the design balanced for a clean look.
– This minimalist design is perfect for those who prefer a subtle yet stylish approach, making it ideal for corporate events or formal occasions.
Conclusion
Spring is all about new beginnings, and your nails deserve a fresh look too! With these 10 easy white spring nail tutorials, you can express your creativity and embrace the beauty of the season.
Whether you prefer pops of color, chic designs, or playful patterns, there’s a perfect style waiting for you. So grab your nail supplies and get ready for a fun nail art session that will have everyone asking where you got your nails done!
Note: We aim to provide accurate product links, but some may occasionally expire or become unavailable. If this happens, please search directly on Amazon for the product or a suitable alternative.
This post contains Amazon affiliate links, meaning I may earn a small commission if you purchase through my links, at no extra cost to you.

Leave a comment