As the sun sets, the sky dances in beautiful hues of orange and yellow. What better way to capture this natural beauty than with stunning ombre coffin nails? These trending nail designs blend warm tones to emulate that magical sunset glow, perfect for any occasion. Whether you’re headed to the beach, a summer party, or just want to feel a bit more vibrant, these ombre styles will elevate your look. Let’s explore seven exquisite designs that will have everyone asking about your nails!
From intricate patterns to simple elegance, there’s something for everyone in this collection. Each design speaks to the essence of summer, offering a unique take on the classic ombre effect. Get ready to be inspired to try these stunning styles yourself!
Contents
- 1. Classic Orange to Yellow Fade
- 2. Sunset Swirl Design
- 3. Neon Ombre Fun
- 4. Sparkling Sunset Ombre
- 5. Ombre Half-Moon Design
- 6. Floral Accents with Ombre
- 7. Minimalist Ombre with Line Art
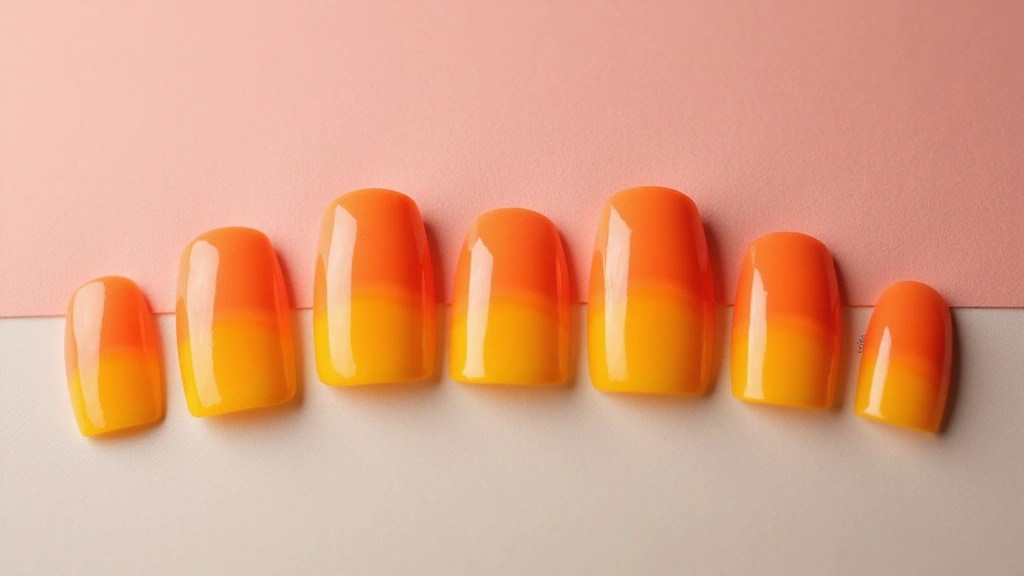
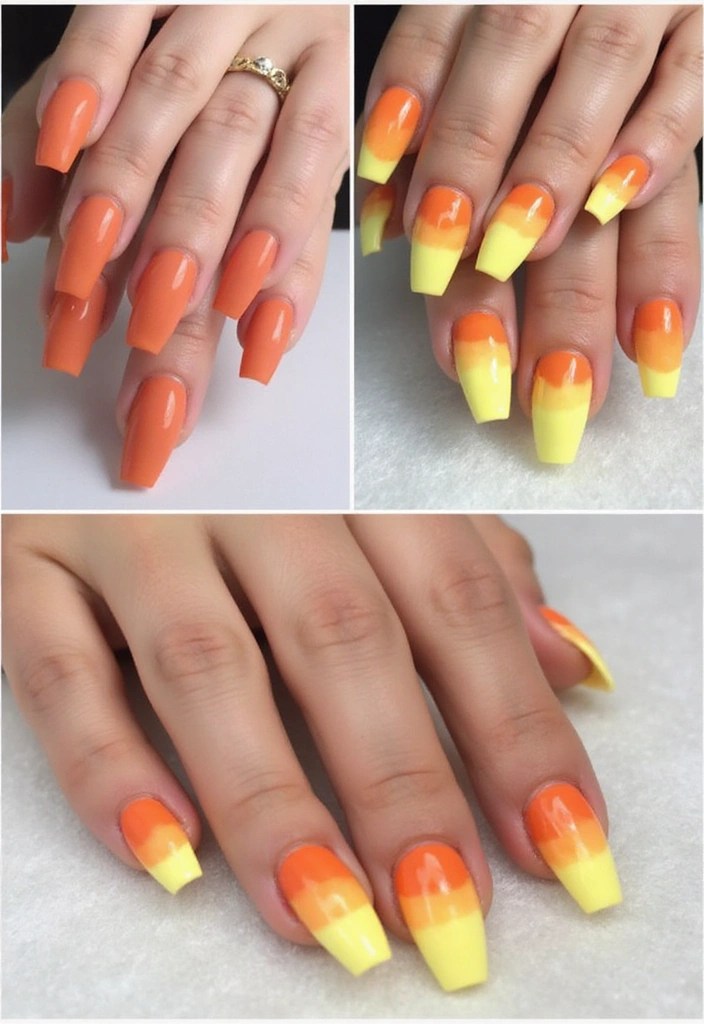
1. Classic Orange to Yellow Fade
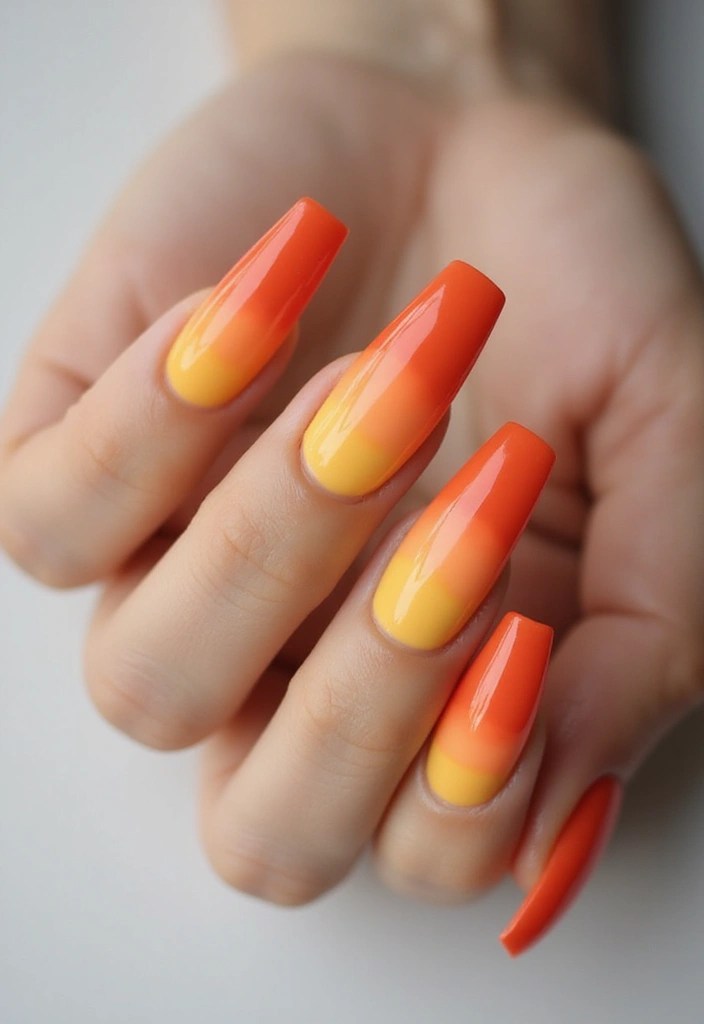
The classic orange to yellow fade is a timeless choice for those who appreciate simplicity paired with elegance. This design features a smooth gradient that transitions from a deep, warm orange at the cuticle to a bright, cheerful yellow at the tips. It’s versatile enough to wear for casual outings or more formal events.
To achieve this look, start with a base coat, then apply a layer of orange nail polish. For a great option, consider using London Rita Ora 60 Seconds Super Shine Nail Polish, Ora-Ngy Vibe, which offers a vibrant color that applies smoothly. Next, using a makeup sponge like the DUAIU 4 Pack Beauty Blender Foundation Sponges Set, dab on yellow polish at the tips, blending it gently into the orange. This sponge is perfect for seamlessly blending colors to create that stunning gradient effect. Finish with a glossy top coat, such as Barry M Cosmetics – Gelly Hi Shine Nail Paint – Plumpy Top Coat, to really make those colors pop!
For this design:
– Choosing shades that complement your skin tone can enhance the overall look.
– For extra flair, consider adding tiny rhinestones at the base for a modern touch.
– Remember to let each layer dry completely before moving on to the next for a flawless finish.
2. Sunset Swirl Design

If you’re looking for something a bit more adventurous, the sunset swirl design might just be your new favorite! This style combines the ombre effect with artistic swirls that mimic the whimsical patterns of a sunset sky. The combination of orange and yellow with swirling designs creates a captivating visual.
To create this design, start with your base colors just like the classic fade. Once dried, use a thin brush to draw swirling patterns with a white or gold polish over the gradient. A great tool for this is the Nail Art Brush Set, which includes a variety of brushes to help you achieve precise swirls. The contrast adds depth and movement, making your nails a true conversation starter!
Here are some tips:
– Practice your swirl technique on paper before applying to your nails to gain confidence.
– For a unique finish, consider using a matte top coat like the Matte Top Coat Nail Polish. This can provide a soft texture that contrasts nicely with the glossy base colors.
– Don’t rush! Creating these swirls takes time and precision for the best outcome.
For the base colors, you might want to check out the Ombre Nail Polish Set, which offers a range of stunning shades that can give your nails that perfect sunset effect. With the right tools and products, you’ll be well on your way to stunning sunset swirl nails!
3. Neon Ombre Fun
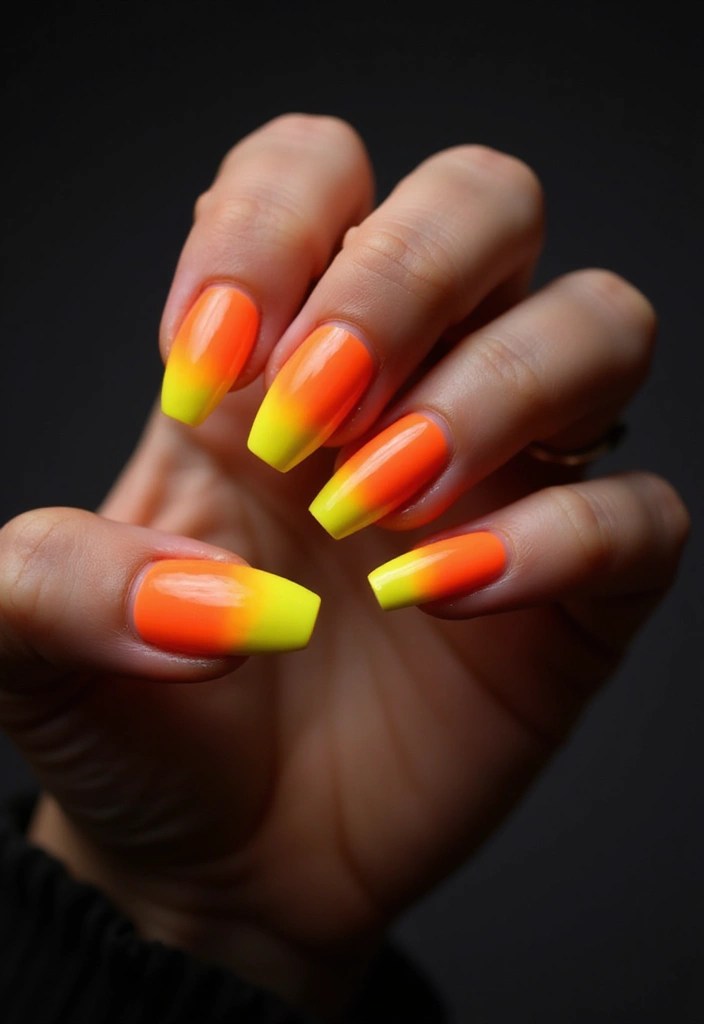
For those who love bold colors, the neon ombre fun design is perfect for making a statement! This style features bright neon orange and yellow that radiate energy and excitement, reminiscent of a summer festival. It’s sure to turn heads wherever you go!
To achieve this look, opt for neon polishes like the Neon Nail Polish Set, which includes six vibrant colors perfect for creating that stunning ombre effect. Neon colors pop especially well under UV light, making your nails a fantastic addition to a night out. To enhance the longevity and shine of your design, layer a clear, glossy top coat such as the Gel Top Coat. This product not only adds shine but also helps the colors stand out even more while providing a protective barrier against chips.
Here are a few tips to keep in mind: ensure your nails are prepped well, as neon colors can show imperfections easily. Consider adding nail art tape like the Nail Art Tape to create clean lines or geometric patterns that amplify the fun vibe. And be ready to reapply the top coat regularly since neon colors can chip faster than standard polishes. With these tools in hand, you can easily achieve a striking neon ombre look that’s perfect for any occasion!
4. Sparkling Sunset Ombre
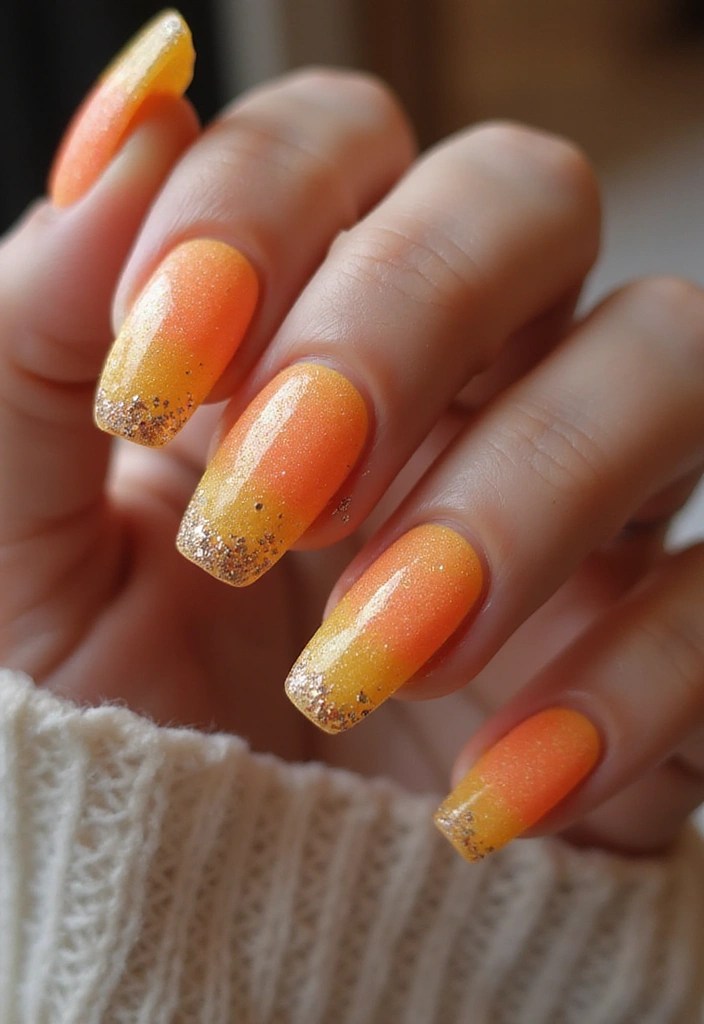
Who doesn’t love a bit of sparkle? The sparkling sunset ombre design takes the classic gradient to new heights with the addition of glitter. This style starts with a seamless orange to yellow fade, topped off with a sprinkle of fine glitter at the tips, creating a radiant sunset effect.
To craft this design, begin with your ombre base using an ombre nail brush set for precise application and smooth blending. Once your gradient is perfected, gently brush on some fine glitter using a high-quality polish like Rimmel 60 Seconds glitter nail polish at the tips. This technique provides a stunning contrast, making your nails look like they’re glistening in the sunlight. The result is a playful yet sophisticated design, perfect for any event.
To enhance the longevity of your beautiful nails, don’t forget to seal in the glitter with a top coat. A reliable option for this is the Barry M nail paint, 54, 3 in 1 base coat, top coat, nail hardener all in one. This will help prevent peeling or chipping, ensuring your sparkling sunset ombre lasts longer.
Here are some additional tips for success:
– Use fine glitter for a more delicate finish; chunky glitter can overwhelm the ombre effect.
– Coordinate your outfit with your nails for a stunning overall appearance.
5. Ombre Half-Moon Design

For a unique twist, try the ombre half-moon design. This style involves creating a half-moon shape at the base of the nail in a contrasting color while maintaining the orange to yellow gradient on the tips. It’s a stylish look that adds an element of surprise!
Start with a base coat of your favorite orange shade, then apply yellow on the tips to achieve the ombre effect. Using nail tape will help you create a clean line at the base of your nail, allowing you to fill in the half-moon with a soft nude or glittery polish. A great option for the nude shade is 60 Seconds Super Shine Nail Polish, which provides a beautiful finish that complements both the orange and yellow for a harmonious appearance.
If you want to elevate the look even further, consider adding tiny jewels. The nail art jewels are perfect for giving your half-moon an elegant touch.
Remember:
– Precision is key with this design, so take your time applying the tape.
– Choose a nude color that complements both the orange and yellow for a cohesive look.
– Have fun embellishing with jewels to enhance the glam factor!
6. Floral Accents with Ombre
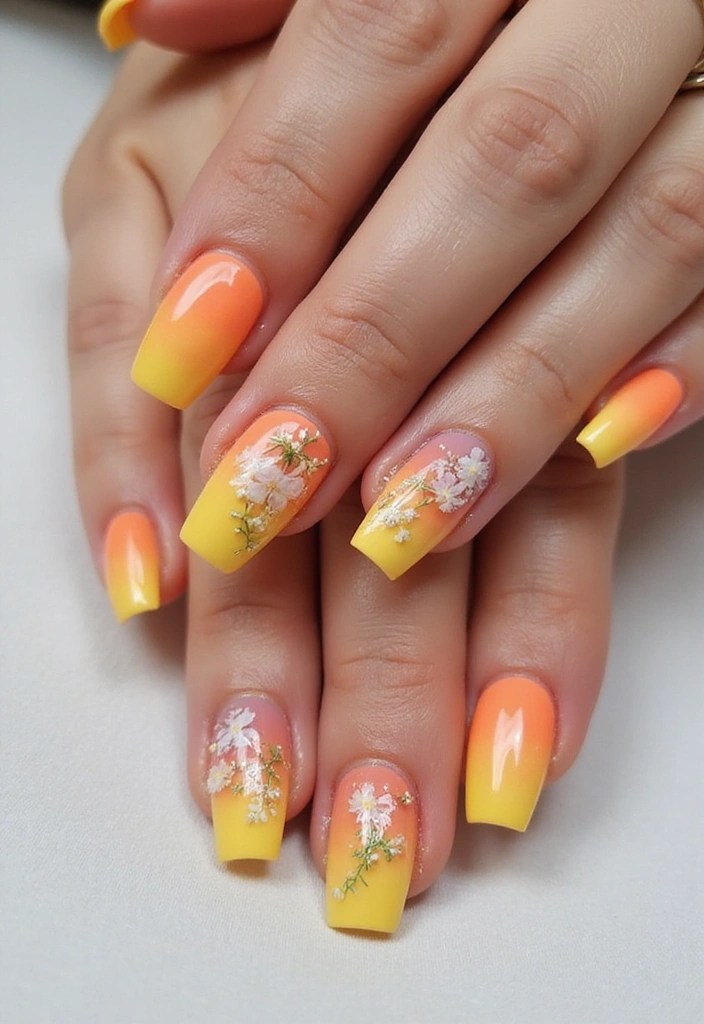
Add a touch of nature to your nails with floral accents! This design features the stunning orange and yellow ombre base, topped with delicate flower designs. The result is a romantic and eye-catching look that’s perfect for summer weddings or garden parties.
To achieve this design, start by creating your ombre effect. Once dry, use a fine brush to paint small flowers in white or pastel colors on top of the ombre. The Nail Art Brush Set is perfect for this step, as it includes different brush sizes that allow for precise detailing on your floral designs. This adds contrast and layers, enhancing the overall aesthetic of your nails.
For the centers of your flowers, a dotting tool can make the process much simpler. The Dotting Tool for Nail Art is an excellent choice, as it provides multiple sizes for varying designs, making it easier to achieve that perfect flower center.
Some tips for floral designs include practicing your techniques on paper before working on your nails to gain confidence. Finally, don’t forget to finish off with a high-gloss topcoat. The High-Gloss Topcoat from Rimmel London will seal in your design and give it that extra shine, ensuring your stunning floral accents stand out beautifully.
7. Minimalist Ombre with Line Art
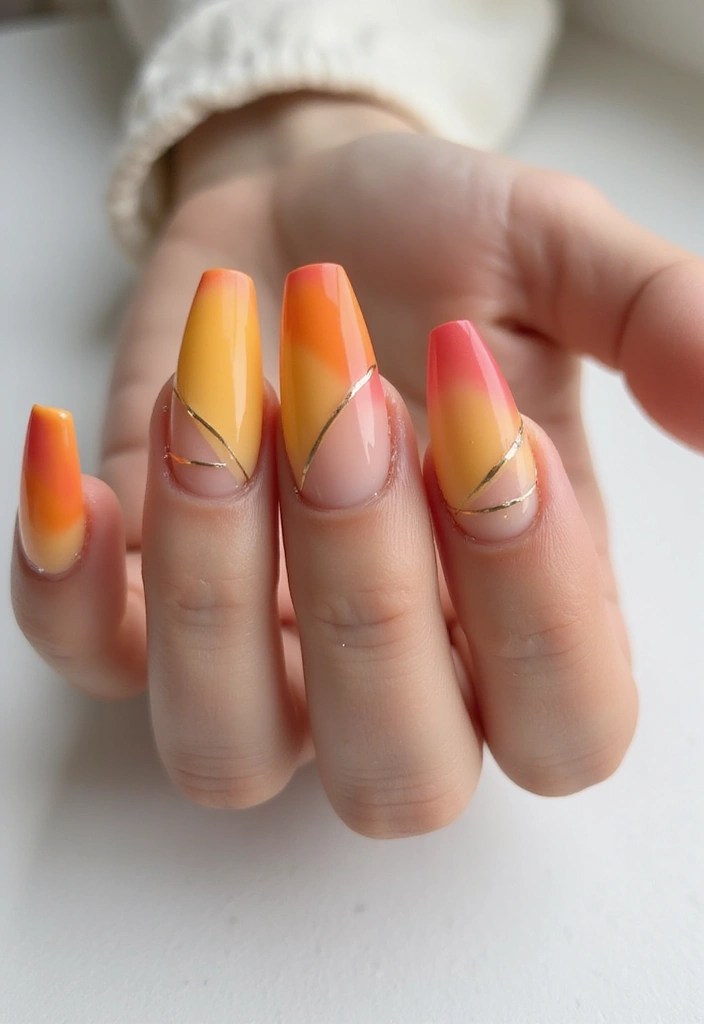
If you prefer a more subtle approach, consider the minimalist ombre with line art. This design focuses on the beauty of the gradient, complemented by simple line art that adds sophistication without overwhelming the nails. It’s perfect for those who appreciate modern aesthetics.
Start with the classic orange to yellow ombre as your base. Once fully dried, use a thin nail art brush from a nail art brush set to add minimalistic line designs, such as waves or geometric shapes. The precision of these brushes will help you create clean, crisp lines, enhancing the overall look of your nails. Alternatively, you can use a nail stamping kit for effortless patterns that maintain that contemporary feel.
For minimalism, remember that less is more; focus on quality over quantity with your line art to maintain a clean look. Don’t forget to apply a good top coat, like Barry M nail paint, to enhance the smoothness of the nails and protect your design. This will not only elevate the finish but also ensure your beautiful ombre lasts longer. Experiment with different designs to find what resonates with your personal style.
Conclusion
From classic fades to whimsical designs, these ombre coffin nail styles in orange and yellow will have you feeling like a sunset goddess! Each design captures the warmth and beauty of summer, making your nails not just an accessory but a statement. Whether you prefer bold neon or delicate florals, there’s an ombre style just waiting to be tried.
Which one will you choose to showcase your summer spirit? Don’t forget to share your creations and let your nails shine bright!
Note: We aim to provide accurate product links, but some may occasionally expire or become unavailable. If this happens, please search directly on Amazon for the product or a suitable alternative.
This post contains Amazon affiliate links, meaning I may earn a small commission if you purchase through my links, at no extra cost to you.

Leave a comment