
Rainbows are the ultimate symbol of joy and positivity, and what better way to bring that vibrancy into your life than through stunning nail art?
Nail art is more than just a beauty trend; it’s a canvas for self-expression and a chance to showcase your creativity.
With the endless possibilities of bright colors and playful designs, rainbow nail art can instantly lift your spirits and add a pop of color to any outfit.
Whether you’re a seasoned nail art enthusiast or just starting out, these five rainbow-inspired designs will inspire you to unleash your inner artist. Get ready to brighten your day, one nail at a time!
Contents
- 1. Ombre Rainbow Delight
- 2. Rainbow Stripes Galore
- 3. Rainbow Dots and Hearts
- 4. Rainbow Marble Effect
- 5. Rainbow French Tips
1. Ombre Rainbow Delight
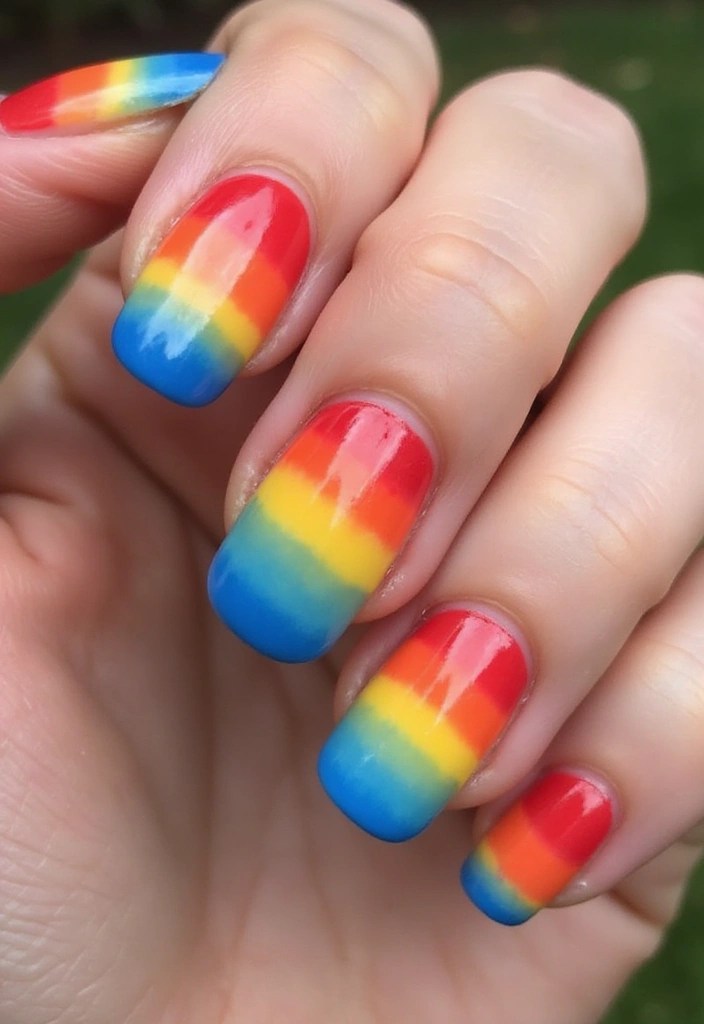
Ombre nail art has taken the beauty world by storm, and when you add a rainbow twist, it’s pure magic! This technique involves blending colors seamlessly from one to another, creating a gradient effect that’s visually stunning.
To create your ombre rainbow nails, pick at least five of your favorite bright colors. A great option for this is the Bright Nail Polish Set, which features six different vibrant shades. Start with a base coat to protect your nails and enhance the vibrancy of the colors. Using a makeup sponge, such as the Nail Art Ombre Sponge, carefully dab each color onto your nails from the cuticle to the tip, ensuring they blend nicely.
Once you achieve the ombre effect, seal the design with the Glossy Top Coat for that salon-finish shine. This design is not only eye-catching but also perfect for any occasion, from birthdays to casual outings.
For success:
– Make sure to let each layer dry before applying the next.
– Try a white base coat for an even bolder look.
– If you’re feeling adventurous, add glitter to the tips for a fun sparkle!
Ombre nails give you the freedom to play with colors and show off different combinations, making every set unique. It’s a versatile style that can be dressed up or down depending on your mood.
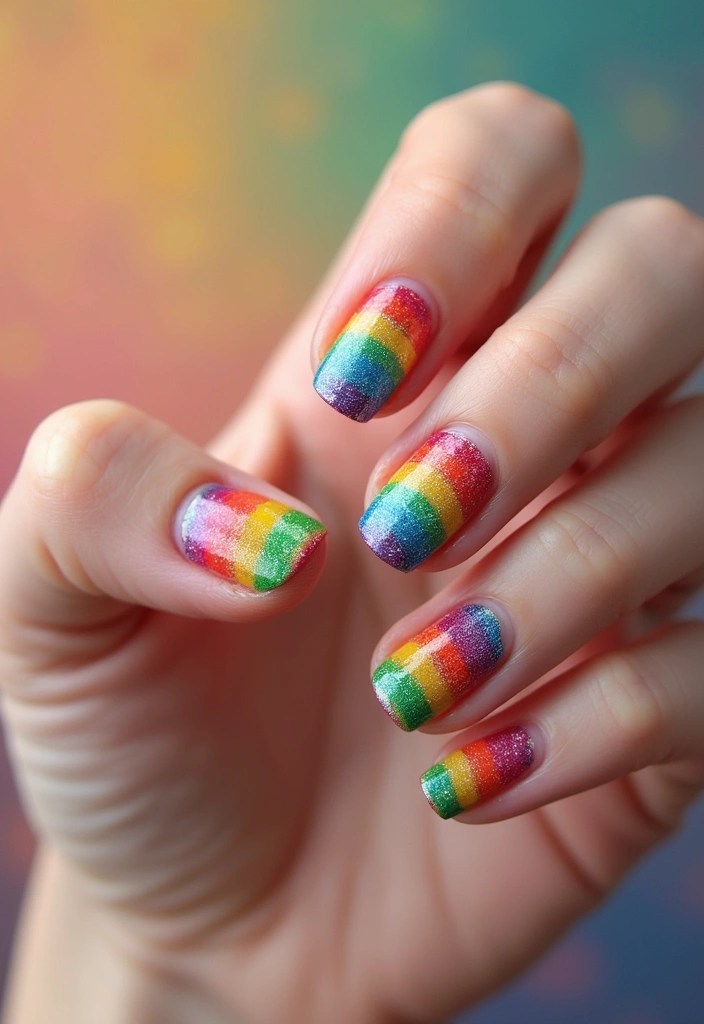
2. Rainbow Stripes Galore

When it comes to fun and playful nail art, rainbow stripes will always steal the show! This design is not only easy to create but also looks chic and stylish.
Start with a white or light-colored base coat to make the colors pop. Once the base is dry, use striping tape, like the striping tape for nail art, or a thin nail brush from a set such as the nail art brush set to create straight lines across your nails. Choose vibrant colors like red, orange, yellow, green, blue, and purple for the stripes, alternating colors for a fun and bold look!
After painting each stripe, carefully remove the tape to reveal crisp lines, and finish with a top coat for durability. A great option is the matte top coat nail polish, which offers a trendy twist to your design.
– Consider using neon colors for an extra eye-catching effect.
– If you want to go wild, try different stripe thicknesses for a more dynamic design.
This colorful creation is perfect for summer or any day you’re feeling particularly joyful. It allows you to express your creativity while keeping things simple and effective.
3. Rainbow Dots and Hearts
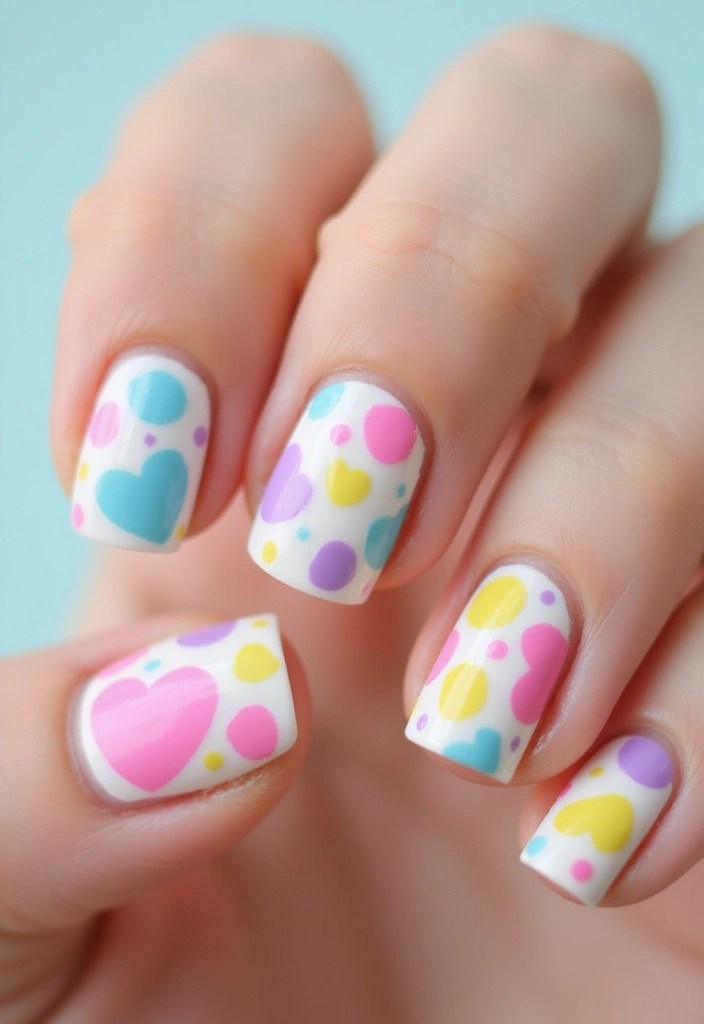
Nothing says fun like colorful dots and hearts on your nails! This design allows for creativity and is perfect for those who love a whimsical touch.
Start with a pastel base coat for a softer look, then use a dotting tool set to create colorful dots in various sizes. The dotting tools make it easy to space them out randomly while maintaining a cohesive color scheme. For hearts, simply use a fine brush from the nail art brush set or a heart stencil to add in rainbow-colored hearts on a few nails for extra flair.
Finish with a glossy top coat to give it that polished look. This design is perfect for parties, dates, or just whenever you want to add some cheer to your hands!
Pro tips:
– Mix and match colors for the dots and hearts to create your unique combo.
– If you’re feeling extra crafty, use rainbow nail stickers for hearts.
– Experiment with different backgrounds like glitter or metallic for added sparkle.
It’s all about having fun and showing off your playful side with this nail art design!
4. Rainbow Marble Effect
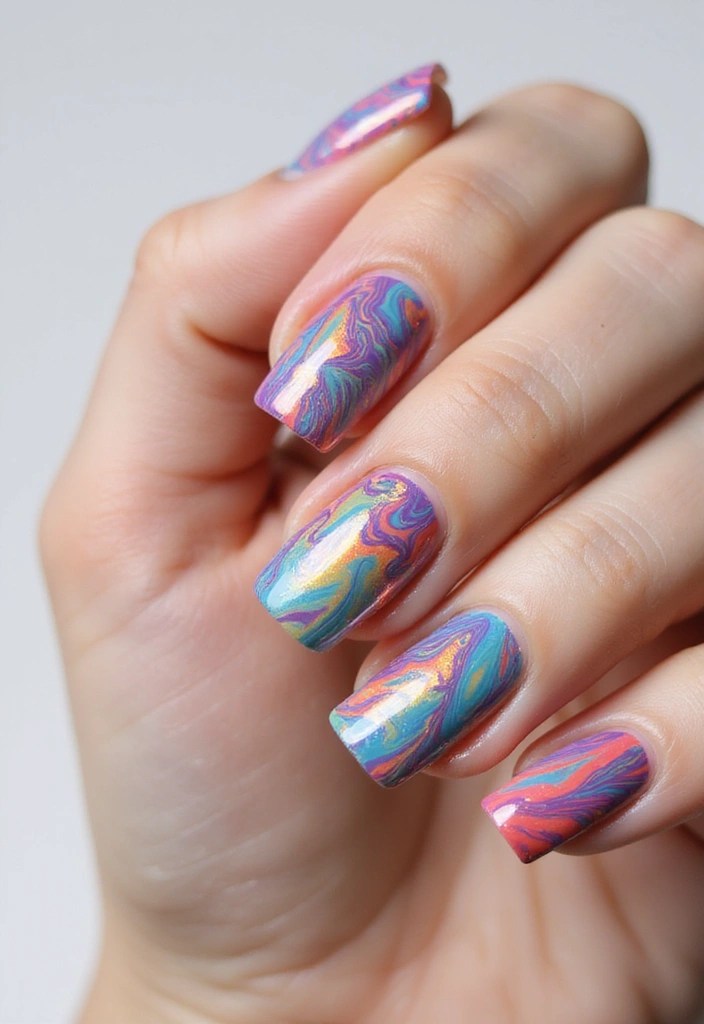
Want to take your nail game to the next level? Marble nail art is where it’s at! The rainbow marble effect combines bright colors in a stunning way that mimics the beautiful patterns found in marble stone.
To create this look, start with a white base coat. Using Nail Art Brush Set, you can expertly apply the base coat and make your nails look neat and professional. Next, randomly drop different colors onto a small dish of water. With the same brush set, you can use a toothpick or a thin brush to swirl the colors together to create that marbled effect, and then dip your nail into the design. It’s messy but so much fun!
After pulling your finger out, you’ll get a unique marbled pattern on each nail. To enhance the look and ensure your design lasts, seal it with top coat nail polish for extra shine and durability.
Remember:
– Practice makes perfect; don’t get discouraged if it doesn’t turn out right the first time!
– Clean the edges of your nails with a brush dipped in nail polish remover to keep things neat.
– Experiment with different color combinations for new looks.
For beginners, the water marble nail art kit is a great option, as it includes everything you need—nail glitter, brushes, and nail stickers—to make the process easier and more enjoyable.
This design is perfect for those who love an artsy vibe and want their nails to look like little masterpieces.
5. Rainbow French Tips
Put a twist on the classic French manicure by adding a rainbow flair! Rainbow French tips combine elegance with a fun splash of color, making them ideal for any occasion – from office wear to weekend fun.
Start by applying a nude or pale pink base coat to create a subtle foundation that lets your rainbow tips shine. Once that’s dry, use nail art tape to create the classic French tip shape on your nails. This handy tool ensures clean lines and makes the application process much easier. Next, paint the tips with vibrant colors from a rainbow nail polish set, featuring shades like red, orange, yellow, green, blue, and purple, in that order or as you prefer. You can even opt for a gradient or alternating colors for an additional creative touch!
After you remove the tape, finish off your look with a glossy top coat to achieve that sleek, polished finish that enhances the vibrant rainbow underneath.
Key insights:
– Keep the base subtle to let the rainbow tips shine.
– You can also play with the width of the tips for different looks.
– Try adding tiny sparkles or glitter at the tips for extra glam.
This design is classy yet playful, allowing you to show off your fun side while still looking put-together.
Conclusion
Brightening up your nails with rainbow designs is an instant mood lifter! These five nail art ideas prove that color can elevate any look while letting your creativity shine through.
Whether you choose the ombre delight or the classic rainbow French tips, there’s a style for every personality and occasion.
So, get inspired and don’t hesitate to experiment with your nail art. After all, your nails are the perfect canvas for expressing your vibrant spirit!
Note: We aim to provide accurate product links, but some may occasionally expire or become unavailable. If this happens, please search directly on Amazon for the product or a suitable alternative.
This post contains Amazon affiliate links, meaning I may earn a small commission if you purchase through my links, at no extra cost to you.

Leave a comment