This design showcases delicate leaf patterns adorned with gold leaf accents, creating an elegant look that feels both chic and nature-inspired. The soft, nude base color lets the gold pop, making it a perfect choice for both casual and formal settings.
– Unique Insight: The leaf motif symbolizes growth and renewal, making this design not just beautiful but meaningful as well.
– Tip: Pair this design with minimalist jewelry to keep the focus on your gorgeous nails.
– Trick: For a more textured look, consider using matte topcoat for the base and a glossy topcoat for the leaves.
This design will definitely turn heads wherever you go!
Imagine your nails adorned with a shimmering gold leaf at the tips – that’s the essence of this design! It’s a modern twist on the classic French manicure, and it radiates glamour.
– Why It’s Hot: The contrast between the natural nail and the gold creates an eye-catching effect that’s perfect for any season.
– Suggestion: Experiment with various lengths to find the perfect fit for your style. Long, almond-shaped nails look stunning with this design!
– Issue: Ensuring the gold leaf adheres well can be tricky, so using a reliable base coat is essential.
This design features intricate botanical patterns intertwined with gold leaf, capturing the beauty of nature on your fingertips. The combination of soft pastels with the metallic sheen creates a fresh and airy feel.
– Unique Insight: Botanical designs are not only trendy but also timeless, perfect for any occasion.
– Tip: Use fine brushes for detailed work to make the leaves and flowers pop.
– Suggestion: Pair this look with a soft, floral outfit for a coordinated style.
You’ll feel like you just stepped out of a garden full of glamour!
Get ready to shine with celestial-themed gold leaf nails! This design features stars and moons embellished with gold, creating a whimsical and magical vibe.
– Why It’s Great: It’s perfect for night outs or special events, as it adds a sprinkle of magic to your overall look.
– Tip: Use a dark base color to make the gold really stand out, or opt for a nude background for a more subtle effect.
– Trick: Layering with rhinestones can elevate this design even further, making it ultra-glam!
With these nails, you’ll feel like you’re reaching for the stars!
This design features clean white lines intertwined with gold leaf, creating a modern and sophisticated look. It’s perfect for those who appreciate minimalist art.
– Unique Insight: The linear design creates an illusion of elongated fingers, making your hands look elegant and sleek.
– Tip: Use striping tape for precise lines and a steady hand to get the look just right.
– Suggestion: This design pairs beautifully with neutral outfits, enhancing the overall chic vibe.
Get ready to showcase your style with these stunning nails!
This design is an explosion of gold glitter and leaf, perfect for those who love to stand out! The combination of glitter and gold leaf creates a textured and dynamic look.
– Why It’s Fun: Perfect for parties or celebrations where you want to shine bright.
– Tip: Consider using a gel topcoat to enhance the glitter’s shine and longevity.
– Trick: Mix different sizes of glitter for added dimension.
With these nails, you’ll be the center of attention!
For those who prefer a more understated look, this design features subtle gold flakes scattered across a nude base. It’s simple yet sophisticated, perfect for everyday wear.
– Why It’s Perfect: It adds a hint of glam without being too flashy, making it ideal for work or casual outings.
– Suggestion: You can change the base color to suit any season or outfit.
– Tip: Use a matte topcoat to keep it sleek and modern.
Nail art has taken the beauty world by storm, and one trend that continues to shine is the mesmerizing cat eye pink nails.
With their captivating shimmer and playful hues, cat eye nails add a touch of glam to any look. This article explores six stunning styles that will make your nails the focal point of every outfit. Whether you’re dressing for a casual day out or a fancy night in, these designs will have you feeling fabulous. Let’s dive into the enchanting world of cat eye nails and discover how to elevate your nail game!
From soft pinks to bold magentas, there’s a shade for every personality. Ready to get inspired? Here are six must-try looks that will leave you spellbound!
Imagine delicate pink nails that catch the light just right—this look is all about soft elegance. The glossy finish creates a refined touch, perfect for both casual and formal settings.
Why You’ll Love It:
– Versatile: Soft pink nails can match any outfit, making them a go-to for any occasion.
– Flattering: This shade complements various skin tones, enhancing your natural beauty.
– Easy to Maintain: The soft hue hides chips and wear, keeping your nails looking fresh longer.
Tips to Achieve the Look: Aim for a high-shine top coat for that extra gloss. Pair with simple jewelry for a chic vibe.
Unique Insights: This style can be dressed up with nail art accents like tiny rhinestones or kept minimal for a clean look. The choice is yours!
Combine the elegance of nude nails with the mesmerizing cat eye effect, and you get a stunning nail design that’s subtle yet eye-catching. This look blends chic sophistication with a hint of sparkle.
Why You’ll Love It:
– Elegant and Understated: Perfect for those who love a minimalist style while still wanting some flair.
– Great for Any Setting: Works beautifully in professional or social environments alike.
– Easy Application: A simple cat eye effect can be achieved even at home with the right tools.
Tips for Application: Ensure your base coat is smooth to enhance the shimmer. A matte top coat can also be applied for a more subdued look.
Unique Insights: This style can be further personalized by adding a touch of gold or silver glitter at the tips for a unique twist.
Take the classic French manicure and give it a modern twist by incorporating cat eye effects at the tips. This design is all about blending traditional styles with contemporary flair.
Why You’ll Love It:
– Trendy and Timeless: This look combines the best of both worlds.
– Playful Yet Polished: Keeps things interesting while still looking professional.
– Color Versatility: You can choose any pink hue for the tips to really make it pop.
Tips for Success: Use a fine brush for a precise line when creating the ‘French’ tip. Consider a gradient effect for added depth.
Unique Insights: Experiment with different shades of pink for the tips to match your outfit and mood. It’s a fun way to express your personality!
Unlock the secrets of cat eye nail art with various techniques to create unique designs. From lightning effects to floral patterns, this trend offers endless possibilities.
Why You’ll Love It:
– Creative Freedom: You can mix and match designs to create something uniquely yours.
– Skill Development: Perfect for those looking to refine their nail art skills while having fun.
– Inspiring Visuals: Each design can spark creativity and inspire new looks.
Techniques to Try: Use a magnetic polish to achieve the cat eye effect, and consider practicing on nail tips before applying to your actual nails.
Unique Insights: The different styles of cat eye effects can convey various moods, from playful to elegant. Don’t hesitate to mix them up!
Imagine nails that look like glimmering glass—this whimsical style combines the allure of cat eye with a glossy finish to create a stunning visual effect. Perfect for special occasions!
Why You’ll Love It:
– Dreamy Aesthetic: The glass-like finish gives an ethereal vibe that stands out.
– Perfect for Events: Ideal for parties, weddings, or any occasion where you want to shine.
– Unique Appeal: This design is sure to turn heads and catch compliments.
Tips for a Flawless Finish: Use a gel polish for that ultra-glossy look, and consider layering different shades of pink for added depth.
Unique Insights: Incorporate delicate nail art such as floral designs or glitters to elevate the glass slipper look even further.
The ombre effect meets cat eye nails, creating a stunning gradient that transitions between shades of pink. This look is both trendy and sophisticated.
Why You’ll Love It:
– Eye-Catching: The gradient effect adds dimension and depth to your nails.
– Personalize Your Palette: Choose from a range of pink hues to create your unique ombre.
– Fun to Create: This design is a great way to experiment with blending colors.
Tips for Application: Use a makeup sponge to blend the colors seamlessly. Start with a lighter shade at the base and gradually transition to a darker hue at the tips.
Unique Insights: Incorporate a touch of shimmer on top of the ombre effect for an added glamorous finish.
Cat eye pink nails are not just a trend; they’re a fabulous way to express your style and creativity. With so many options to choose from, there’s a perfect look for everyone.
Which style are you most excited to try? Share your thoughts and nail art ideas in the comments below!
If you’re on the hunt for the next big trend in nail art, blue silver nails are the dazzling answer! These stunning manicures effortlessly blend the cool, serene vibes of blue with the sophisticated sparkle of silver, making them perfect for any occasion—from casual outings to glamorous parties.
With endless designs and styles to choose from, the versatility of blue silver nails is unmatched. Whether you crave a subtle shimmer or want to go all out with eye-catching patterns, there’s something here for everyone. Get ready to turn heads as we reveal 7 must-try designs that will leave your nails looking chic, stylish, and oh-so-glamorous!
Ombre nails have taken the beauty world by storm, and blue silver combinations are a gorgeous way to nail this trend! This design features a seamless gradient that transitions from a deep navy blue to a sparkling silver tip.
What makes ombre nails so popular is their ability to create depth and dimension, making your nails look sophisticated yet playful. To achieve this look, start by applying a base coat of navy polish. A great choice for this is the Nail Polish Set – Blue and Silver, which includes beautiful shades that will help you achieve that perfect base.
Next, use a makeup sponge to dab on silver polish at the tips, blending it into the blue. For best results, consider using the Nail Art Ombre Sponge, which is specifically designed for creating smooth gradients and comes with replacement heads to ensure you get the most out of your nail art.
Finish with a top coat for a glossy finish. For perfect ombre:
– Ensure the colors blend smoothly by using light pressure when dabbing the sponge.
– Experiment with different shades of blue to find your perfect gradient.
– Add fine glitter on the tips for an even more glam effect! The Fine Glitter for Nails offers a selection of sparkles that could elevate your ombre design to new heights.
This design is perfect for both day and night, giving you that effortlessly chic vibe.
2. Sparkling Stars
Embrace your inner cosmic goddess with starry blue silver nails! This design features a deep blue base adorned with hand-painted silver stars, creating a celestial effect that’s truly magical.
For added depth, consider layering small rhinestones, like those from EARLMONI 5200PCS Nail Art Rhinestones, around the stars to mimic twinkling constellations. These rhinestones will elevate your design and create a stunning, eye-catching effect.
To nail this look:
– Use a good quality top coat to seal in your design, ensuring the stars stay vibrant.
– Try adding tiny dots of silver polish to represent smaller stars scattered across your nails.
– Don’t hesitate to mix sizes for your stars to create an interesting visual contrast.
This whimsical design is perfect for parties or even a night out, making your nails the talk of the evening.
3. Geometric Glam
For those who love modern art, geometric nails are a trendy choice! Utilizing sharp lines and shapes, blue silver nails can be transformed into a chic masterpiece.
To ensure a smooth finish, don’t forget to apply a top coat after your design is complete. Experiment with different shapes—triangles, squares, or even chevrons—to showcase your artistic flair. Feel free to mix in other colors for added dimension as well!
This design is perfect for those looking to keep their nails looking effortlessly glam while expressing their creativity.
4. Glitter Tip Delight
If you’re all about that sparkle, glitter tips are your best friend! This simple yet stunning design features a solid blue base color with dazzling silver glitter tips that catch the light in all the right ways.
For extra glitz, consider layering multiple glitter types—fine glitter for a smooth finish and larger chunks for a more textured look. Here’s how to make it shine:
– Use a sponge to apply the glitter for a more blended effect.
– For a trendy contrast, pair it with a matte top coat on the blue part.
This design is perfect for any event, from casual to formally glam!
5. Artistic Swirls
Unleash your creativity with artistic swirls that combine blue and silver in a dreamy design. This nail art focuses on swirling patterns that blend the two colors beautifully for a mesmerizing effect.
– Try mixing in other shades of blue for a more complex pattern.
– Seal your design with a glossy top coat to enhance the swirls’ vibrancy.
This design is perfect for those looking to express a more abstract and artistic side to their nail art!
6. Marbled Majesty
Marble nails are all the rage, and when combined with blue and silver, you get a look that’s both luxurious and dramatic! This nail art style features a marbled effect that mimics real marble stone.
To achieve this look, start with a solid blue base, such as those found in the blue and silver nail polish set. Then, use a small brush, like the one in the nail art brush set, to swirl in silver polish, creating a marble-like pattern. The key here is to avoid over-mixing to achieve a more natural marble effect.
Here are some tips for marbling like a pro:
– Use a clear top coat, such as clear top coat nail polish, to add depth and shine to your marbled design.
– Experiment with different shades of blue and silver for unique variations.
– Consider adding small silver foils for an extra touch of glam.
This design is perfect for anyone looking to add an artistic and luxurious vibe to their nails!
7. Classic Chic French Twist
Put a fresh spin on the classic French manicure with blue silver tips! This elegant design pairs a neutral or light blue base with sparkling silver tips for a modern twist on a timeless style.
To create this look, start with a base coat of a soft blue polish, like the 60 Seconds Super Shine Nail Polish – Danny Boy Blue. Once dry, use a striping brush, such as the Nail Art Striping Brush, to apply silver polish to your tips in a straight line or a slight curve, depending on your preference. This balanced design adds a touch of glam while remaining sophisticated.
For the silver tips, consider the Rimmel 60 Seconds Glitter Nail Polish, 833 Extra for a beautiful sparkle. This product helps achieve that eye-catching shimmer that enhances the overall look.
Ways to enhance your French twist:
– Add a glittery silver stripe below the tips for extra bling!
– Experiment with different base shades of blue, from pale pastel to deeper hues.
– Finish with a high-gloss top coat for a polished finish that shines.
This design is perfect for any occasion, making your nails look classy yet trendy at the same time.
Conclusion
Blue silver nails offer a stunning array of stylish possibilities that are easy to achieve and perfect for every occasion. With these 7 designs, you can express your creativity while staying on-trend with nail art. Whether you opt for marbled elegance or sparkling stars, your nails will undoubtedly stand out!
So grab your favorite blue and silver polishes and start experimenting with these glamorous designs—your nails will thank you!
Note: We aim to provide accurate product links, but some may occasionally expire or become unavailable. If this happens, please search directly on Amazon for the product or a suitable alternative.
This post contains Amazon affiliate links, meaning I may earn a small commission if you purchase through my links, at no extra cost to you.
Safari nails are not just a trend; they’re a bold expression of your adventurous spirit! This season, unleash your inner beast with vibrant colors, intricate animal prints, and stunning wildlife-inspired designs that will have everyone turning their heads.
From playful leopard spots to elegant zebra stripes, these nail art ideas bring the thrill of the safari directly to your fingertips. Dive into the wild world of nail art and discover how to make a statement with your manicures. Get ready to celebrate your wild side with creativity and flair!
Whether you’re preparing for a getaway or adding a pop of excitement to your everyday life, these nail designs are sure to inspire your next salon visit or at-home nail session.
Embrace the wild with nail designs that mimic the stunning patterns of exotic animals. Think leopard spots, tiger stripes, and giraffe patches! These prints can be achieved using various techniques, from stamping to freehand painting. To make the process easier, consider using a nail art brush set. This set includes 15 acrylic nail brushes and 5 dotting tools, perfect for creating detailed designs and achieving precision in your animal prints.
The secret to nailing this look is to play with colors—mix classic black and brown with bold shades like turquoise or coral for a modern twist. It’s a fun way to showcase your personality and love for wildlife. To ensure your animal prints look fresh and last longer, always finish with a reliable top coat, such as the top coat nail polish by Barry M. This 3-in-1 formula acts as a base coat, top coat, and nail hardener, providing shine and durability to your designs.
For those who prefer a quicker method, consider using a nail art stamping kit. This kit comes with 5 stamping plates featuring various animal patterns, along with stampers and scrapers to help you easily transfer the designs onto your nails.
Don’t hesitate to mix different animal prints on each nail for a wild safari look! Use thin brushes for detailed work, and practice on a nail wheel first to perfect your technique. And don’t forget to remove any smudges around your cuticles for a clean finish.
2. Safari Sunset Gradients
Channel the breathtaking sunsets of the savannah with gradient designs that blend warm hues of orange, red, and yellow. This chic look mimics the beautiful sky at dusk, serving as a stunning backdrop for your wild adventure. Start with a light base and layer darker shades gradually towards the tips for that perfect sunset gradient.
For a flawless gradient effect, use the Nail Art Gradient Sponge. Its double-headed design and replacement heads help you achieve a smooth transition between colors effortlessly.
To create the vibrant sunset look, consider the Nail Polish Set – Sunset Colors. With its array of warm shades, this set provides the high impact color you need to capture that stunning sunset vibe, ensuring your nails complement your adventurous spirit.
For added flair, you might want to include silhouette designs of acacia trees or animals against the gradient backdrop. This adds depth and tells a story about your love for adventure. Don’t forget to finish with Top Coat for Nail Art to seal in your masterpiece! Gradient nails can be worn casually or dressed up for special occasions—perfect for any adventure you embark on.
3. Jungle Leaf Designs
Bring the lush greenery of the jungle to your fingertips with leaf-themed nail art. From palm fronds to monstera leaves, this design is perfect for nature lovers.
Using a rich green base, you can paint various leaf shapes in lighter greens and yellows for a layered effect. To achieve this, the nail art brush set will be your best friend, allowing you to create precise and detailed designs that celebrate the vibrancy of wildlife and nature. Adding gold or bronze accents gives a luxurious touch that stands out beautifully.
To elevate your nail game, consider the green nail polish set, which includes a variety of shades perfect for crafting that lush, jungle look. Additionally, playing with different finishes—matte for the base and glossy for the leaves or vice versa—adds dimension and makes your nails pop.
For those who prefer a more straightforward approach, the nail art stencils can help you achieve the leaf designs effortlessly. Simply apply the stencils as guides for your nail art, saving you time and ensuring a professional look.
Consider pairing this design with a neutral outfit to let your nails be the highlight of your look.
4. Wild Animal Faces
Why not wear a piece of wildlife on your nails? Creating tiny animal faces is a playful and whimsical approach to safari nails. Choose your favorite animals—perhaps a lion, elephant, or even a cheeky monkey! Start with a light base color for your nails, then paint the animal faces using fine detail brushes for precision. A great option for this task is the detail nail art brushes set, which includes a variety of sizes perfect for capturing fine details.
This design takes patience, but it’s well worth it for the unique look it provides. To get the hang of the details, practice on a nail wheel first. The nail wheel practice display is ideal for testing out your designs without committing to your nails right away. You can also mix and match different animal faces on each nail for an eclectic style that showcases your love for wildlife.
Finally, remember to seal your artwork with a top coat to keep those adorable animal faces intact. The top coat nail polish is a great choice, serving as a base coat, top coat, and nail hardener all in one, ensuring your designs stay vibrant and chip-free. Happy painting!
5. Earthy Textures
Capture the essence of the earth with textured designs that mimic natural elements. Think sandy tones, rocky textures, and even wood patterns. Start with an earthy base color such as beige or light brown, then use a sponge to dab on darker shades to create a texture that resembles sand or stone. For this, nail art sponge applicators are perfect as they help achieve a seamless ombré effect, making your nails look effortlessly natural. You can even add streaks of white for a rocky effect.
For a fun twist, consider incorporating small elements like tiny gems or beads to resemble pebbles. The nail art gems and beads set is an excellent choice, providing a variety of flat back gems that can elevate your design, adding a touch of sparkle reminiscent of natural stones. You might even want to use faux animal fur on an accent nail for a more adventurous look.
To ensure that your stunning earthy theme stays intact and resists chipping, finish off your design with top coat nail polish. This all-in-one product not only serves as a base and top coat but also helps to harden your nails, keeping your creative designs looking fresh and vibrant. This earthy theme is great for those who love a natural look without sacrificing creativity.
6. Colorful Tribal Prints
Tribal prints are not only visually stunning but also celebrate cultural artistry. With bold colors and intricate patterns, these designs can turn heads and start conversations.
To create your colorful tribal designs, consider using a small brush or nail art tape. The Nail Art Brush Set is perfect for precision painting, allowing you to craft geometric shapes and lines with ease. Furthermore, the Nail Art Tape can help you achieve clean lines and layered patterns that add depth to your design. Choose a variety of bright reds, yellows, blacks, and blues to make each nail a unique story, incorporating dots and lines for added detail.
Tribal nail designs pair beautifully with neutral outfits, making them the perfect statement pieces. Just remember to keep the designs clean to avoid overwhelming your look. For a distinctive finish, consider using the Matte Top Coat, which will set your art apart from traditional glossy manicures, giving it an elegant and modern touch.
7. Safari Animals in Action
Bring the savannah to life by painting iconic safari animals in action on your nails. Imagine a giraffe reaching for leaves or a lion lounging in the sun!
These designs require a bit of artistic flair, and for that, you’ll want to start with a light base color. To sketch each animal with precision, consider using the fine detail nail art brushes set. This 15-piece set includes various brush sizes that will help you capture the intricate details, like the animals’ eyes and fur textures, with ease.
Mixing and matching animals on different nails adds a playful aspect to your look. You might also want to incorporate some sparkle—adding a little glitter can make those animal portraits pop even more. Check out the nail art glitter set, which includes nail glitter, brushes, and dotting tools, perfect for adding that extra flair to your designs.
To keep these creations fresh, think about seasonal themes, such as snowy backgrounds for winter or bright flowers in spring. This way, your nails can reflect the changing seasons while showcasing your love for wildlife!
8. Minimalist Safari Symbols
For those who prefer a more subtle approach, minimalist safari symbols can be a chic choice. Think simple outlines of animals, paw prints, or even safari hats! A neutral base color like nude nail polish creates the perfect canvas for these simple designs, ensuring a sophisticated look.
To bring your ideas to life, the nail art brush set is essential. With its fine brushes, you can easily create clean lines and symmetrical designs, focusing on the beauty of minimalist art. You can mix different symbols on each nail or maintain consistency with a single theme. A matte finish, achieved with the matte top coat, works wonderfully here, adding a sophisticated touch to your creations.
This style is ideal for work settings where a splash of fun is welcomed while still maintaining professionalism. The simplicity of these designs allows you to showcase your love for wildlife without being too over-the-top.
9. Sparkling Safari Nights
Capture the magic of a safari night with dark, glittery nails that reflect the stars. A deep navy or black base mimics the night sky, while adding a touch of sparkle with fine glitter can create that celestial effect. For a perfect base, try the Dark Nail Polish Set, which includes stunning shades like dark blue and black to set the tone.
Once you have your base, layer on a fine glitter polish to enhance the twinkling effect of your nails. The Fine Glitter Nail Polish is a great choice for achieving that magical sparkle, as it is breathable and non-toxic, making it a healthy option for your manicure.
To elevate your design, consider adding small rhinestones that represent the constellations above. The Nail Art Rhinestones Kit offers 24 colors of flat back gems, allowing you to create personalized designs that really stand out against your dark base.
For a unique twist, don’t hesitate to incorporate a few animal silhouettes or leafy patterns in a contrasting color. Lastly, finish with a top coat to keep that sparkle intact for longer and ensure your nails shine bright during evening outings or special events!
10. Tribal Animal Fusion
Combine the boldness of tribal designs with animal motifs for a unique nail art experience. Picture tribal patterns intermingling with animal prints or silhouettes!
To create your stunning designs, you’ll want the right tools. The Nail Art Brush Set is perfect for intricate detailing and ensuring your tribal patterns stand out. This set includes 15 acrylic nail brushes and 5 dotting tools to help you achieve precise lines and patterns, making your artwork pop.
For the tribal element, consider using the Tribal Nail Stencils. These reusable stencils will allow you to paint perfect tribal designs easily, giving you a professional look without the hassle. With these templates, you can create striking base designs that serve as a backdrop for your animal motifs.
Once you’ve layered your tribal and animal designs, don’t forget to seal everything in with a clear top coat. The Clear Top Coat Nail Polish not only keeps your artwork vibrant and intact but also adds a beautiful shine.
Keeping the designs organized ensures that they don’t clash, and using contrasting colors wisely will help both elements shine without overpowering each other. This style works well for any occasion, bringing a touch of the exotic wherever you go. Enjoy expressing your love for both culture and wildlife through your nail art!
11. Earthy Tones with Animal Accents
Opt for a warm, earthy palette with animal accents for a sophisticated safari nail look. Think browns, beiges, and greens complemented by subtle animal prints or illustrations. Start with a neutral base using the Earthy Nail Polish Set to create a textured foundation that embodies the essence of nature.
To bring your designs to life, consider the Nail Art Brush Set. This kit includes 15 acrylic nail brushes and 5 dotting tools, giving you the precision needed to create intricate patterns inspired by leaves or animal fur with gentle strokes of color. Subtle accents of animal prints on a couple of nails can enhance this look without being too loud, allowing you to express your love for nature in an understated way.
This design effortlessly transitions from casual to classy, making it perfect for any occasion. To elevate the whole look, finish with the Matte Top Coat, which can accentuate the earthy vibe and provide a modern touch to a classic style. With these elements, you’ll achieve a stunning safari nail design that showcases your wild side!
12. Vibrant Safari Ombre
Last but not least, the vibrant safari ombre is a showstopper! Blend bold colors inspired by sunsets and wildlife into a stunning ombre effect for a bright and cheerful nail design.
Choose a gradient of vibrant colors that represent the hues found in nature, such as sunset oranges, yellows, and greens. To achieve this smooth transition, grab a nail art ombre sponge. This double-headed sponge comes with four replacement heads, making it perfect for creating that flawless gradient look.
For your base colors, the vibrant nail polish set features six neon bright colors that are sure to bring your design to life. These long-lasting polishes are ideal for a home salon experience and will keep your nails looking fresh and eye-catching.
Once you’ve perfected your ombre effect, finish it off with a glossy shine using the high-gloss top coat. This top coat not only enhances your nails’ shine but also helps to protect your beautiful design from chips and scratches.
You can keep the ombre effect uniform across all nails or mix and match for a vibrant twist. Be bold, be fierce, and let your nails do the talking! It’s the perfect way to showcase your adventurous personality!
Conclusion
From adventurous animal prints to dazzling ombres, these safari nail designs let you express your love for wildlife in creative ways.
No matter your style, there’s a safari-inspired nail art idea perfect for you. Whether you prefer bold statements or subtle hints of safari allure, your nails can be your canvas for adventure and creativity.
Dare to experiment with these trendy designs and unlock your wild side with each manicure!
Note: We aim to provide accurate product links, but some may occasionally expire or become unavailable. If this happens, please search directly on Amazon for the product or a suitable alternative.
This post contains Amazon affiliate links, meaning I may earn a small commission if you purchase through my links, at no extra cost to you.
French nails in an almond shape are the ultimate expression of elegance and style.
With their graceful curves and chic finish, they perfectly blend classic and modern aesthetics.
This article will guide you through eight essential techniques to help you master this beloved nail style, ensuring your nails become a canvas of creativity and sophistication.
Get ready to impress with every gesture; the world of almond-shaped French nails awaits your artistic touch!
The classic French manicure gets a refreshing upgrade when styled in an almond shape.
Imagine a soft pink base, elegantly contrasted by crisp white tips that elongate the fingers beautifully. The almond shape complements this look perfectly, adding a touch of sophistication. This design is ideal for any occasion, whether it’s a business meeting or a night out.
Tips to Achieve This Look:
– Start with a base coat to protect your nails and enhance longevity.
– Use nail guides to create those perfect tips.
– Experiment with the thickness of the white tips for a more personalized style.
– Finish with a glossy top coat for that salon-fresh shine.
Unique Insight: Consider using a sheer nude base instead of pink for a more understated elegance, perfect for a minimalist approach.
This classic design not only looks chic but is also versatile enough to match any outfit.
Ombre nails are all the rage, and they look stunning in the almond shape!
Fading from a soft nude to a light pink or even a pastel hue creates a dreamy effect that’s hard to resist. The almond shape enhances the gradient, drawing attention to the delicate blend of colors.
How to Achieve This Style:
– Use a makeup sponge to create that seamless transition between colors.
– Layer the colors gradually for depth.
– Seal with a matte top coat for a trendy twist, or stick with glossy for a classic finish.
Unique Insight: Play with different color combinations; a lavender to white ombre can be particularly enchanting for spring and summer!
This style not only looks great but also adds an element of fun to your nail game.
Why not bring a touch of nature to your nails? Floral designs on almond-shaped nails can be incredibly striking.
Whether it’s delicate daisies or intricate roses, these designs can be customized to match any season or mood. The almond shape allows for ample space to showcase your artistry.
Tips for Floral Designs:
– Use fine brushes for detailed work; a dotting tool can help create flower centers.
– Start with a light base coat for the flowers to pop.
– Consider using gel polish for added durability.
Unique Insight: Try layering different floral designs on each finger for a more eclectic vibe!
This technique not only showcases your creativity but also makes your nails a conversation starter.
Why stick with neutrals when you can make a statement? Bright and bold colors look stunning on almond-shaped nails.
From vibrant reds to electric blues, these colors can express your personality and make your nails stand out. The almond shape softens the look, making it both fierce and feminine.
How to Pull This Off:
– Choose colors that complement your skin tone for the best effect.
– Experiment with matte versus glossy finishes to see what you love most.
– Consider using glitter or foil accents for added flair.
Unique Insight: Mixing two bold colors can create a unique look that’s perfect for special occasions.
Glitter can elevate any nail design, and when paired with almond shapes, it creates an enchanting effect.
Imagine a classic French tip with a subtle glitter overlay or a full glitter nail that catches the light beautifully. Almond shapes allow the glitter to shine while keeping the design elegant.
How to Incorporate Glitter:
– Use loose glitter for a more dramatic look; press it into the wet polish.
– For a subtle approach, opt for glitter polish over a solid base coat.
– Ensure to seal with a top coat for longevity.
Unique Insight: Combining different sizes of glitter can create an eye-catching textured effect.
This technique is perfect for parties or festive occasions!
Tinkerbell and her whimsical charm have inspired countless fans around the world, and now she’s taking center stage in the world of nail art!
Tinkerbell nails are the perfect way to add a playful and magical touch to your style. With vibrant greens, glimmering pixie dust, and the iconic fairy silhouette, these nail designs celebrate both fun and femininity.
Whether you’re a devoted Disney fan or simply love cute and creative nail art, this list of 12 Tinkerbell-inspired nail designs is sure to spark some excitement and inspiration for your next manicure. Let’s sprinkle a little magic on your nails with these enchanting ideas!
Get ready to dazzle with a pixie dust ombre effect! This design starts with a soft gradient of greens at the base, fading into a sparkling gold or glittery white tip. The ombre effect captures the whimsical essence of Tinkerbell, making your nails look like they are sprinkled with fairy dust.
To achieve this look, use a makeup sponge for nail art, which is perfect for blending the colors smoothly to create that enchanting gradient. After you’ve completed your design, finish it off with a top coat for extra shine, making your nails truly magical!
For a long-lasting finish, opt for a high-quality gel nail polish set that includes a variety of shades, allowing you to get just the right colors for your design. And if you want to elevate your look even further, consider adding some tiny rhinestones using the nail art rhinestones kit for an added touch of sparkle. This design looks great on both short and long nails!
Enjoy bringing Tinkerbell’s magic to your fingertips!
2. Fairy Silhouette Art
Embrace the enchanting silhouette of Tinkerbell with detailed nail art that showcases her iconic pose. This design involves painting Tinkerbell’s silhouette in black or dark green against a soft pastel background, like a light pink or sky blue, to mimic that fairy-like feel. To elevate the magic, consider adding a few star or crescent moon decals around her.
For precision, a fine brush is essential, and a great choice is the Fine Detail Nail Art Brush Set. This set includes various brushes perfect for achieving the intricate details of Tinkerbell’s silhouette.
To finish off the look with a modern twist, apply a Matte Top Coat Nail Polish. This will give your design a sophisticated, velvety finish that contrasts beautifully with the pastel background.
Lastly, to add an extra touch of whimsy, don’t forget to use some decorative elements. The Star and Moon Nail Art Decals are a fantastic way to enhance your design with twinkling accents that complement Tinkerbell’s magic.
This design is perfect for a night out or any special occasion. Remember, take your time with the details to achieve the best result! You can also alternate your fingers with different designs for a multi-dimensional look.
3. Glittery Green Tips
Nothing says playful like glittery green tips! This design features a classic French manicure with a twist. Instead of a traditional white tip, opt for a sparkly emerald green that truly embodies Tinkerbell’s spirit. A great way to achieve this look is by using a London Glitter Nail Polish Top Coat, Disco Diva to add that dazzling finish.
Start with a base of nude or soft pink to allow the glittery green to really pop. If you’re feeling adventurous, you can even play with different shades of green to create a multi-tonal effect! For precise application and intricate designs, consider using the URAQT Nail Art Brush Set. This set includes multiple brushes that make it easy to create perfect tips and details.
This nail art is versatile and can be worn for casual outings or festive events, making it a delightful choice for any occasion.
4. Floral Pixie Adventure
Add a touch of nature to your Tinkerbell nails with a floral theme! This design incorporates delicate flowers alongside Tinkerbell’s charm. Think little daisies or roses painted in soft pastels on a mint green or lavender base.
To achieve those intricate floral details, consider using the Nail Art Brushes Set. This set features 15 precision brushes that are perfect for creating detailed flower designs, making it easier for you to make each petal pop.
You can paint Tinkerbell amongst the flowers or keep it simple with floral accents on one or two accent nails. For a beautiful color palette, grab a Pastel Nail Polish Set. This set includes six modern shades that are ideal for evoking a soft, whimsical garden feel.
To complete the look and make the floral designs truly stand out, apply a shiny finish with the Shiny Top Coat. This high-gloss, no-wipe top coat ensures your art remains vibrant and long-lasting, keeping your playful nails looking fresh.
Points to consider:
– Use nail art brushes for detailed flower designs.
– Mix and match colors for a more dynamic floral garden feel.
5. Tinkerbell Glitter Fade
This design is perfect for those who love a bit of glam! Start with a base coat of Tinkerbell green nail polish, a beautiful sage green that sets the stage for your fairy-inspired look. Gradually fade into sparkling gold or silver glitter towards the tips for an enchanting gradient effect.
To elevate the shimmer, consider using holographic glitter nail powder, which adds a dazzling touch to your design. This gradient creates a mesmerizing effect that shimmers as you move, perfect for bringing a little fairy magic into your everyday look. Apply a glossy top coat, like the glossy top coat for nails, for added shine and protection, ensuring your stunning manicure lasts longer.
This design looks great on both short and long nails, offering versatility for anyone seeking a touch of whimsy in their style!
6. Whimsical Watercolor
Get artsy with a whimsical watercolor approach! Using a mix of greens, yellows, and whites, create a soft, blurred effect that mimics Tinkerbell’s magical world. This technique captures the essence of fairytales and can be done easily with a brush or even a dotting tool, like the nail art dotting tools for precision and creativity. Perfect for a creative twist, this design is charming and playful without being too overbearing.
For the best results, opt for a water-based polish, such as the water-based nail polish set, which allows for easy blending of colors. To finish off your look with an unexpected touch, use a matte top coat like the matte top coat nail polish to give your design a unique finish. Happy nail painting!
7. Pixie Heart Beats
Show your love for Tinkerbell with hearts! This design combines her iconic colors with cute heart motifs. Start with a pastel base using the pastel nail polish set, which includes a delightful range of soft shades perfect for capturing Tinkerbell’s whimsical spirit.
Once your base is dry, use a small brush or dotting tool like the nail art dotting tools set to create hearts in various shades of green and gold. This tool will help you achieve precision and help you get creative with different heart sizes for a fun, dynamic look.
To finish off this playful design, add depth and shine with the glossy top coat nail polish. It will not only enhance the vibrancy of your colors but also provide a long-lasting finish, perfect for romantic dates or special celebrations! You can choose to go for a heart accent nail on one finger or cover them all in this adorable pattern. Enjoy creating your Tinkerbell-inspired nail art!
8. Starry Night Tinkerbell
Bring the night sky to your nails with a starry Tinkerbell design! Start with a deep navy or black base to mimic the night sky. For a stunning navy shade, consider using Rimmel London Rita Ora 60 Seconds Super Shine Nail Polish, 902 Moonlight Magic. This polish provides a rich color that sets the perfect backdrop for your design.
Next, use a small brush to paint tiny stars and a silhouette of Tinkerbell soaring across the sky. For this step, the Nail Art Brush Set is an essential tool. With its variety of brushes, you’ll have the right precision to create delicate details and intricate designs.
This design is perfect for fans who love a bit of drama and elegance. And don’t forget to apply a shiny top coat to make the stars twinkle! If you’re looking for an enchanting twist, utilize Glow in the Dark Insta-Dri Nail Color (#720 – Fa-BOO-lous). This glow-in-the-dark polish adds a dreamy effect that will make your nails shine even in the dark.
Finally, pair your starry night Tinkerbell nails with a matching deep-colored outfit for added style!
9. Tinkerbell and Friends
Celebrate the whole crew with Tinkerbell and her friends! Paint each nail with a different character or element, like a butterfly, flower, or even Peter Pan. This whimsical design allows for endless creativity and is a great way to express your love for the entire Disney universe!
To bring your vibrant ideas to life, consider using a bright nail polish set featuring six different candy-colored shades. These bright and playful colors will make each character pop against a neutral base, ensuring your nails stand out.
If you’re short on time or want to add more intricate designs, using nail art stickers and decals can make the process much easier. These self-adhesive, ultralight, and waterproof stickers allow you to create wonderful designs without the need for detailed painting skills.
For those who prefer a more hands-on approach, a nail art brush set includes everything you need for DIY designs. With 15 acrylic nail brushes and dotting tools, you can unleash your creativity and achieve the perfect details for each character.
To create a cohesive look across your nails, select a common background color that complements the vivid characters. With these tips and products, you’ll have an adorable Tinkerbell-themed manicure that showcases your playful spirit!
10. Garden Fairy Nails
Embark on a mystical garden adventure with floral and leaf designs that Tinkerbell would adore! Start with a soft green base, which serves as a perfect backdrop for delicate white or pastel flowers and tiny leaf patterns sprinkled across your nails. To help you achieve those intricate designs, consider using the Nail Art Brush Set. Its thin brushes are ideal for creating detailed leaf patterns, allowing you to express your creativity effortlessly.
This nature-inspired nail art is not only refreshing but also perfect for any season. If you want to add a touch of glam, you can enhance your design with some sparkle. The Nail Art Gems and Jewels offer a variety of rhinestones in different sizes, making it easy to find the perfect accents to elevate your garden fairy nails.
To ensure your artwork lasts and maintains an elegant finish, layering your designs with a top coat is essential. Using the Top Coat Nail Polish will not only enhance the longevity of your nail art but also give it a beautiful shine.
Feel free to alternate flower designs for a vibrant mix, and let your nails reflect the enchanting spirit of nature!
11. Tinkerbell-Inspired Rainbow
Inject a burst of color into your nail art with a vibrant rainbow design inspired by Tinkerbell herself! Use bright shades of green, pink, yellow, and blue to create a rainbow effect across the nails. For the perfect colors, consider using the Bright Nail Polish Set, which includes six different bright rainbow colors—perfect for achieving that whimsical Tinkerbell look.
You can also include small details like clouds or stars for added whimsy! This nail art is sure to make a statement and is perfect for summer or festival vibes. To ensure your designs have clean, sharp lines, a fine brush is essential. That’s where the Nail Art Brush Set comes in handy. With 15 different brushes and dotting tools, you’ll have everything you need for precise detailing.
Finally, don’t forget to seal your design with a good top coat. The Top Coat Nail Polish not only provides a glossy finish but also helps keep your masterpiece looking fresh and vibrant for longer. Happy painting!
12. Enchanted Fairy Dust
For the final touch of magic, consider a design simply adorned with fairy dust! Start with a nude or light green base and apply Barry M Glitter Effect Nail Paint, Shade White Party Pearl, an iridescent glitter polish that catches the light beautifully. This creates a soft shimmering effect that’s both playful and elegant.
To enhance the charm, sprinkle small stars or tiny beads throughout using nail art beads and stars set. These delicate accents add a whimsical touch that complements the glitter perfectly, elevating your design without overwhelming it.
For a polished finish, don’t forget to use a base coat and top coat nail polish set like Barry M’s 3 in 1 formula. This will ensure your nails are well-prepped and help your enchanting fairy dust design last longer.
This design is ideal for a minimalist yet enchanting look that whispers of magic. For the best results, apply two coats of the glitter polish for a more dramatic effect, or use this design as an accent alongside your other Tinkerbell nail art.
Conclusion
There you have it! Twelve adorable Tinkerbell nail inspirations to sprinkle a little pixie dust into your life.
Whether you prefer subtle designs or bold statements, these nail art ideas embody the enchanting spirit of Tinkerbell. Try them out and let your nails reflect your playful personality! Which design will you try first?
Note: We aim to provide accurate product links, but some may occasionally expire or become unavailable. If this happens, please search directly on Amazon for the product or a suitable alternative.
This post contains Amazon affiliate links, meaning I may earn a small commission if you purchase through my links, at no extra cost to you.
Summer is the perfect time to express your flair for beauty, especially when it comes to nail art!
Coffin nails are the perfect canvas for showcasing stunning floral designs. With their elegant shape, they offer ample space to play with colors and patterns, making them ideal for beach trips.
Whether you’re lounging by the waves, sipping a cocktail, or taking Instagram photos, floral coffin summer nails will elevate your vibe. From vibrant hues to soft pastels, there’s a floral design for every beachy personality. Let’s look at 12 gorgeous floral coffin nail designs that will have everyone asking where you got them!
Welcome to the vibrant world of tropical floral coffin nails!
These designs often feature bold colors like bright pinks, greens, and yellows, echoing the beauty of exotic flowers like hibiscus and plumeria. The combination of deep greens for leaves adds a refreshing touch, while the bright florals pop against a neutral base.
To achieve this look, consider starting with a matte base coat for a chic finish, then top it off with glossy, vibrant floral art. The matte finish creates a stunning contrast with the bright designs. For those intricate details, using the nail art brush set can really help you get that precision you need, allowing you to create fine lines and delicate floral patterns effortlessly.
If you want to add some sparkle, consider incorporating tiny details like glitter or gold leaf for that extra glam. For an easier application without the need for intricate drawing, nail art stickers are a fantastic option. They provide beautiful designs that you can simply apply over your base, saving you time while still achieving a stunning look.
Additionally, you might experiment with a sponge technique to create a gradient effect behind your flowers, adding depth and dimension to your nails.
This design is not just eye-catching; it’s an instant mood booster, perfect for your next beach trip!
2. Pastel Blooms
If you prefer something softer, pastel floral coffin nails are your go-to!
These designs use gentle colors like lavender, mint green, and baby pink, evoking a dreamy, whimsical vibe. Small, delicate flowers like daisies and baby’s breath can be painted elegantly across the nails, creating a serene yet stylish look.
To replicate this style, start with a nude base and use a thin brush for detail—check out the Nail Art Brush Set. This set includes various brushes that make it easy to create intricate floral designs.
To add a subtle sparkle, consider incorporating tiny rhinestones. These can elevate your floral creations beautifully. A great option is the Rhinestones for Nail Art, which come in multiple sizes and include tools to help you place them perfectly.
Make sure to finish with a good top coat to keep those pastels fresh—try the Top Coat Nail Polish for a long-lasting shine. A matte finish can also give these blooms a chic look, while mixing in some gold accents adds a classy touch.
Perfect for sunset walks on the beach, these nails are both charming and versatile!
3. Boho Chic
Bohemian-inspired floral coffin nails are all about free-spirited designs!
Think wildflowers, earthy tones, and lots of artful layering. This style can have a more textured look with matte finishes, giving the impression of a rustic, natural vibe. Earth tones mixed with sporadic colorful blooms can create a unique edge that’s perfect for music festivals or beach bonfires.
To achieve this aesthetic, consider using the nail stamping kit, which includes everything you need to create beautiful designs effortlessly. With intricate patterns at your fingertips, you can easily add those boho-inspired wildflowers to your nails.
Additionally, don’t overlook the importance of texture in your nail art. A matte top coat can give your nails that rustic appearance, perfectly contrasting with glossy accents for added depth. Mixing finishes will enhance the overall bohemian feel.
For those fine details, a nail art brush set is essential. This versatile set allows you to add minute touches like feathers or beads, enhancing the boho style with precision.
These nails scream creativity and fun, making them perfect for summer adventures!
4. Bold Color Block
For those who love a statement, bold color block floral coffin nails are a must-try! These designs break the traditional mold by mixing vibrant colors with stark black or white lines, creating a stunning contrast. Large floral images can be used alongside blocks of color, drawing the eye and making each nail a work of art.
To achieve this look, start by choosing two to three bold colors and a neutral background. Use nail tape for nail art to create sharp lines for that clean, color-blocked effect. This tape is perfect for ensuring the precision you want in your design. Experiment with different floral patterns in each color block for added fun.
Make sure to finish your design with a strong top coat like strong top coat nail polish. This will protect your beautiful creations, especially when using bold colors that are prone to chipping.
Additionally, these designs work best with longer coffin nails, so consider using coffin nail tips for that perfect length to showcase your creativity. These nails are ideal for a chic beach party or a vibrant night out!
5. Minimalist Floral
Minimalist floral coffin nails are for those who prefer subtlety in their designs. Think small, delicate flowers on a nude or light-colored base. The beauty of this style lies in its simplicity, where a few well-placed flowers can create a chic and elegant look. This design is perfect for anyone who wants to keep things classy yet stylish during their beach trip.
To achieve this, consider using the fine detail nail art brush set. This set includes a variety of brushes that are perfect for creating tiny flower details, helping you achieve that minimalist vibe with precision.
Stick to a neutral palette with a good quality nude nail polish like the nude nail polish, as this will keep the focus on your floral designs while providing a smooth, even base.
You might also want to add some tiny dots of white or metallic accents for a bit of glam. The nail art dotting tools are excellent for this, allowing you to create perfect little dots that enhance your design without overwhelming it.
This style is also great for transitioning to other seasons. With the right tools and colors, these nails can go from beach to brunch seamlessly, making them wonderfully versatile!
6. Vintage Floral
Channel your inner vintage goddess with gorgeous vintage floral coffin nails! These designs often use muted colors and intricate patterns reminiscent of classic floral wallpapers. Think roses, peonies, and other vintage favorites swirling gracefully across your nails. This style is perfect for adding a touch of old-world charm to your summer look.
To achieve this vibe, start with a muted base and consider using nail art brushes set for detailed painting or create intricate designs with nail wraps with floral designs. These wraps are a quick and easy way to bring a beautiful floral pattern to your nails without the need for advanced painting skills.
Incorporating a matte finish is essential for that vintage feel, and you can achieve this with matte top coat. This top coat will not only give your nails a sophisticated look but also help the floral designs stand out beautifully.
For an added vintage twist, mix florals with soft stripes or polka dots, and consider gold outlining for an extra touch of elegance. These nails will pair beautifully with your favorite summer dress, making you feel like a timeless beauty.
7. Glitter Bomb Flowers
Who doesn’t love a little sparkle? Glitter floral coffin nails are a fun way to add pizzazz to your beach style!
These designs can vary from a full-glitter base with floral detailing to a chic glitter gradient on the tips of the nails. Flowers accentuated with glitter can truly shine when the sunlight hits—perfect for beach outings!
To achieve this, start with a quality glitter polish like the glitter nail polish set for a vibrant base that dries quickly and lasts long, ensuring your nails look fabulous throughout your trip. For more intricate designs, you can add floral accents using a nail art brush set, which makes it easy to create beautiful flower patterns that complement the glitter.
If you want your manicure to endure the sandy beach environment, consider using gel polish for longevity. The gel nail polish kit includes everything you need, including a UV lamp to ensure your nails stay intact and stunning.
– Mix different sizes of glitter for dynamic texture.
– Keep your flower designs simple to let the glitter shine!
These nails scream fun and excitement, making them a fantastic choice for vacation vibes!
8. Neon Floral
Get ready to turn heads with neon floral coffin nails! These vibrant designs are perfect for those who love to stand out. Using bright neon colors as bases, flowers painted in contrasting shades can create a striking, playful effect. Think bright yellows, greens, and pinks.
To nail this look, start with a neon polish like the Neon Nail Polish Set, which features six bright colors that dry quickly, making it ideal for a summer makeover. Once you’ve applied your base, use a contrasting color for the floral artwork. The key is to keep the flowers bold and easy to distinguish.
For added fun during nighttime beach strolls, consider a glow-in-the-dark effect with Glow-in-the-Dark Nail Polish. This will help your nails stand out even after the sun goes down.
To finish off your design, a matte top coat like Matte Top Coat Nail Polish can create a unique finish that beautifully complements the neon colors. Just make sure you have a steady hand for those intricate floral details.
These nails are perfect for summer festivals and wild beach parties!
9. Watercolor Florals
Watercolor floral coffin nails are a stunning way to incorporate artistry into your nail designs. Using a blend of soft colors, this design mimics the look of a watercolor painting, giving an ethereal feel. Gentle florals swirl together, creating a captivating, artistic look that’s perfect for relaxed beach vibes.
Next, use a small brush to apply colors in layered strokes, ensuring to blend them well. The URAQT Nail Art Brush Set is perfect for this, featuring a variety of brushes that make it easy to achieve the delicate brushwork needed for your floral designs.
Once you’re satisfied with your artwork, finish off your nails with a top coat that enhances the glossy water effect. The Rimmel London Ultra Shine Nail Polish Top Coat offers the high-gloss finish you need to elevate your design.
Remember to let each layer dry before adding the next for better blending. These nails are perfect for the artistic soul who loves to stand out with a soft touch!
10. Confetti Florals
Add a festive spin with confetti floral coffin nails!
These fun designs incorporate tiny bits of color splashes or glitter that mimic confetti mixed in with floral details. They’re perfect for celebrations, summer barbecues, and beach parties!
To achieve this, start with a clear or nude base and apply small bits of vibrant color across the nails, blending them with floral patterns. A great option for this is the bright nail polish set, featuring six different bright rainbow colors to give your nails that joyful summer vibe.
For precision, utilize a dotting tool set to apply confetti-like spots. This tool will help you create detailed floral patterns with ease, ensuring each nail is uniquely decorated.
To finish off your look, don’t forget a glossy top coat! The glossy top coat provides a high-shine finish that enhances the vibrancy of your design and gives your nails that party-ready shine.
These nails radiate joy and are absolutely perfect for celebrating summer!
11. Ombre Floral
Ombre floral coffin nails blend two styles beautifully! By merging a gradient effect with floral art, you can create a serene yet eye-catching look. To achieve this stunning design, start by choosing two to three shades in the same color family, transitioning from a light to a darker hue. A great tool for creating this ombre effect is the nail art ombre sponge, which allows for a smooth and seamless gradient.
Once your ombre base is set, it’s time to add some floral designs on top. For this detail work, the fine detail nail art brush set is perfect, featuring various brush sizes suitable for creating intricate floral patterns. Consider using colors inspired by a sunset for a dreamy effect, and keep the floral designs minimal to allow the ombre to shine.
Finally, to enhance and protect your gorgeous creation, finish with a layer of clear glossy top coat. This will not only enhance the ombre transition but also add a beautiful shine to your nails. These nails bring a harmonious mix of colors, making them perfect for a sunset beach walk!
12. Artistic Expression
Last but not least, express your inner artist with unique floral designs that tell a story! This style allows for complete freedom—mix techniques like dot art, brush strokes, and even 3D elements. Incorporate personal touches, like your favorite flower or colors that represent you, turning your nails into a canvas.
To achieve this, let your creativity flow and use various tools. The Nail Art Brush Set is perfect for detailed brush strokes, giving you the precision needed to create intricate designs. Additionally, if you’re looking to add some flair, the 3D Nail Art Decorations provide delightful embellishments like rhinestones and charms that can take your artistic expression to another level.
Don’t forget to explore unexpected color combinations for a stunning outcome. If you prefer a quicker option, the Nail Art Stickers are ultralight and self-adhesive, making it easy to layer beautiful floral designs onto your nails without the mess.
Let your personality shine through every nail! These artistic nails are perfect for showcasing your individuality while enjoying a carefree beach day!
Conclusion
With so many beautiful floral coffin nail designs, your beach trip just got a whole lot more stylish!
From tropical vibes to minimalist styles, there’s a floral design for everyone. Try experimenting with different colors and techniques to find a look that resonates with you. Happy nail painting, and may your beach days be as vibrant as your nails!
Note: We aim to provide accurate product links, but some may occasionally expire or become unavailable. If this happens, please search directly on Amazon for the product or a suitable alternative.
This post contains Amazon affiliate links, meaning I may earn a small commission if you purchase through my links, at no extra cost to you.
If you’re looking for a way to make your manicure shine, look no further than the stunning world of pink nails with glitter! These delightful designs combine the sweetness of pink with the sparkle of glitter, offering a playful yet sophisticated vibe that’s perfect for any occasion. Whether you’re headed to a casual brunch or a fancy party, these sparkling pink nail designs will surely turn heads. From soft pastels to vibrant fuchsias, there’s a shade for every personality. Get ready to take notes and get inspired as we explore twelve must-try nail art ideas that will elevate your nail game to the next level!
Imagine transitioning from a soft baby pink at the base of your nails to a dazzling glittery tip with a glitzy ombre effect. This design is perfect for adding depth and dimension while keeping it chic. To achieve this look, start with a light pink base coat. For the perfect glitter finish, consider using Fine Glitter Nail Polish for a subtle shimmer that glides on beautifully. Then, grab a Nail Art Makeup Sponge to dab the glitter onto the tips of your nails, giving you that seamless ombre transition.
To top it all off, seal your design with a glossy finish using Glossy Top Coat. This top coat not only enhances the shine but also ensures your manicure lasts longer. This glitzy ombre design suits any nail length and shape, providing you with a trendy yet classic finish.
– Choose a fine glitter for a more subtle appearance.
– Blend the colors carefully for a seamless transition.
– Consider mixing different shades of pink for more variety.
2. Sparkly French Tips
Put a spin on the classic French manicure by adding glittery tips! Instead of traditional white, opt for pink tips dipped in glitter. Start with a base coat of soft pink and carefully paint the tips with your chosen glitter polish for that extra sparkle. For precision, you might want to use a detailing brush set for nail art, which allows you to create clean, defined lines when painting the tips.
To achieve a stunning finish, consider using glitter nail polish in various colors that can add that perfect touch of glitz, whether you’re going for a subtle sparkle or a bold look for a special occasion. Finally, ensure your design lasts by sealing it with top coat nail polish for durability, which not only enhances the shine but also protects your nails from chipping.
The result? A fresh take on a timeless design that’s both elegant and fun!
3. Glitter Dots
For those who love a playful twist, try adding glitter dots on a pink base! Start by painting your nails with a solid pink color using Barry M Gelly Hi Shine Nail Paint in shade Peony, which offers a lovely light pink glossy finish. Once your base is dry, grab a dotting tool set for nail art to apply glitter in varying sizes. This design is perfect for a fun day out or a casual hangout.
You can customize it by choosing different shades of glitter from a glitter nail polish set to match your mood or outfit! For a striking effect, consider using contrasting colors for the glitter dots while keeping the rest of the nail simple to let the dots shine. Don’t hesitate to experiment with dot placement for a more artistic design that showcases your creativity!
4. Glitter Gradient
Create a fabulous gradient effect using pink and glitter for a more dramatic look! Start with a solid pink base using Gelly Nail Paint – Pink Candy Floss, which provides a vibrant and smooth application. Then, layer the glitter from the tips down while gradually fading it towards the cuticles. A great choice for the glitter is the London Glitter Nail Polish Top Coat, Disco Diva, which adds that perfect shimmer without overwhelming the pink base. This design shines in any light and adds a glamorous flair to your nails, making it perfect for a night out or special event. It’s simple yet stunning and gives you that wow factor without needing intricate nail art skills.
Be sure to blend the glitter well to avoid harsh lines. For a unique twist, consider adding a colored base under the pink. Finally, finish with a glossy topcoat for extra shine using Kanorine Top Coat Gel Nail Polish, which ensures long-lasting wear and a high-gloss finish. Enjoy your gorgeous glitter gradient nails!
5. Pink Marble with Glitter
Marble nails are a chic trend, and combining this technique with pink and glitter elevates the elegance! Using a water marbling technique for the best results, create swirls of light and dark pinks and then sprinkle fine glitter throughout for that extra shine. For your glitter needs, the FANDAMEI cosmetic glitter offers 24 pots of fine nail glitter that will enhance your marble effect without overpowering it, keeping the design sophisticated and eye-catching.
This design looks incredibly elegant and is perfect for those who love an artistic flair. It may be a bit more complex, but it’s totally worth the effort! To help achieve the beautiful marbling, consider using the Nail Art Water Marbling Kit, which is a fun and effective way to play with colors and create stunning patterns.
Finally, don’t forget to seal your masterpiece with a topcoat to maintain the design. The Barry M top coat nail polish is perfect for this step, as it acts as a base coat, top coat, and nail hardener all in one, ensuring your nails stay beautiful and chip-free for longer.
With these tips and products, you’ll have a stunning pink marble look that will definitely be the talk of the town!
6. Pink Glitter Bomb
If you’re a fan of sparkle, go all out with a pink glitter bomb! Cover your entire nails in a vibrant pink glitter polish like the Barry M Glitter Effect Nail Paint, Shade Fuchsia Fiesta for a full-on glam look. This design works exceptionally well for special occasions where you want to truly stand out. You can also layer a clear or colored base underneath for extra depth—make sure to use a good base coat, such as the Barry M 3 in 1 Base Coat, Top Coat, Nail Hardener All in One, to help with removal later.
To keep your stunning glitter nails looking fresh and chip-free, be sure to seal them with a topcoat. The Barry M 3 in 1 Base Coat, Top Coat, Nail Hardener All in One serves this purpose perfectly. It’s bold, it’s fun, and it’s sure to get you noticed! Pair with simple jewelry to keep the focus on your nails.
7. Heart Glitter Accents
Add a touch of romance with heart-shaped glitter accents on your pink nails! Start by painting your nails in a soft pink hue. To create those adorable heart designs, you can use heart-shaped glitter to give your nails a charming sparkle, or opt for a stencil from the nail art stencils set for a clean and precise look. This style is delightful for Valentine’s Day or simply to show off your love for nail art. It’s sweet, flirty, and oh-so-fun!
To apply the heart glitter easily, use clear nail polish as a base. Mixing different sizes of hearts can add dimension and interest to your design. Finally, top it all off with a shiny coat for that polished look. Enjoy your gorgeous heart-accented nails!
8. Glittery Stripes
For a chic and modern design, try glittery stripes over a pink base! Start by painting your nails a solid pink, and then add stripes of glitter using tape or a nail striping brush. The nail striping tape is perfect for achieving crisp lines, ensuring your stripes look clean and professional. You can also experiment with different widths of stripes for a unique touch. To apply the glitter, the glitter nail polish set will add that eye-catching sparkle, making your design really pop. For more intricate detailing, consider using the nail striping brush set, which is ideal for fine designs and will help you create stunning stripes with ease. This design is simple yet elegant, merging two trendy elements into one stylish manicure. It’s perfect for the office or a night out, making your nails the talk of the town!
9. Pink Glitter Flowers
Bring a touch of nature to your nails with pink glitter flowers! Start with a solid pink base and create delicate flower designs using a nail art brush. For this, I recommend the Nail Art Brush Set. With 15 different acrylic brushes and 5 dotting tools, this kit is perfect for both DIY enthusiasts and professionals alike, allowing you to achieve intricate designs with ease.
Once your flowers are painted, add glitter to the centers or petals for a whimsical effect. The Pink Glitter Nail Polish will give your floral art that extra sparkle, making it ideal for spring or summer.
For those who want a bit more guidance, you can also use the Nail Art Stencils for Flowers. This set includes 72 different designs, which can help you create beautiful floral patterns without the stress of freehand painting.
To complete the floral theme, consider adding some leaves to your design. Don’t forget to practice your flower design on paper first and feel free to use contrasting colors for the flowers for a bold look. This vibrant design is sure to be the talk of the town!
10. Glitter Mosaic
For a fun and artistic approach, try a glitter mosaic design! Use small pieces of glitter in various shapes and sizes against a pink base. This creative look allows for endless possibilities and is perfect for those who enjoy nail art as a form of expression. To help you achieve this unique style, consider using a nail art glitter set, which comes with a variety of glitters, brushes, and tools to spark your creativity.
To encapsulate the glitter beautifully, a reliable clear base is essential. The Clear Nail Polish Base Coat by Barry M serves as an excellent option, providing a smooth foundation for your artistic designs.
Finally, to bring your mosaic to life with precision, you’ll want the right tools at your disposal. The nail art brush set offers everything you need, with various brushes and dotting tools designed for both DIY and professional use.
Make sure to apply a topcoat for a glossy finish, and you’re all set to showcase your stunning glitter mosaic nails that are sure to grab attention!
11. Glittery Animal Print
Why not go wild with a glittery animal print? Choose a base of soft pink and layer a glittery leopard or zebra print on top. This fierce design adds a trendy edge to your look and is perfect for those who love a bit of adventure in their nail art. It’s trendy, eye-catching, and uniquely yours!
To create intricate animal patterns, using a fine brush is essential. A great option is the Nail Art Brush Set, which includes 15 painting pens and 5 dotting tools, making it perfect for detailed designs.
For that eye-catching glitter effect, make sure to finish with a sparkling coat. The Glitter Nail Polish adds a dazzling touch that complements your animal prints beautifully.
If you want to explore different animal patterns without freehand painting, consider a stamping method. The Nail Stamping Kit provides a variety of templates to experiment with, helping you achieve professional-looking designs with ease.
Stick to a limited color palette for a chic look, and don’t hesitate to experiment with different animal patterns for variety!
12. Pink Glitter Marble
Finish off your glittery journey with a pink glitter marble design! This technique mixes pink polish, like Insta-Dri Nail Polish in Pink Blink, with glitter to create a swirled, marble effect that’s utterly stunning. This quick-drying polish, thanks to its 3-in-1 formula that includes a built-in base and top coat, ensures a long-lasting, streak-free finish. It’s a more complex design but can really turn heads.
To achieve the marble effect, use a needle or toothpick for swirling the colors. A reliable tool for this is the Nail Art Brush Set, which includes various brushes and dotting tools, perfect for any DIY or professional nail art project. Blend the glitter into the polish carefully to enhance your design’s complexity.
Finally, seal your beautiful creation with a top coat like Barry M Nail Paint. This all-in-one base coat, top coat, and nail hardener will keep your design intact and glossy, ensuring that your pink glitter marble nails radiate elegance and fun, making it a must-try for special occasions!
Conclusion
With these twelve fabulous pink nail designs featuring glitter, you’re sure to find something that sparks joy and creativity! Nail art is all about expressing yourself, and these styles blend fun, elegance, and a bit of sparkle perfectly. Don’t hesitate to play around with different techniques and colors to create your own unique look. Happy nail painting!
Note: We aim to provide accurate product links, but some may occasionally expire or become unavailable. If this happens, please search directly on Amazon for the product or a suitable alternative.
This post contains Amazon affiliate links, meaning I may earn a small commission if you purchase through my links, at no extra cost to you.
Summer vibes are just around the corner, and what better way to celebrate than with eye-catching orange fruit nails?
These colorful designs not only brighten up your look but also evoke the refreshing essence of warm, sunny days.
From juicy oranges to playful slices, each nail art inspiration is a little piece of summer waiting to be worn. Grab your favorite nail polish and let’s explore these 10 fabulous orange fruit nail designs that are sure to make your fingertips pop with happiness!
A classic orange ombre nail design is the perfect way to ease into the fruity nail art trend. This look blends shades from bright tangerine to deep sunset orange, resulting in a stunning gradient effect that mimics a summer sunset. Achieving the ombre technique is surprisingly easy with the right tools, such as makeup sponge for ombre nail art, which allows for a smooth and seamless blend of colors.
To enhance your ombre nails, consider adding a glossy finish with glossy top coat for nails. This not only provides extra shine but also helps protect your natural nails with its base coat properties. For those who want to add a touch of glam, sprinkle some nail glitter for decoration on the tips for that little sparkle.
Here are a few tips to ensure your ombre nails turn out beautifully:
– Use a light hand while applying the second color for a smoother blend.
– Experiment with different orange shades for a unique take.
– Combine with short, rounded nails for a cute, summery look.
2. Cute Orange Slice Nail Art
Who doesn’t love a refreshing slice of orange? This nail art design captures the joy of eating a juicy orange on a hot summer day.
Start with a white or nude base and paint bright orange semi-circles at the tips using a high-quality polish like Ultra HD Snap Nail Polish in hot stuff. Its long-lasting vegan formula provides quick-drying, one-coat full coverage that makes your fruit-inspired manicure vibrant and eye-catching.
For adding tiny details like the white lines that create the fruit’s texture, a fine touch is essential. Use a fine brush such as the Fine Detail Nail Art Brush Set. This is perfect for achieving the delicacy required to make your orange slices look authentic and playful.
To finish off your design and ensure those fruit nails last longer, seal everything with Barry M Nail Paint Top Coat. This all-in-one product acts as a base coat, top coat, and nail hardener, providing the perfect protective layer for your fun nail art.
Adding small green leaves for a touch of contrast will enhance the overall look, making this design perfect for all nail lengths and an excellent choice for anyone looking to add a whimsical touch to their manicure without going overboard.
3. Tropical Fruit Medley
Combine all your favorite fruits in one go with a tropical fruit medley design!
Imagine your nails adorned with vibrant oranges, pineapples, and kiwi slices, creating a fun summer party on your fingertips. To bring this design to life, you’ll want to start with a great base. A light blue or sandy beige polish can evoke the feeling of beach days, and the colorful nail polish set is perfect for achieving those bright and cheerful hues. With its quick-drying and long-lasting formula, this set will help your artwork shine.
Each nail can represent a different fruit, making it a super fun and colorful design while showcasing your love for summer fruits. To add intricate details to your fruit designs, our nail art brush set is an essential tool. It includes a variety of brushes for creating fine lines and detailed patterns, allowing you to perfectly depict each juicy slice.
For that extra touch of glam, consider adding small rhinestones with the rhinestones for nail art. With 1500 pieces in various sizes, you can easily embellish your design and make the fruit pop even more. The included tools will help you apply the rhinestones with precision, giving your nails a festive flair.
Styling suggestions:
– Use bold colors to make each fruit pop.
– Try a matte finish for a modern twist.
– Add rhinestones for extra flair, creating a stunning look that’s perfect for summer!
4. Juicy Orange Drip Nails
Take a playful spin with juicy orange drip nails that look good enough to eat! This design mimics the effect of orange juice dripping down your nails, adding a fun and artistic flair to your summer style. Start with a bright orange base using Bright Orange Nail Polish for a vibrant look, and then apply a darker shade to create the dripping effect towards the tips. This design is eye-catching and unique, perfect for making a statement.
To achieve those precise drips, be sure to use a set of Nail Art Dotting Tools. These tools will help you create the perfect drip shapes that will elevate your nail art. For an extra touch of shine, consider incorporating a glossy finish with Glossy Top Coat Nail Polish. This top coat not only provides a sleek, wet look but also enhances the longevity of your manicure.
Keep the rest of your nails simple to let the drips stand out, and don’t hesitate to personalize your design with some glitter or metallic accents for added flair. Enjoy your vibrant orange drip nails and bring a slice of summer to your style!
5. Abstract Orange Patterns
For those who love modern art, abstract orange patterns on nails might just be your go-to summer look! This design incorporates various shapes and strokes in different hues of orange and even hints of cream or gold. It’s an expressive way to showcase your personality while keeping your nails trendy.
To achieve this look, consider using nail art tape to create clean lines and shapes. This will help you define your designs with precision, making your abstract art stand out even more. Don’t be afraid to mix in other colors for a creative twist—this is your chance to unleash your creativity!
For the perfect orange shades, try the orange nail polish set. With a range of hues, this kit gives you the versatility to play with different tones and finishes, ensuring that each nail is a unique piece of art.
Finally, finish your masterpiece with top coat nail polish. Not only does it enhance the shine of your designs, but it also provides longevity, allowing you to enjoy your vibrant nails throughout the summer.
Insider tips:
– Use tape for precision in your designs.
– Experiment freely – there are no rules with abstract art!
6. Chic Orange French Tips
Give the classic French tip a fruity twist with chic orange tips! Instead of the traditional white, opt for a bright orange that adds a fun pop of color. This design is perfect for summer while still looking polished and sophisticated. It’s versatile too; you can wear it to casual outings or even to work.
To achieve this look, start by painting your nails with a clear or nude base. For the vibrant orange tips, consider using Ultra HD Snap Nail Polish in Hot Stuff, which offers a long-lasting vegan formula that dries quickly and provides one-coat full coverage. Once your base is dry, carefully paint the tips orange. For an extra touch of glamour, think about adding a little sparkle with nail art glitter. These holographic iridescent flakes can elevate your orange tips with a beautiful shimmer.
If you’re leaning towards a modern finish, consider using Beetles No Wipe Matte Top Coat. This matte polish will give your nails a trendy look while ensuring the design stays intact.
To further elevate this design, you might want to experiment with different shades of orange, add small floral designs on one or two accent nails, or simply enjoy the chic simplicity of the vibrant tips.
7. Citrus Fruit Theme
Why stop at oranges? Embrace the entire citrus family with a citrus fruit-themed nail design!
Mix oranges, lemons, and limes to create a vibrant collage of colors on your nails. Start with a pastel base using the pastel nail polish set for a softer touch. This set includes six modern colors that are perfect for capturing the bright essence of citrus fruits. Make each nail represent a different fruit, and don’t forget to add tiny details like leaves and seeds to enhance the playful vibe.
Use a nail art brush, such as the nail art brush set, for detailing your designs. Its double-ended tools will help you create intricate patterns with ease.
For added depth, consider using a mix of matte and glossy finishes. The matte and glossy top coat set allows you to achieve that perfect balance, ensuring your citrus creation stands out beautifully.
This design is perfect for those who love bold colors and a bit of whimsy. And if the design feels too busy, keep some nails simple to strike a balance. Enjoy your vibrant citrus nails, and let them be a reminder that summer is just around the corner!
8. Neon Orange Pop
Get ready for a bold summer look with neon orange nails! This vibrant design is all about making a statement. A solid coat of neon orange instantly brings energy to your summer style, making it the perfect choice for those who love to stand out. To achieve this look, consider using the neon orange nail polish from Ultra HD Snap, which offers a long-lasting vegan formula and quick-drying, one-coat full coverage.
To enhance your neon look, pairing it with a white base coat is essential. It ensures that the neon truly pops and gives a smooth foundation. The white base coat nail polish from Sally Hansen is a great option, as it dries quickly and provides a streak-free shiny finish, all while serving as a built-in base and top coat.
For an extra layer of excitement, you can add some geometric patterns or stripes in complementary colors like pink or teal. Using nail art striping tape will help you achieve those clean lines effortlessly, allowing you to create fun designs that keep the focus on that stunning neon orange.
Remember these tips:
– Use a white base coat for the neon to pop even more.
– Keep your designs simple to maintain that bold statement.
– Consider a matte finish for an edgy vibe.
With these products and tips, you’ll be ready to flaunt those gorgeous neon orange nails all summer long!
9. Painted Orange Leaves
For a more artistic approach, try painted orange leaves!
This design focuses on simple orange leaf shapes against a nude or light background. It’s understated yet elegant, perfect for a chic summer look. Use a fine brush to create the leaf outlines and fill them in with a bright orange. For this, consider the fine detail nail art brush set, which will help you achieve precise lines and shapes effortlessly.
To enhance the vibrancy of your leaves, use the bright orange nail polish. This long-lasting vegan formula provides quick-drying, one-coat full coverage, ensuring your design stands out beautifully against the base.
For a touch of glam, add some metallic elements with gold nail art foil. This will create a striking contrast and elevate your overall look. You could also use a matte finish for the leaves to contrast with a glossy base, keeping the overall design balanced and elegant.
This design is great for those who prefer a minimalist style while still embracing the fruity theme.
10. Orange Glitter Glam
End your fruity nail art journey with some sparkling orange glitter! This design combines the bright, cheerful essence of orange with glam. Start with an orange base using the 60 Seconds Super-Shine Nail Polish, 410 Wild Spice for a vibrant foundation. Then, apply glitter on the tips or over the entire nail for a dazzling effect. This is perfect for summer parties or special occasions where you want to shine.
For those who want to get creative, consider using the Nail Art Glitter Set. This kit comes with various glitters, brushes, and tools, allowing you to mix different sizes of glitter for added depth and a unique effect.
Key points for this look:
– Use a base coat for easy removal later.
– Experiment with mixed glitter for a unique effect.
– Pair it with simple outfits to let your nails steal the show.
Conclusion
These 10 vibrant orange fruit nails are sure to inspire your summer manicure game!
From playful designs to chic styles, there’s something for everyone to enjoy. Don’t shy away from experimenting with colors and patterns that celebrate the freshness of summer fruits.
So grab your nail polish and start creating these fruity masterpieces!
Note: We aim to provide accurate product links, but some may occasionally expire or become unavailable. If this happens, please search directly on Amazon for the product or a suitable alternative.
This post contains Amazon affiliate links, meaning I may earn a small commission if you purchase through my links, at no extra cost to you.
When it comes to nail art, American manicure nails have taken the spotlight, blending chic elegance with versatile styles.
These manicures are all about sophistication, featuring clean lines, subtle hues, and a touch of creativity that makes them perfect for any event—be it casual outings or glamorous parties.
In this article, we’re showcasing 15 stunning American manicure nail looks that you can easily replicate. Whether you’re a fan of classic designs or looking for something trendy, there’s a style here for everyone. Get ready to be inspired by these chic nail ideas that are bound to turn heads and elevate your manicure game!
Ombre nails are a delightful blend of colors that create a smooth gradient effect, giving your fingertips a chic and sophisticated look.
This particular American manicure features a soft pink to white ombre transition, making it perfect for both casual and formal occasions. The ombre effect is not only visually pleasing but also provides a unique tactile experience as the colors blend seamlessly.
Tips for Achieving Ombre Nails:
– Use a makeup sponge for a soft gradient effect.
– Try different color combinations, like lavender to white or nude to pink.
– Seal with a glossy top coat for that extra shine.
This style is particularly popular for bridal looks, photo shoots, or just making your everyday style feel a bit more special. Pair it with dainty rings for a feminine touch, and you’re ready to dazzle!
Who said French tips have to be boring? This chic twist on the classic design incorporates a sprinkle of glitter that brings a touch of glam without being over the top.
The nude base allows the sparkle to pop, making your nails look effortlessly chic. This design is versatile enough for work, special events, or even a night out with friends.
Glittery French Tips Tips:
– Choose fine glitter for a more subtle sparkle.
– Experiment with different colors for the tips—gold, silver, or even pastel tones.
– Keep the rest of your look balanced; let the nails be the star!
This style is perfect for those who want a little bit of sparkle in their lives while keeping it classy.
The almond shape is timeless and elegant, elongating your fingers and providing a sophisticated backdrop for any nail design.
This particular style showcases a beautiful nude color that is versatile and chic. The almond shape, paired with the right nail polish, can be both understated and striking, making it suitable for any occasion.
Almond Shape Tips:
– Make sure to file your nails to a rounded point for that perfect almond look.
– Opt for high-quality nail polishes for a smooth finish.
– Consider adding a matte topcoat for a trendy twist!
Almond nails can easily transition from day to night, making them a favorite among fashionistas.
Floral designs are not just for spring! This chic American manicure showcases delicate floral art that adds a feminine touch to your nails.
Using soft pastels for the base and intricate white floral designs, this look is both elegant and playful. It’s perfect for weddings, brunches, or any occasion where you want to feel a little extra special.
Floral Design Tips:
– Use a fine nail brush for detailed floral work.
– Consider using nail stickers if you’re short on time.
– Pair with a simple outfit to let your nails shine!
Floral designs can be customized to fit any season, making them a versatile choice that never goes out of style.
Sometimes, less is more. A glossy nude finish offers a sophisticated and polished look that’s perfect for any occasion.
This style emphasizes the natural beauty of your nails while providing a clean and chic appearance. Whether you’re at the office or out for a casual dinner, glossy nude nails are a timeless choice.
Nude Finish Tips:
– Choose a shade that complements your skin tone for the best effect.
– A glossy topcoat is essential for that salon-fresh look.
– Maintain your nails with regular manicures to keep them looking pristine.
The glossy nude finish is a great way to keep your nails looking elegant without the fuss of intricate designs.
Stand out with triangle tips! This modern take on the French manicure features sharp, geometric shapes that add an edgy vibe to your nails.
Using contrasting colors, such as black and white or vibrant hues, this design allows for personal expression. Perfect for fashion-forward individuals, triangle tips can elevate any outfit and make a bold statement.
Triangle Tip Tips:
– Use tape to create sharp lines for the triangles.
– Experiment with color combinations for a unique twist.
– Keep the rest of your nails simple to let the design shine!
Triangle tips are perfect for those who want to make a statement without compromising on elegance.
Half-moon designs are making a comeback! This chic manicure features a contrasting color at the base of the nail, creating a fresh and modern look.
The half-moon manicure can be dressed up or down, making it a versatile choice for any occasion. Whether you’re at work or attending a wedding, this design is sure to impress.
Half-Moon Tips:
– Use a small dotting tool for precise placement.
– Try different colors for the half-moon to match your outfit.
– A matte finish can add a trendy touch!
This design is a fun way to switch up your usual manicure and show off your style.
Who doesn’t love a classic red? This chic American manicure combines the timeless appeal of red with a modern twist by incorporating bold red tips.
The contrast of the nude base with vibrant red tips creates a striking visual impact that is perfect for date nights or special occasions. This design screams confidence and style.
Bold Red Tips Tips:
– Choose a high-quality red polish for a rich color.
– Keep the base nude for balance, ensuring the red pops!
– Glossy topcoat is essential for that fabulous shine.
Red tips are perfect for those who love to make a statement and feel empowered!
Less is more with minimalist lines! This style showcases simple, clean lines that create an elegant look without being overly complicated.
The use of neutral colors, paired with a few well-placed lines, transforms your nails into a chic accessory. Perfect for everyday wear or professional settings, minimalist lines are a great way to keep things fresh and modern.
Minimalist Lines Tips:
– Use striping tape for perfectly straight lines.
– Experiment with different colors—think pastels or metallics!
– Keep your nails well-shaped for the best effect.
This design is ideal for anyone wanting to keep their nails looking stylish without the fuss.
Take the ombre trend to the next level with a shimmering effect! This chic American manicure adds a layer of shimmer to the traditional ombre design, making it even more eye-catching.
The subtle sparkle catches the light beautifully, perfect for special occasions or nights out. This design is not only trendy but also exudes elegance and sophistication.
Shimmering Ombre Tips:
– Choose a shimmer polish that complements your base color.
– Apply a glossy topcoat to enhance the sparkle.
– This look is fabulous for weddings or parties!
The shimmering ombre is an exciting way to express your personality while keeping things chic.
Geometric patterns are a fun way to add a modern touch to your nails. This design features bold shapes and contrasting colors that create a striking visual appeal.
Perfect for those who love to stand out, the geometric manicure is both artistic and stylish. Pair it with minimalist jewelry for a chic, put-together look.
Geometric Patterns Tips:
– Use a fine brush for intricate designs.
– Stick with a limited color palette for a sophisticated feel.
– Consider a matte finish for a trendy vibe!
This design is perfect for those who want their nails to reflect their creative side.
Metallic accents can take any manicure to the next level! This design features a nude base with metallic accents that catch the light beautifully.
The subtle shimmer adds a touch of glam while keeping the overall look chic and understated. This style is ideal for both day and night, making it a versatile choice.
Metallic Accents Tips:
– Use metallic nail tape for clean lines.
– Pair with neutral colors for balance.
– Perfect for special events or everyday wear!
Metallic accents are a great way to add a touch of luxury to your nails without going overboard.
Negative space designs are a trendy way to embrace the natural nail while adding a touch of artistry. This manicure features strategic gaps that create a chic look, perfect for modern fashionistas.
Negative space allows for creativity while keeping things minimalistic, making it ideal for any occasion.
Negative Space Tips:
– Use tape to create clean lines.
– Experiment with shapes for a unique look.
– Pair it with a glossy topcoat for added shine!
This design is perfect for those who wish to keep their nails looking fresh and stylish.
For those who love to make a statement, neon accents can add a pop of color to your American manicure. This style features a nude base with bright neon tips or accents, creating a fun and playful look.
Perfect for summer parties or festivals, neon accents are great for expressing your personality and creativity.
Neon Accents Tips:
– Use a matte topcoat to tone down the brightness.
– Pair with solid outfits for a balanced look.
– Keep the rest of your nails simple to let the neon shine!
This design is a fabulous way to show off your vibrant side.
Add dimension to your nails with a textured finish! This style combines a smooth base with a textured design on one or two accent nails, creating a chic and modern look.
The contrast between textures adds interest and sophistication, making it perfect for any event.
Textured Finish Tips:
– Use textured polish or nail art tools for unique designs.
– Keep the color palette cohesive for a polished finish.
– Ideal for those who love to experiment with different styles!
This design is perfect for creative souls wanting to take their nail art to the next level.
American manicure nails are all about versatility and elegance, allowing you to express your personal style effortlessly.
With these 15 chic looks, you’re bound to find inspiration for your next manicure. From subtle designs to bold statements, there’s something here for everyone.
So grab your favorite nail polish and get creative—your nails are your canvas!
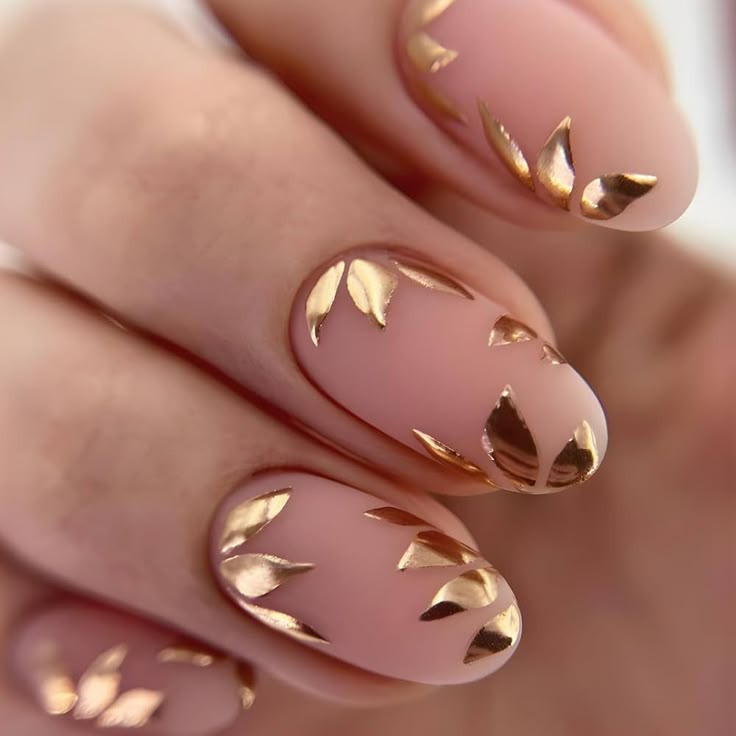


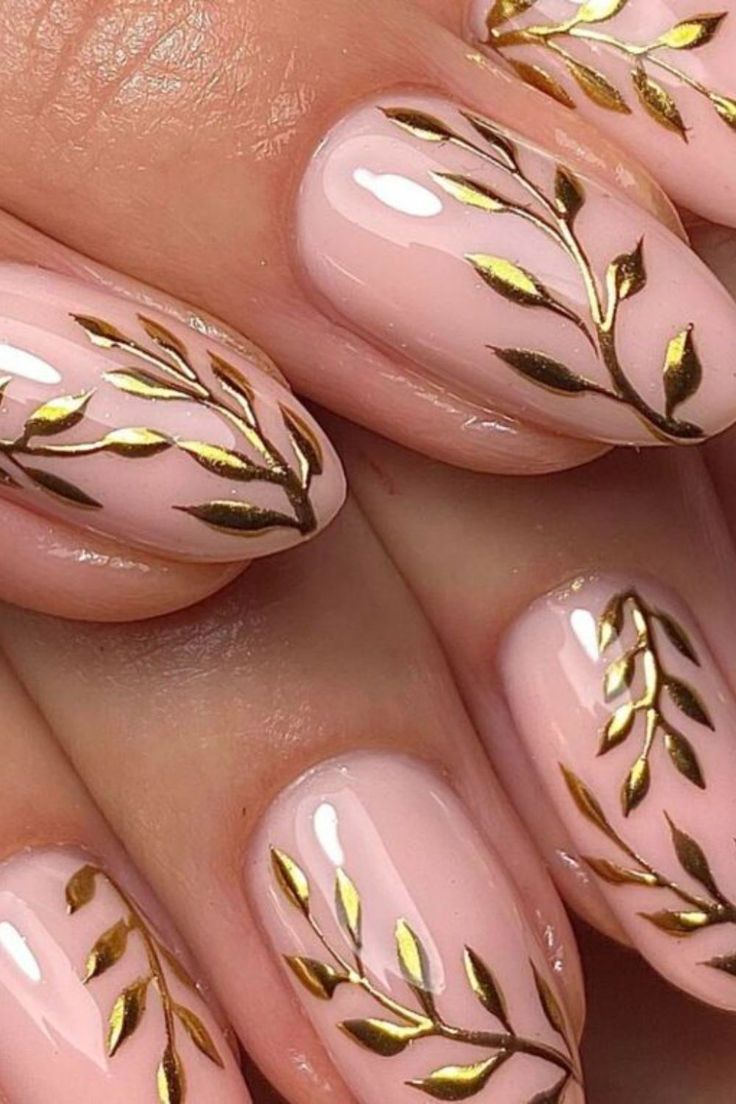
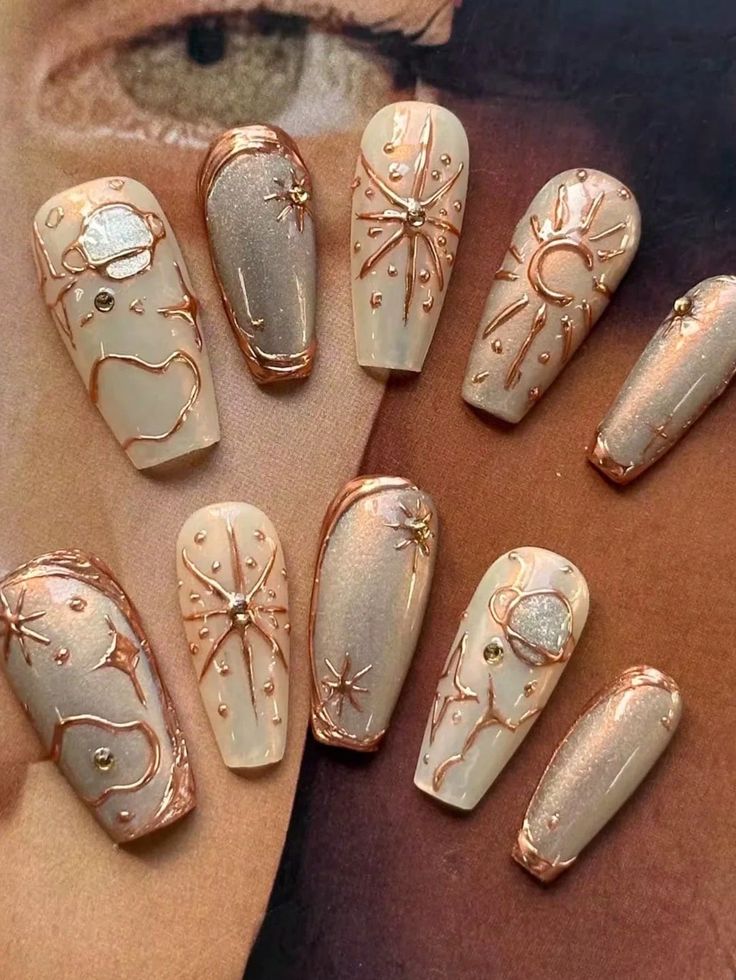
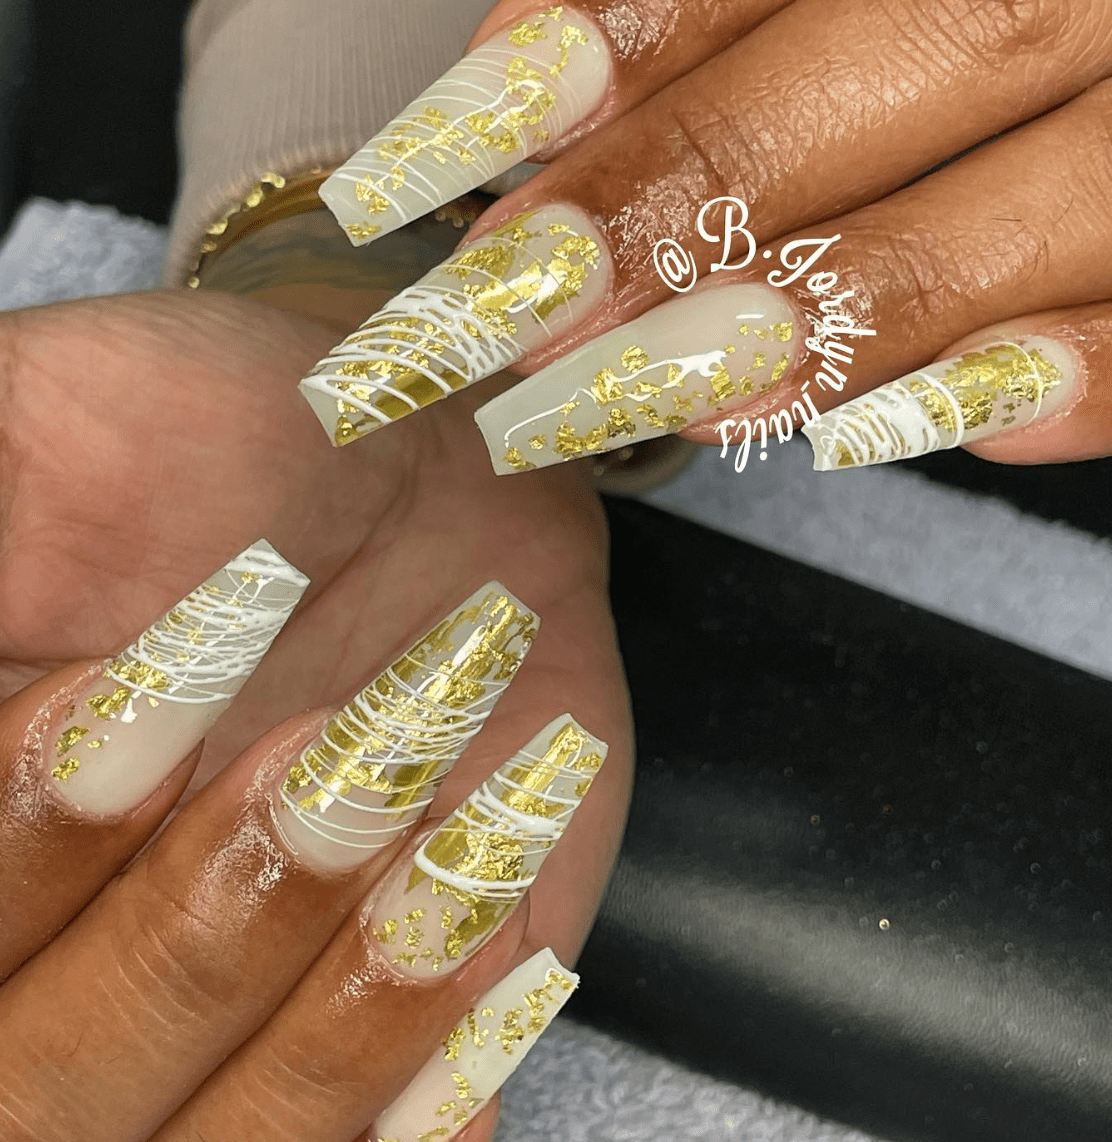
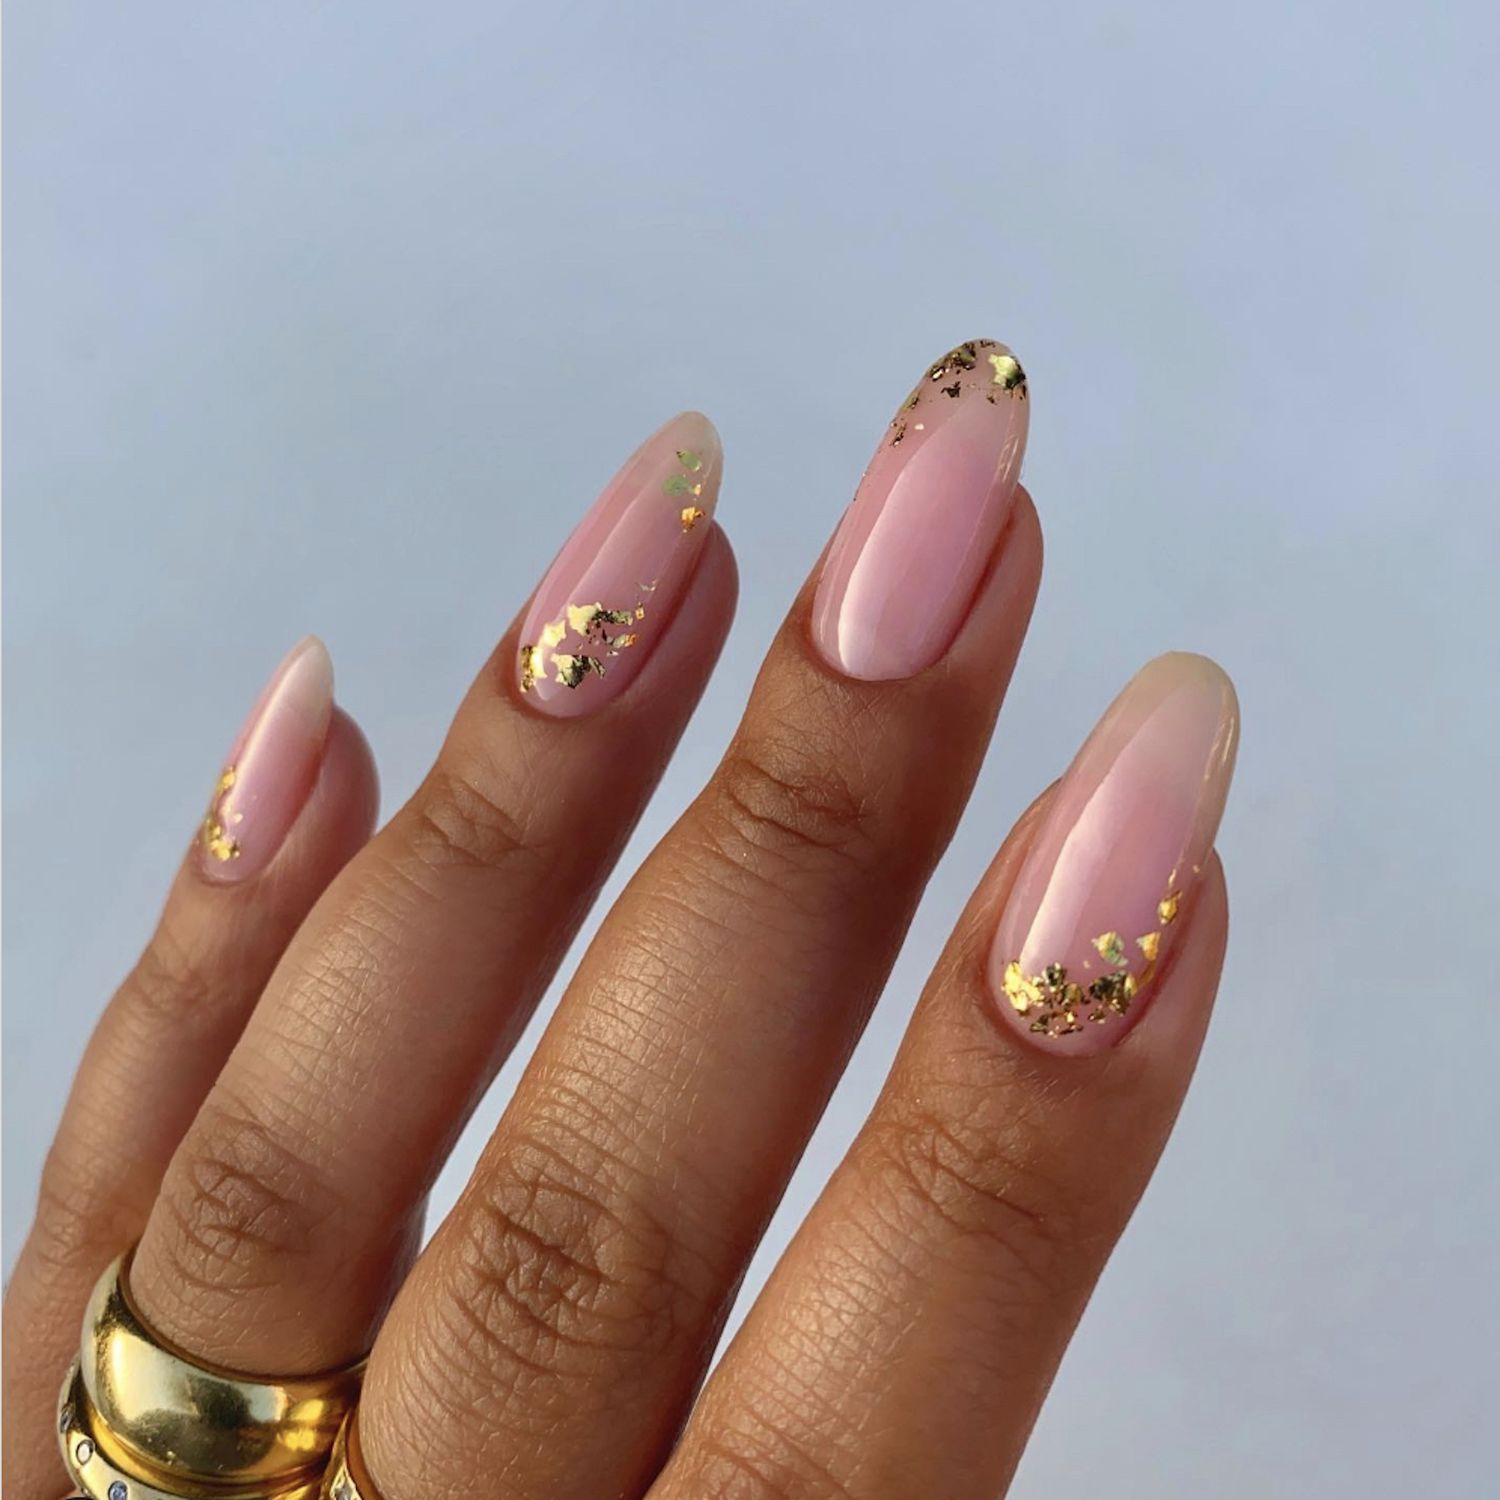

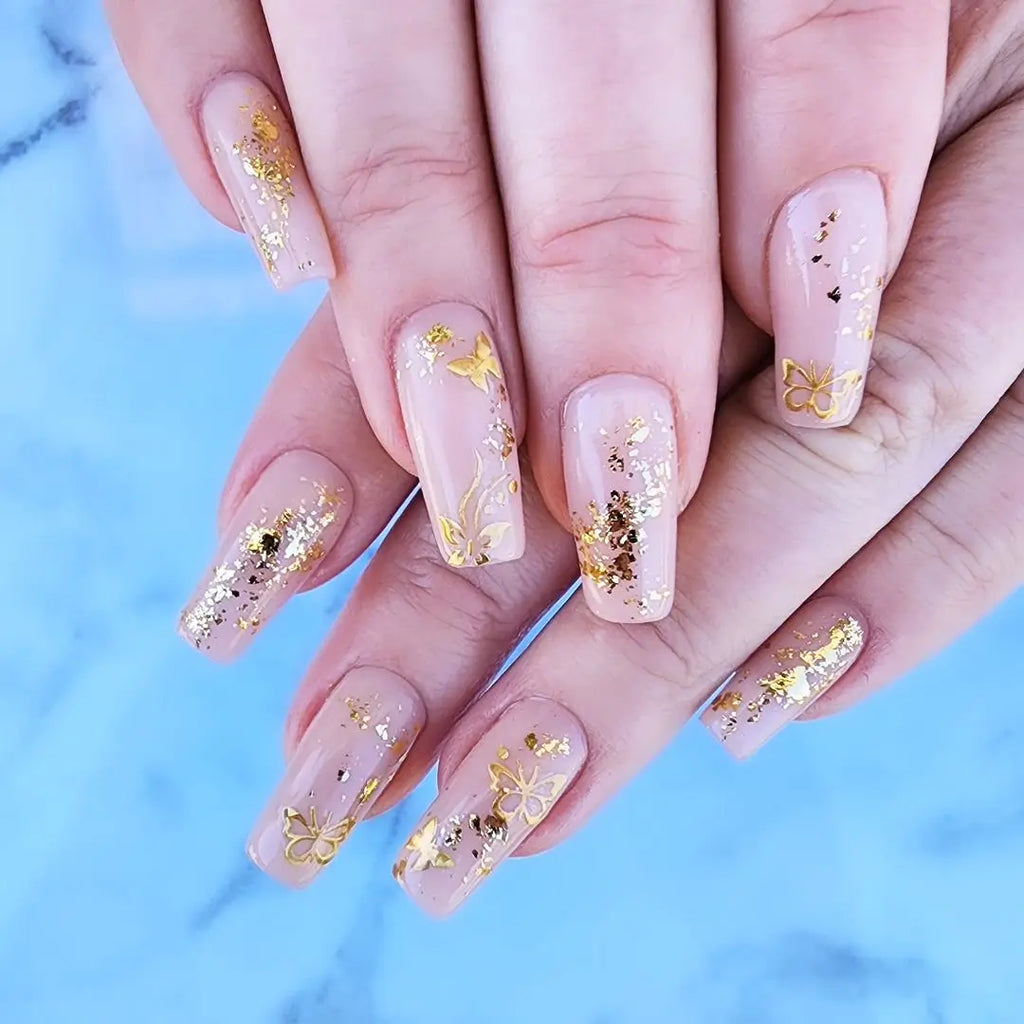
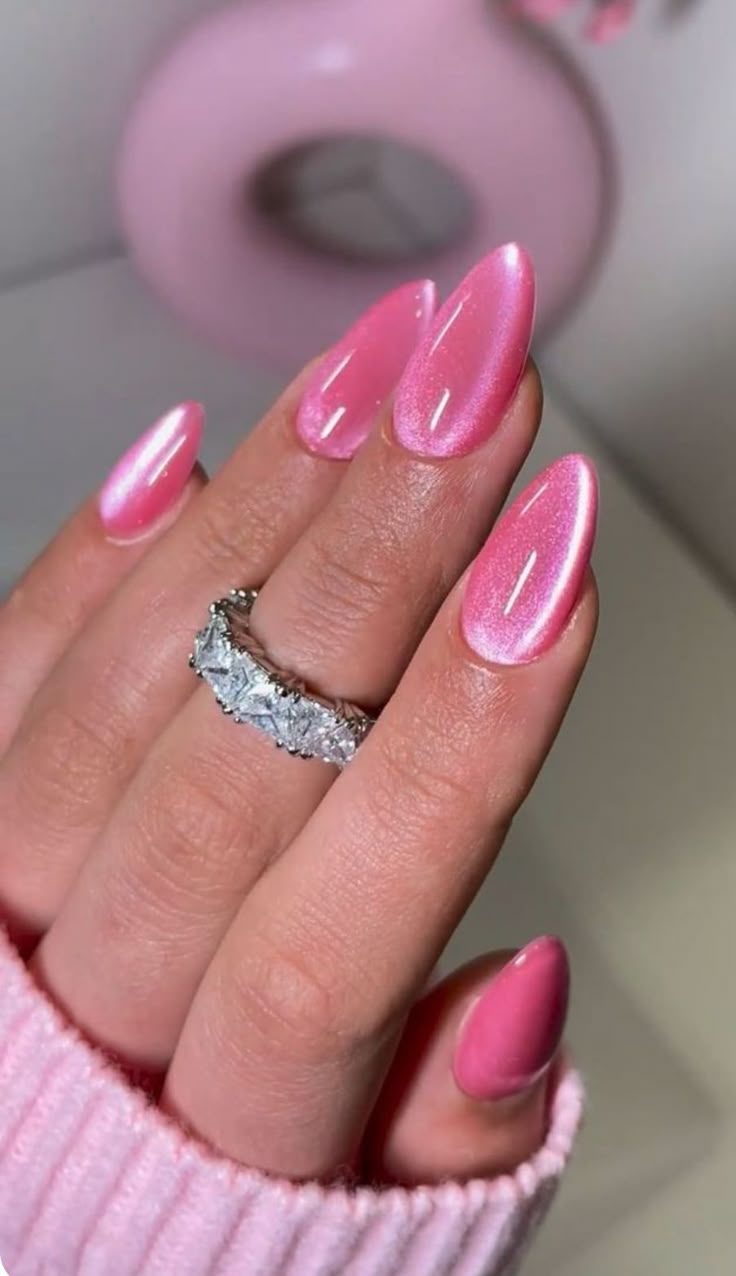

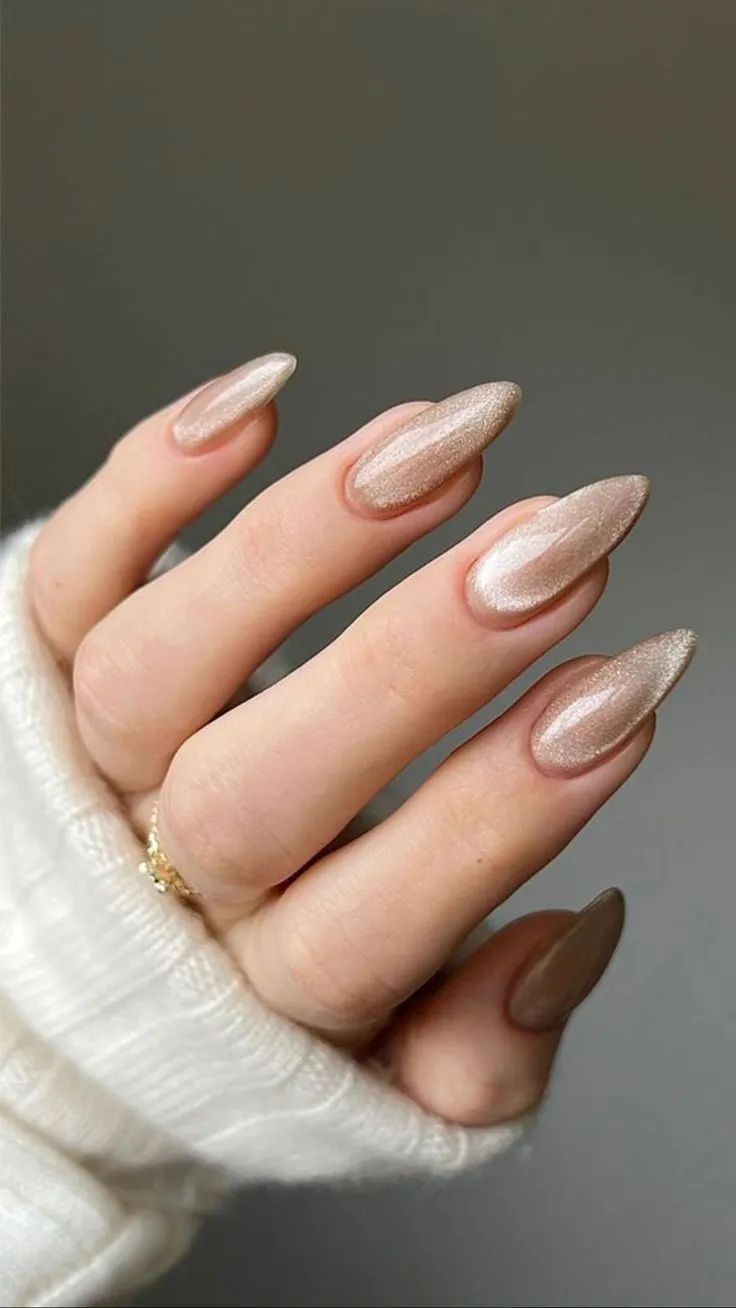
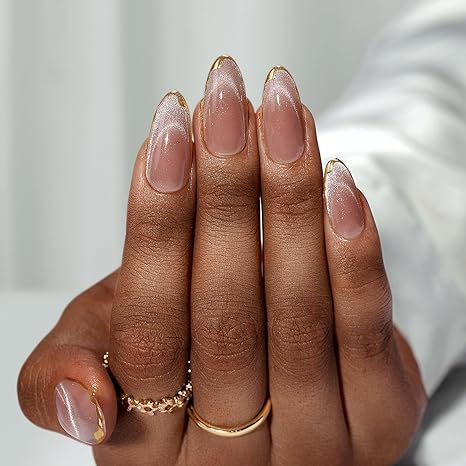

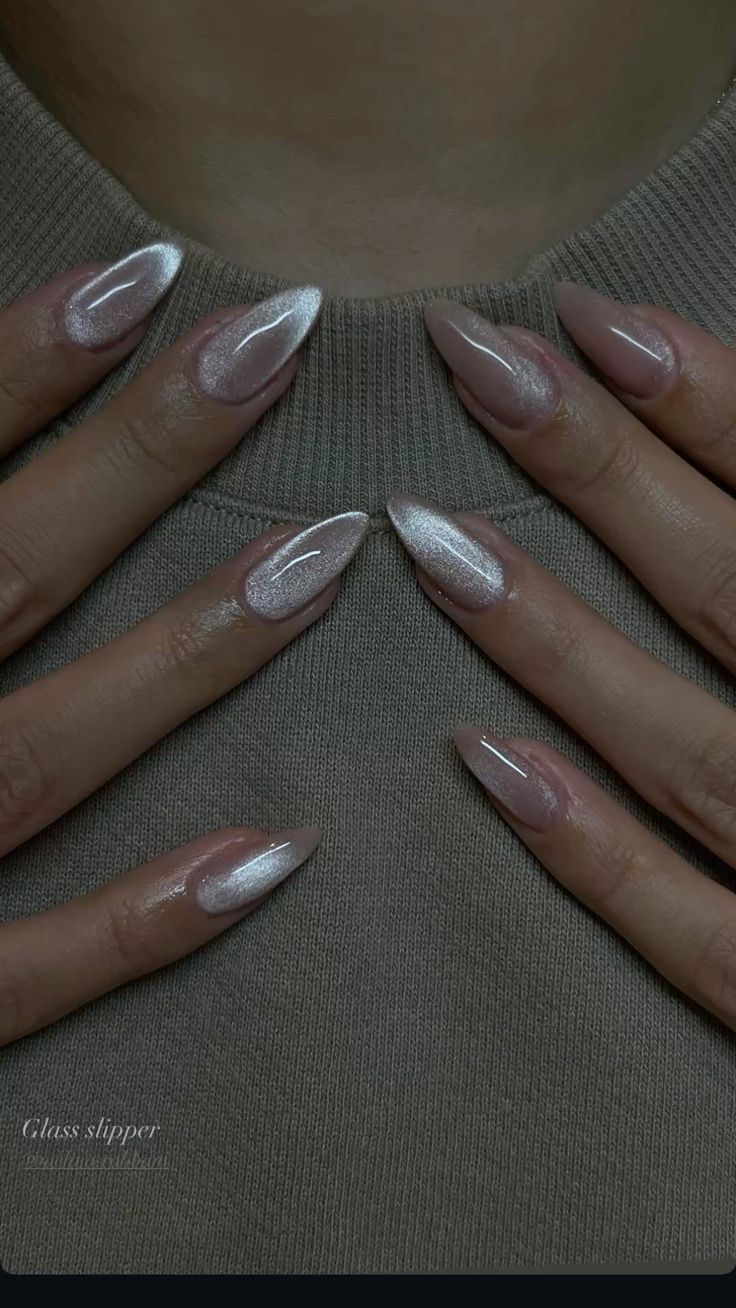


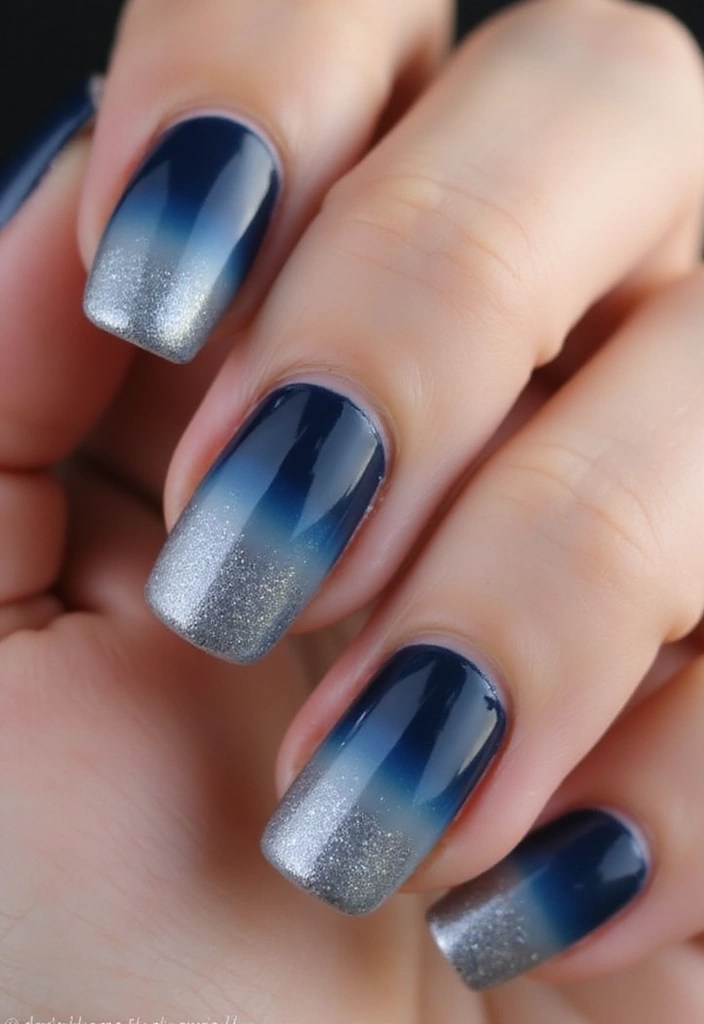
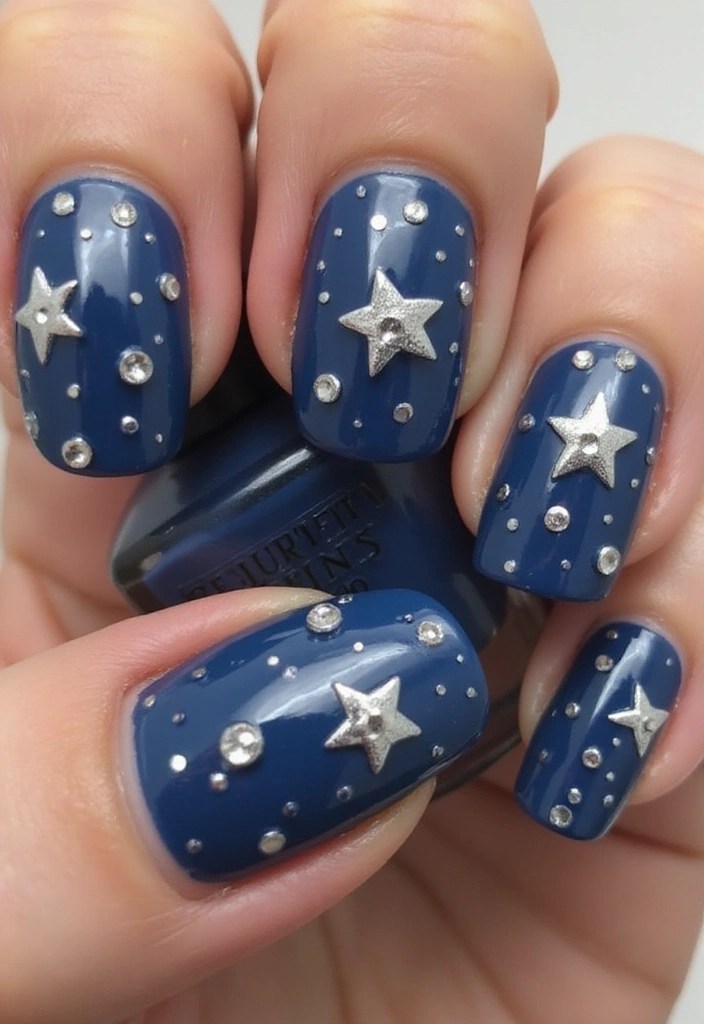

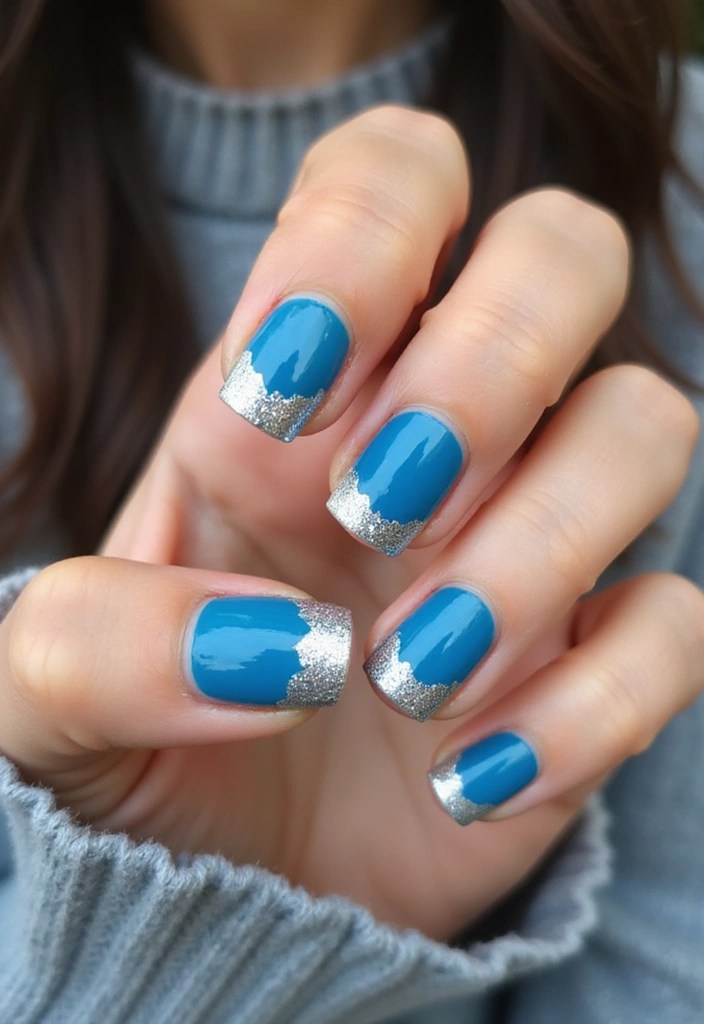

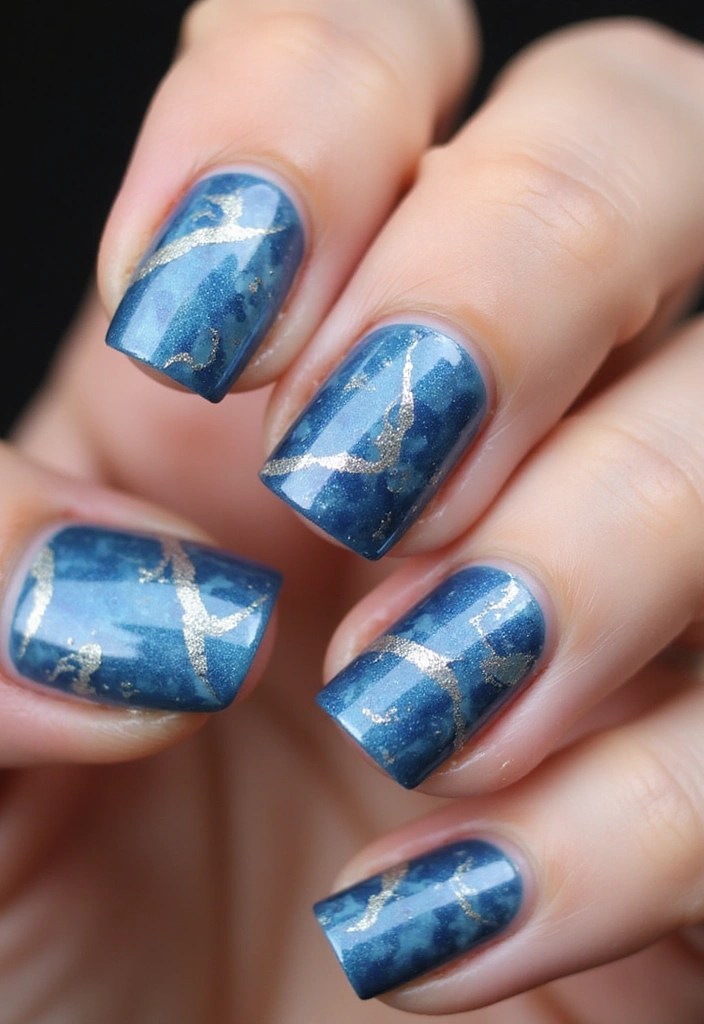
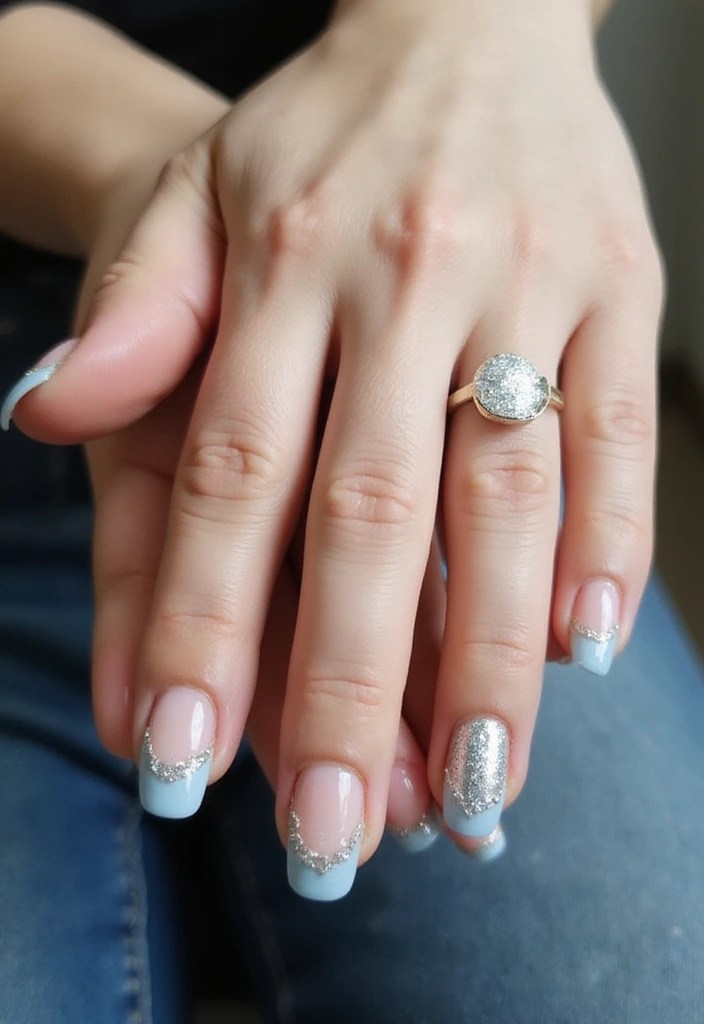
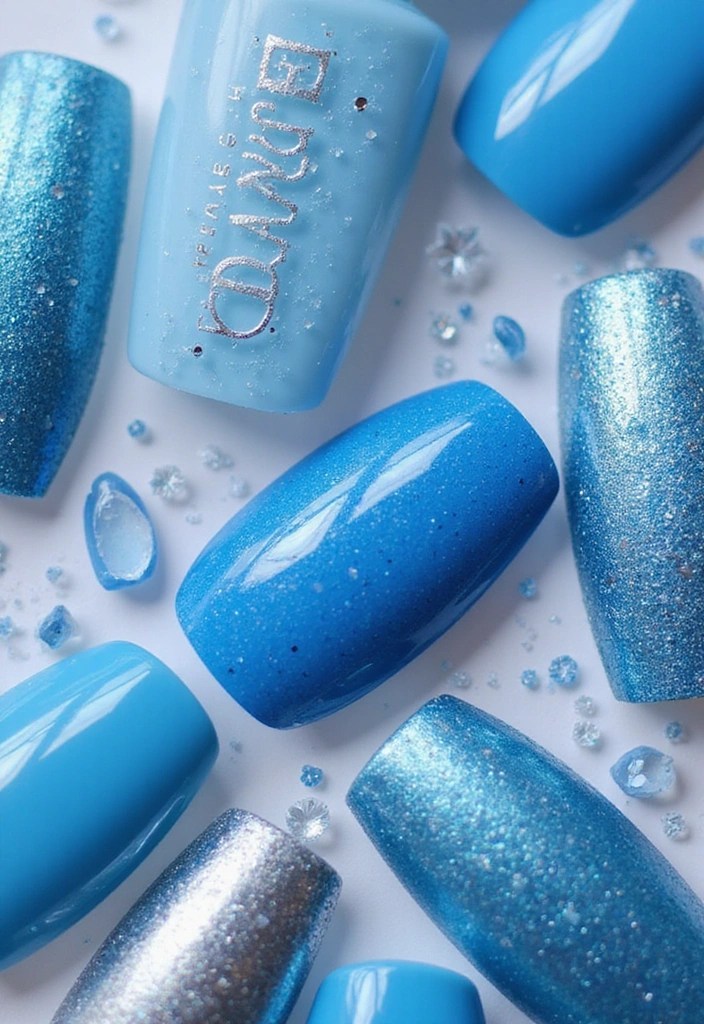

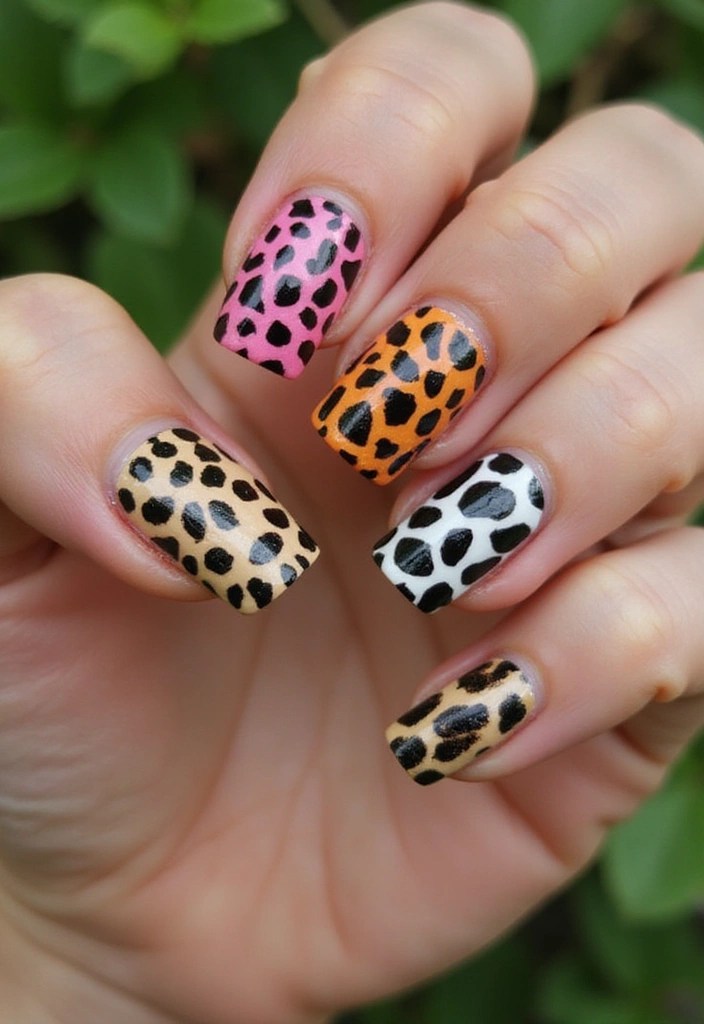
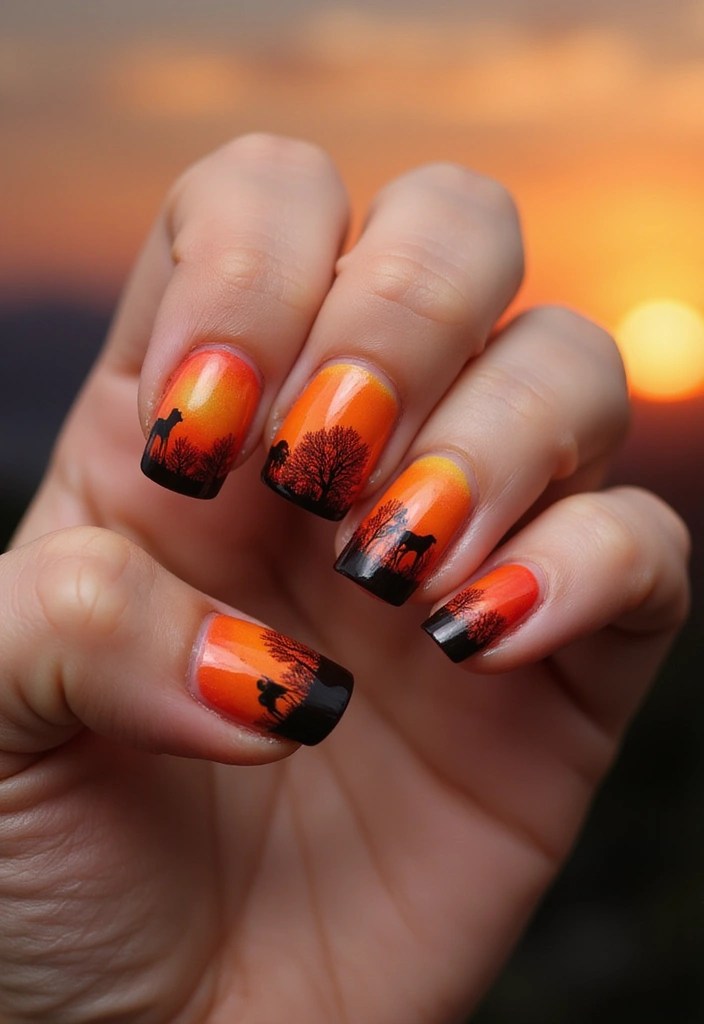
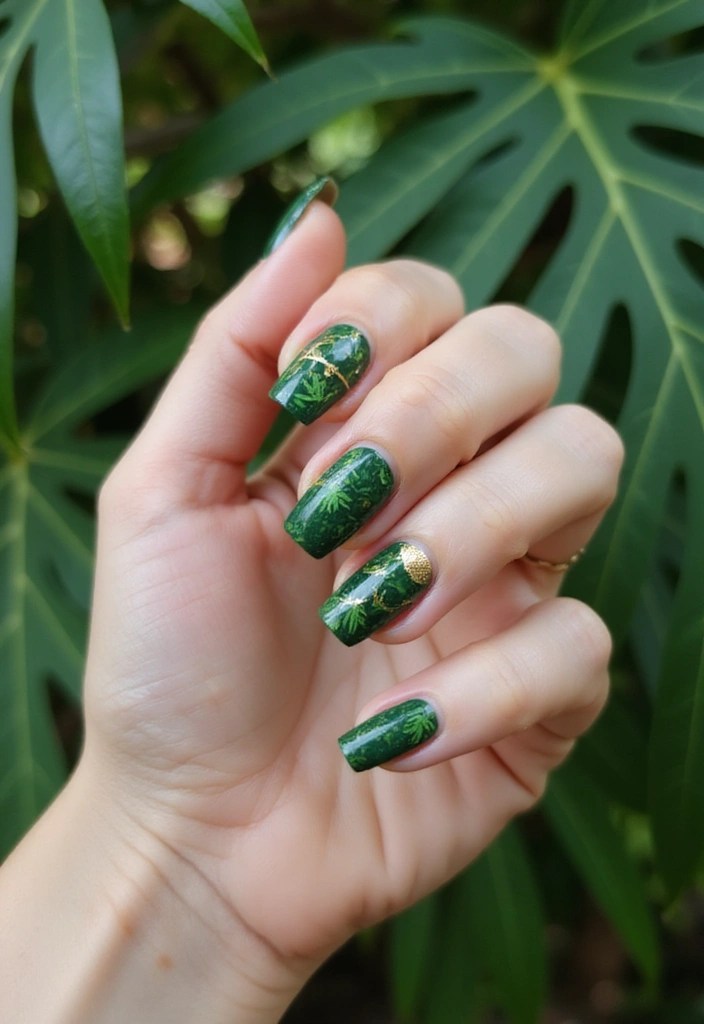
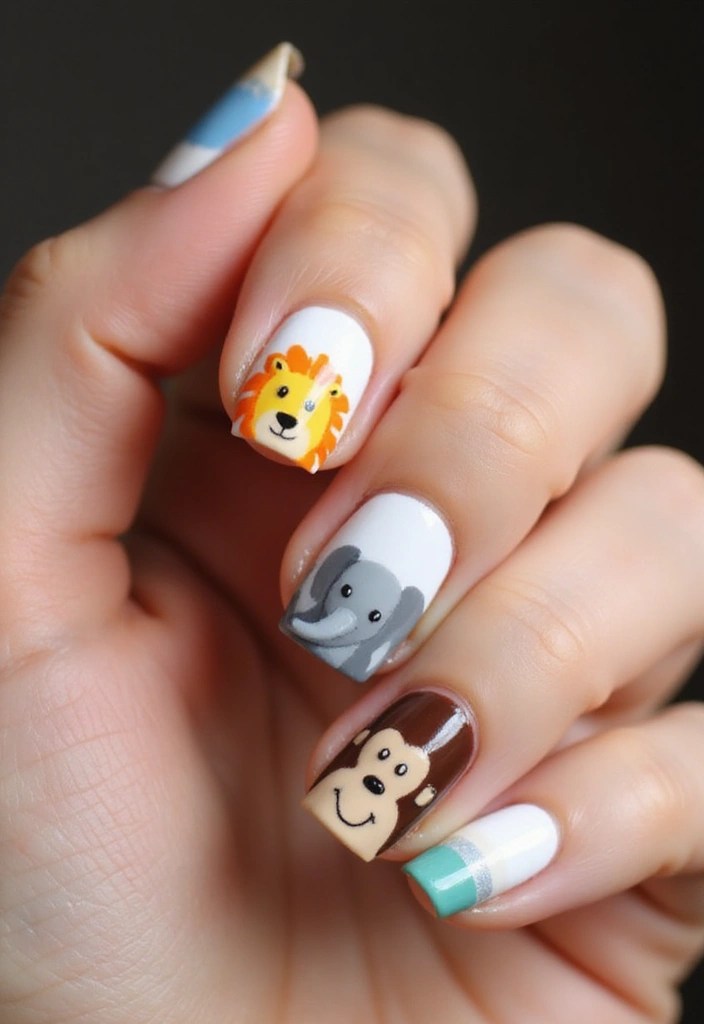
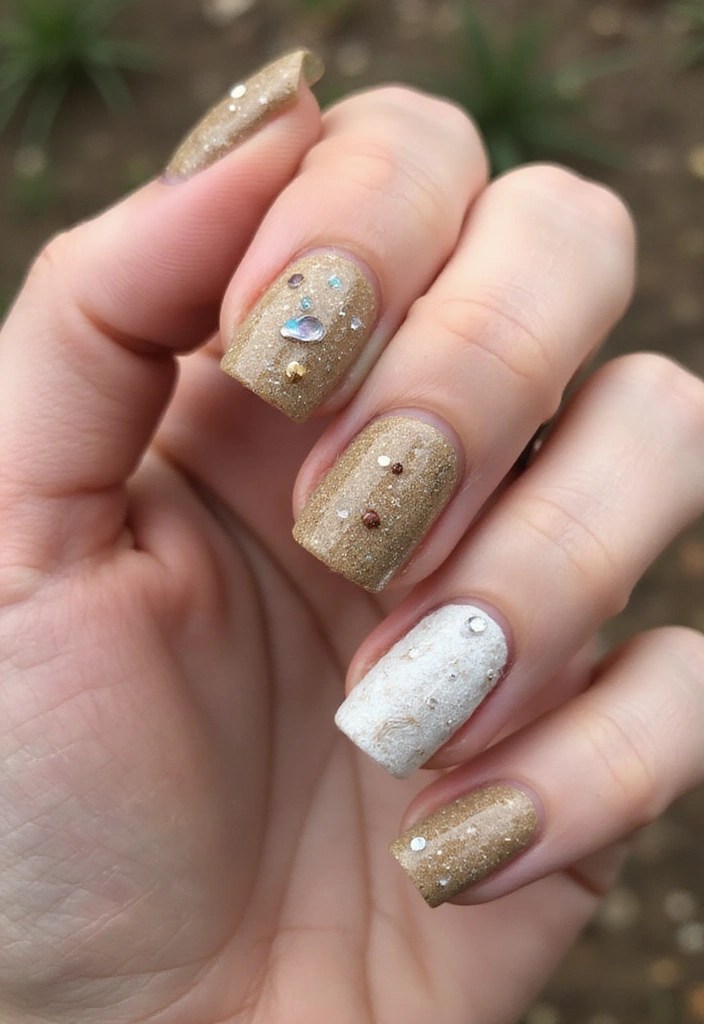
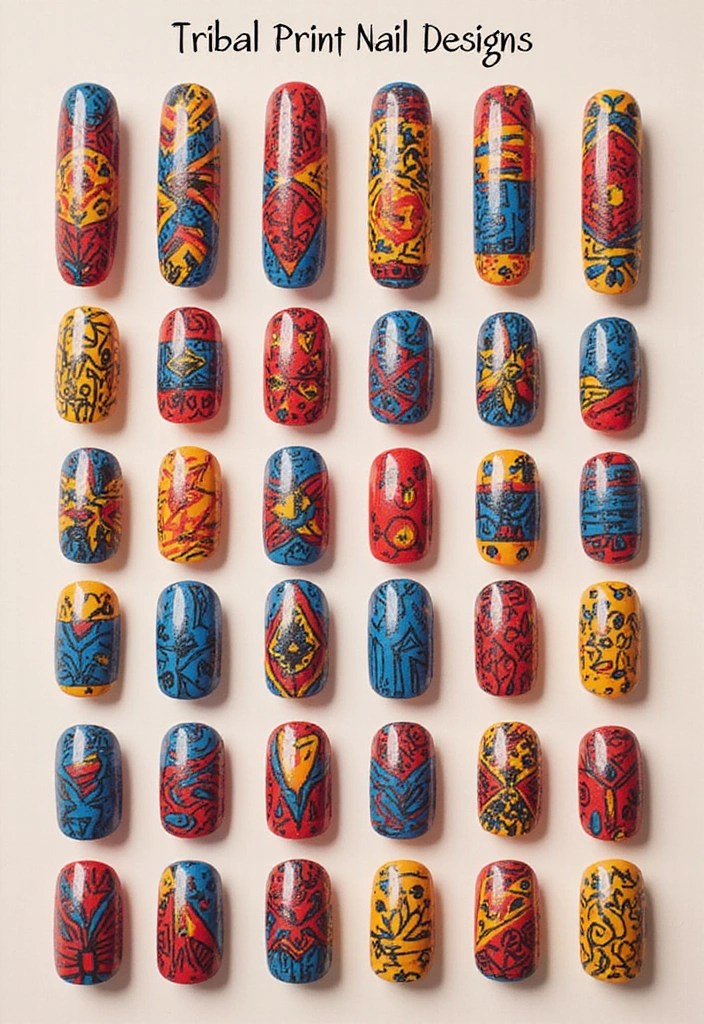
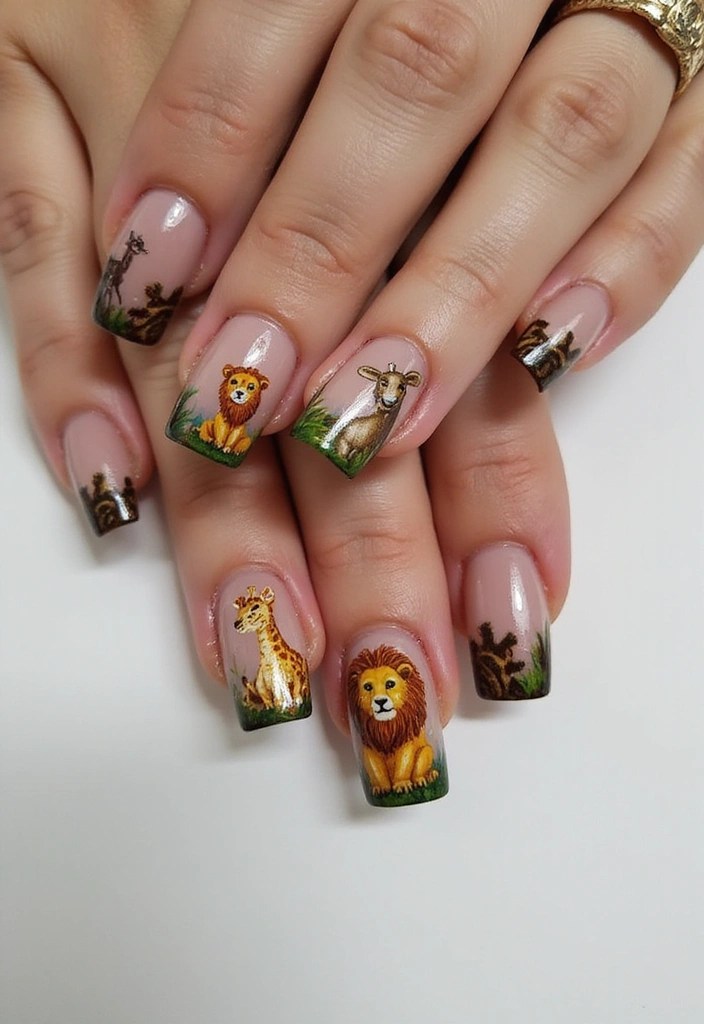

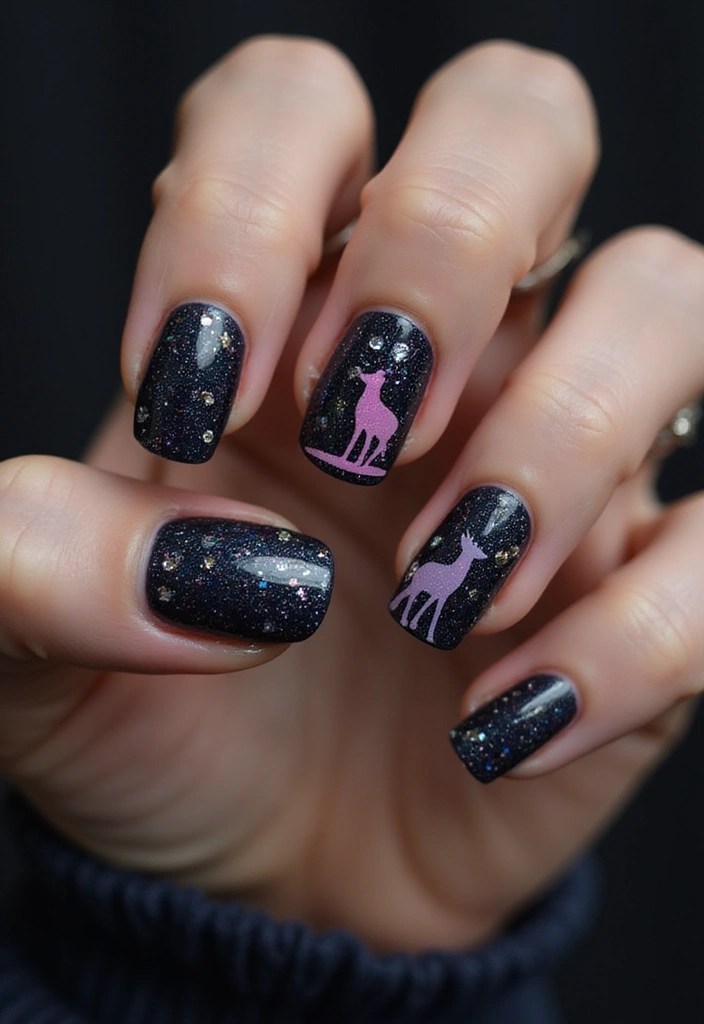
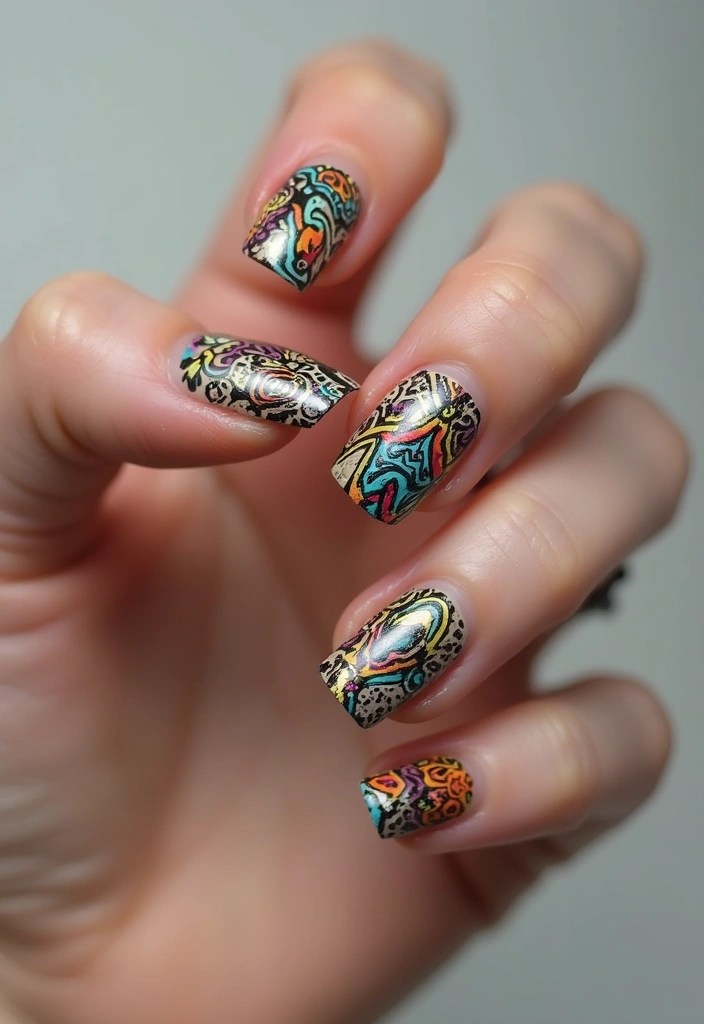
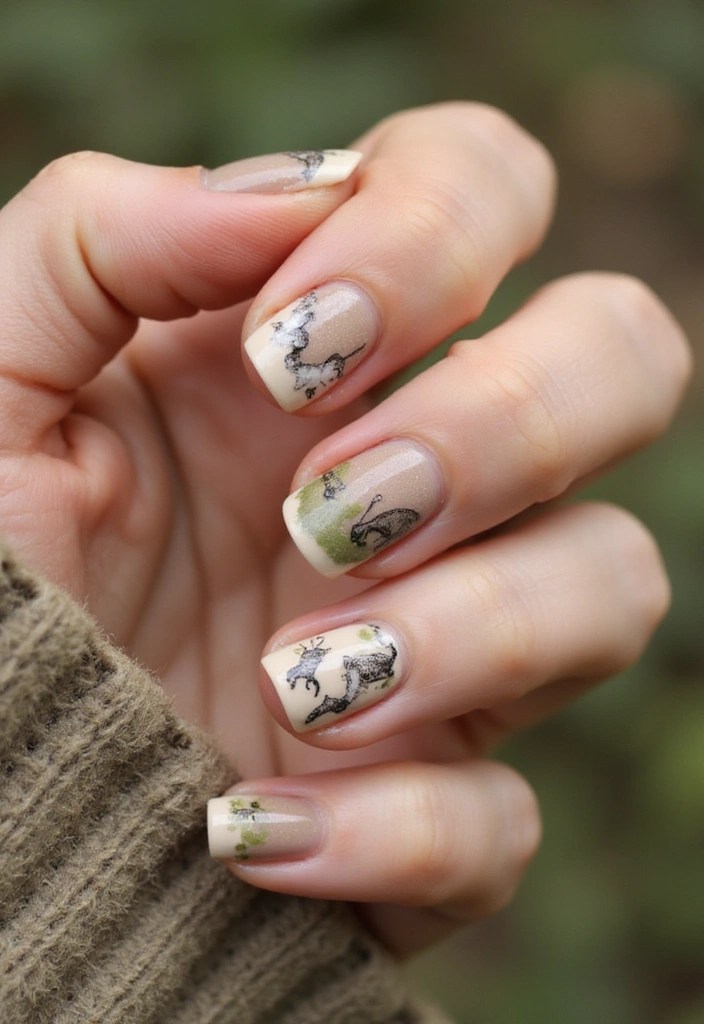
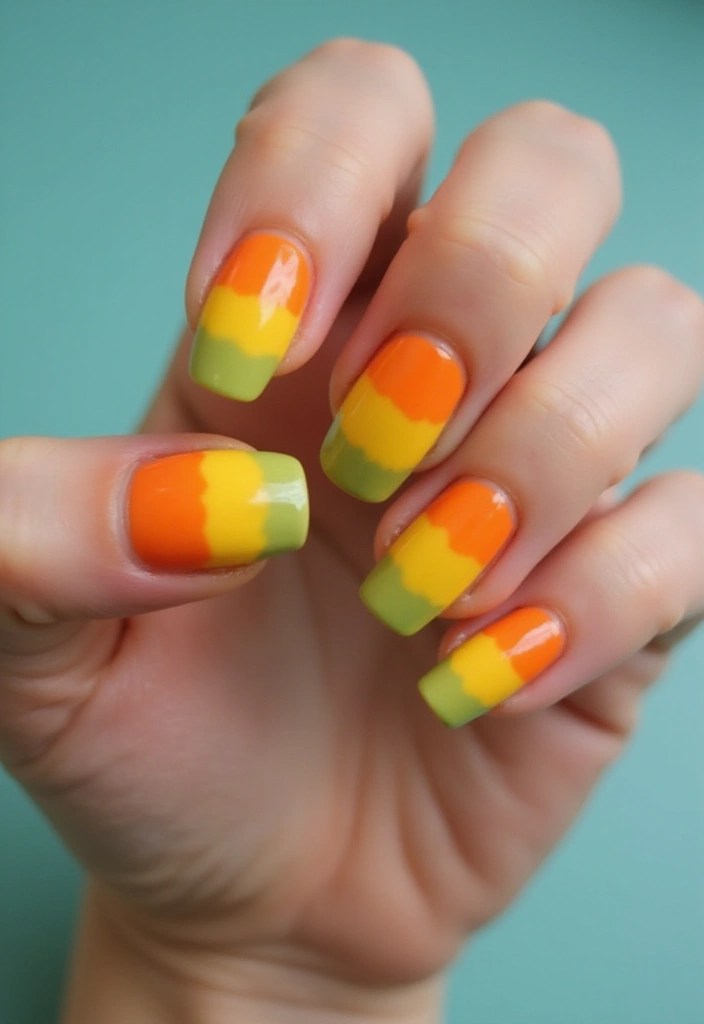


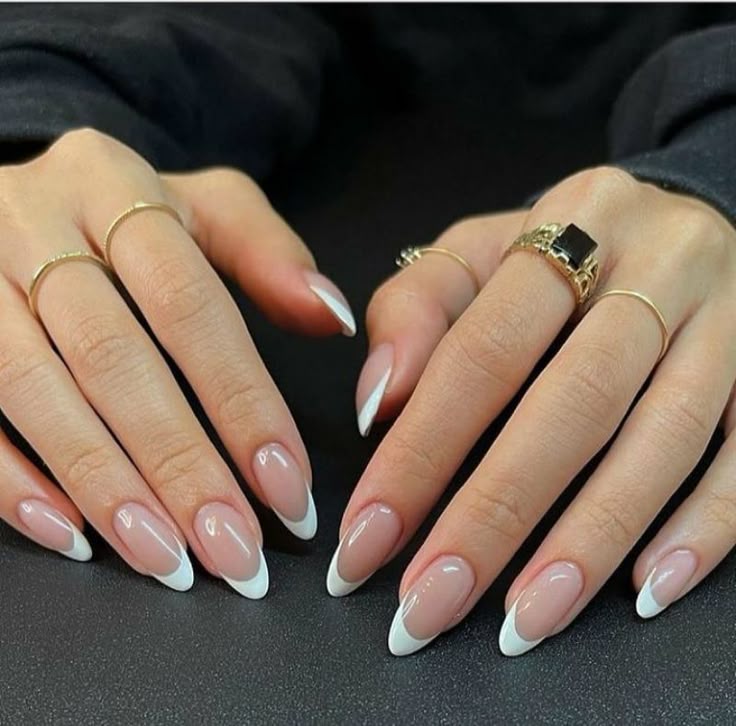

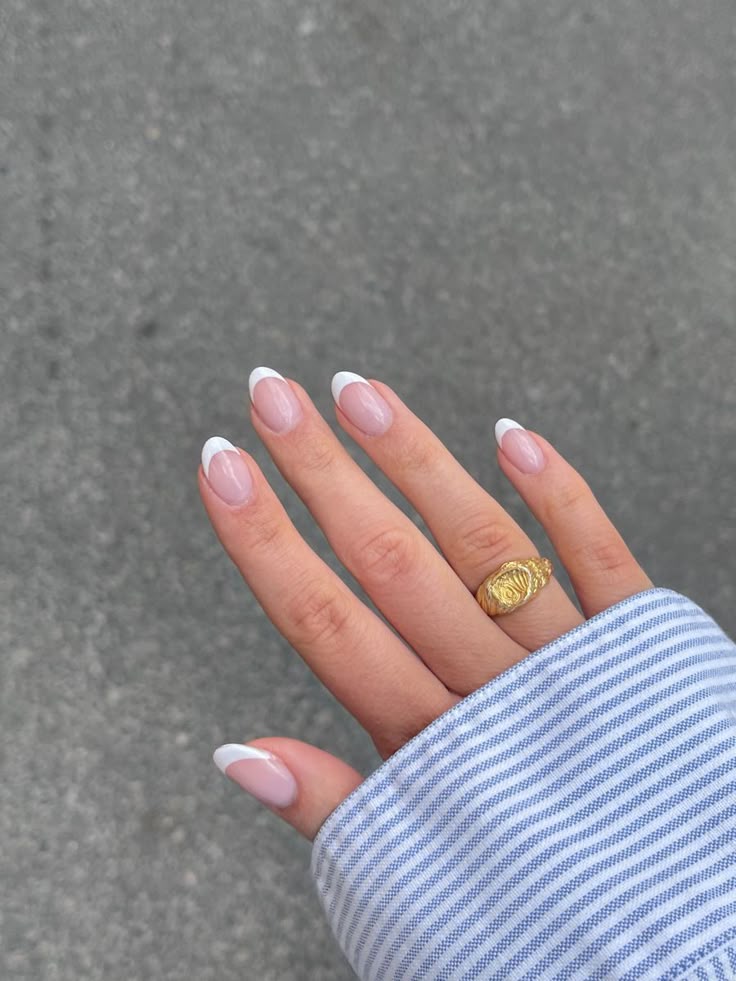
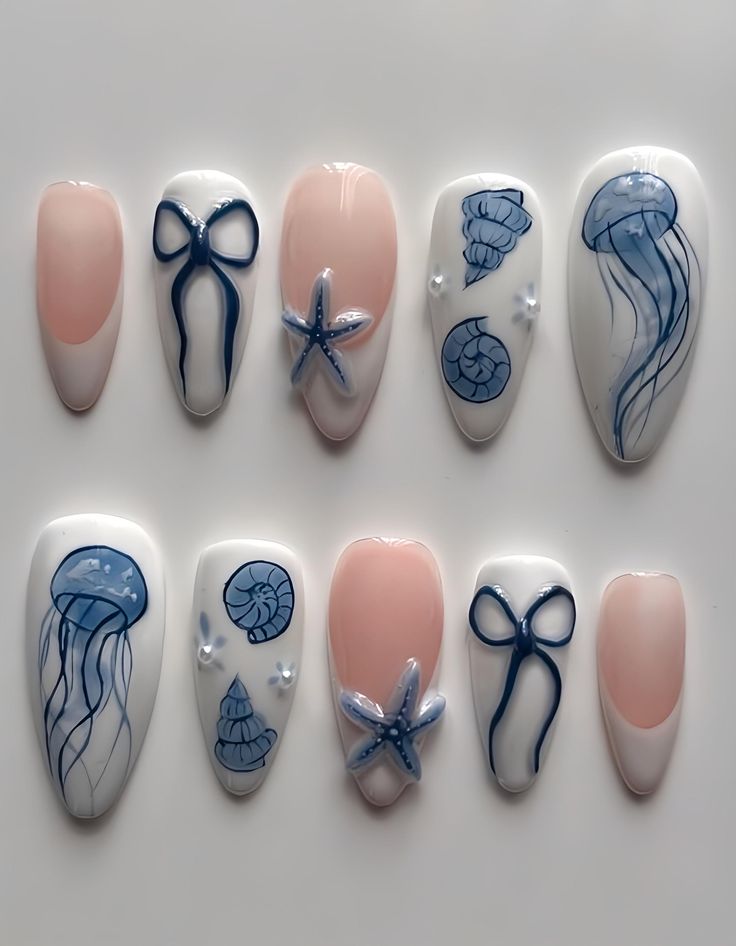
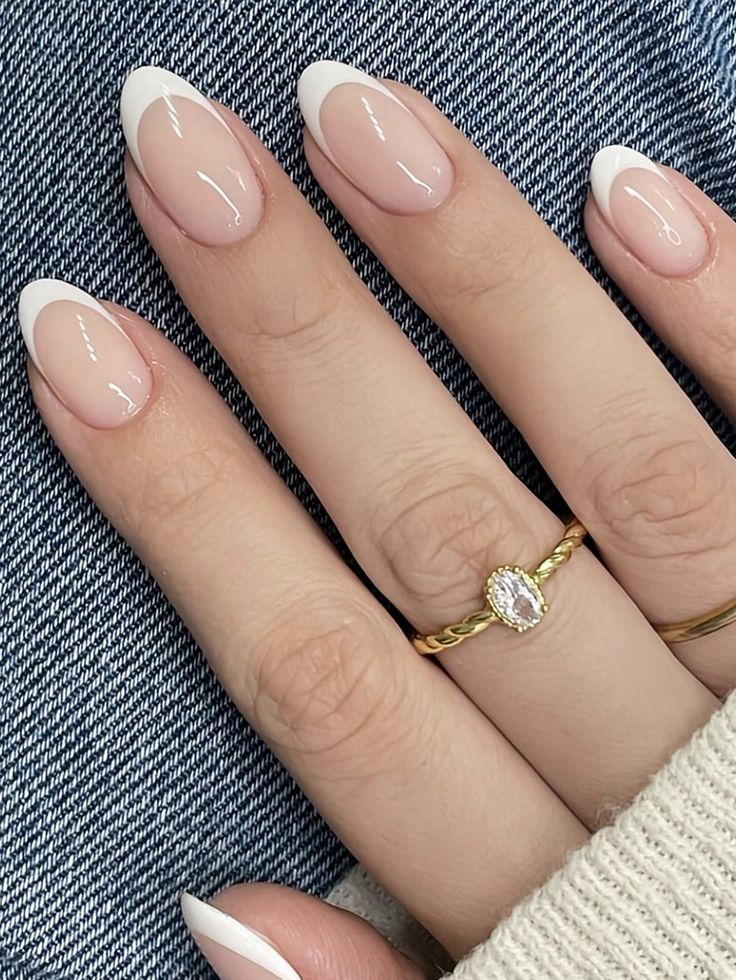

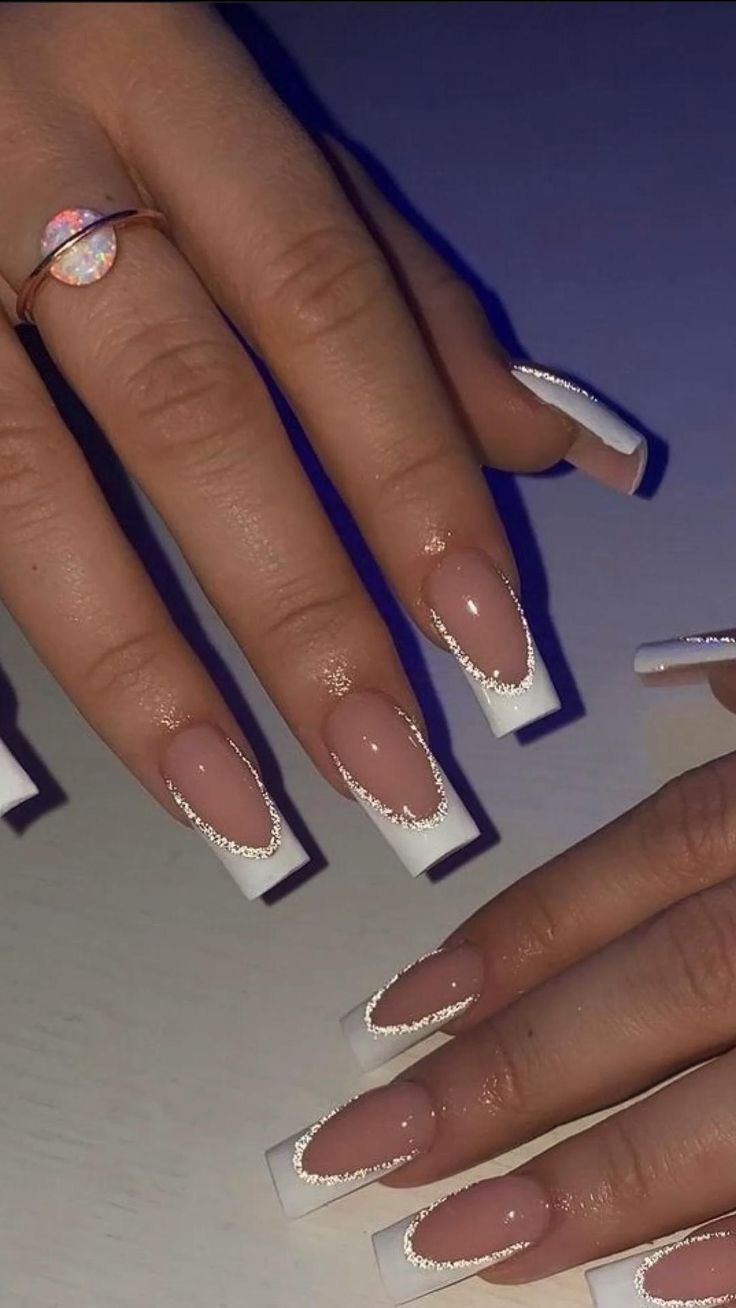
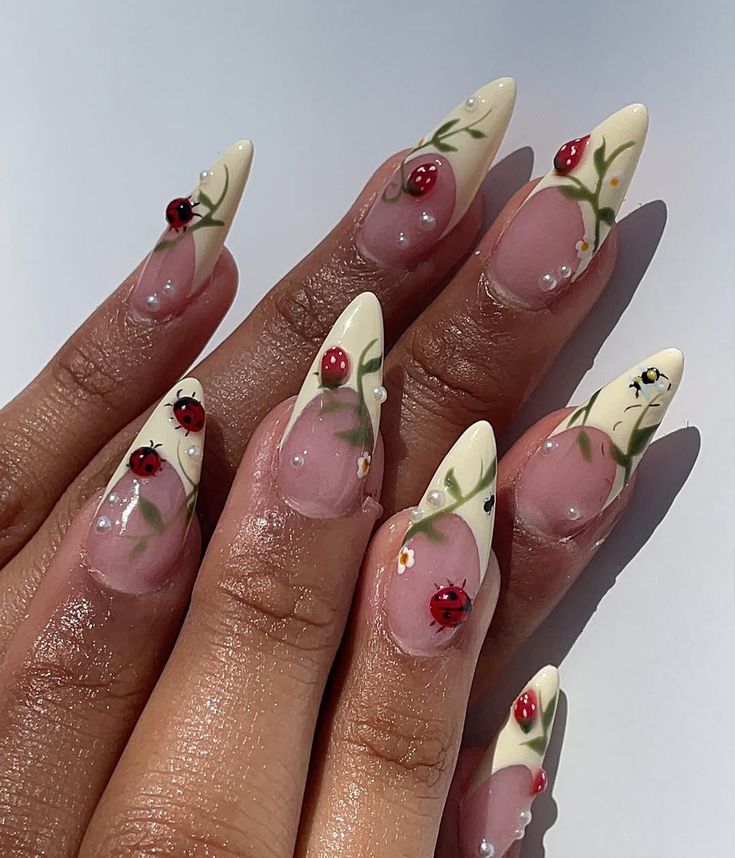

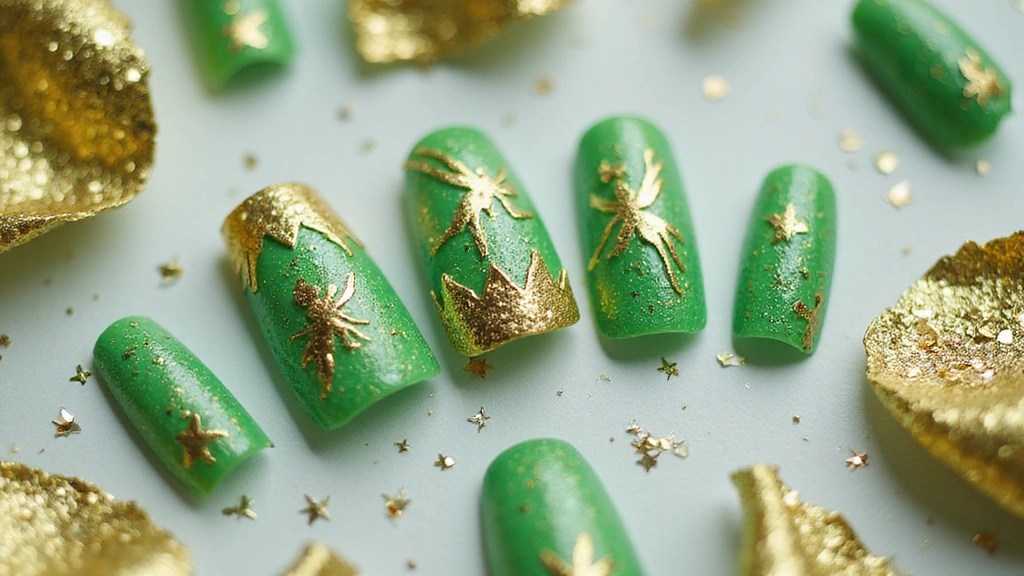
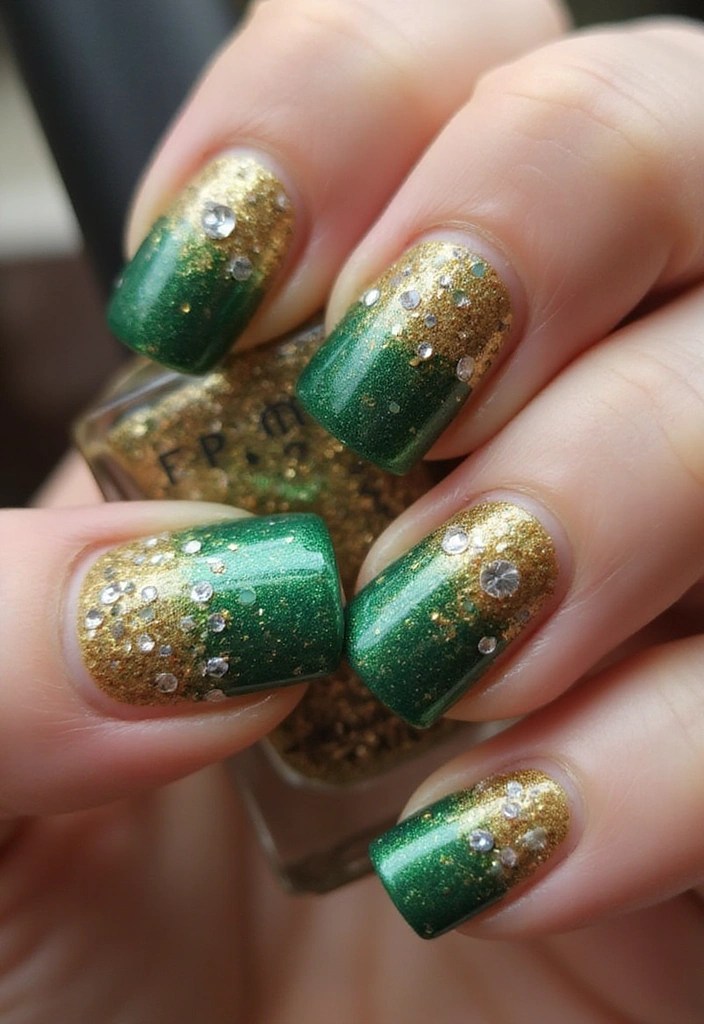
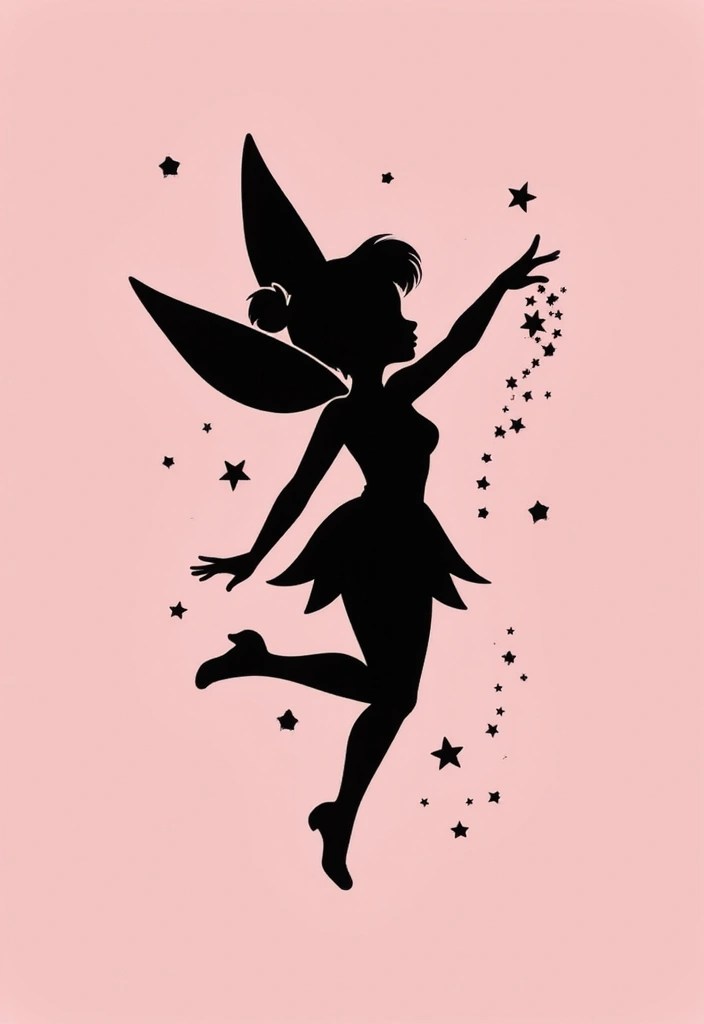
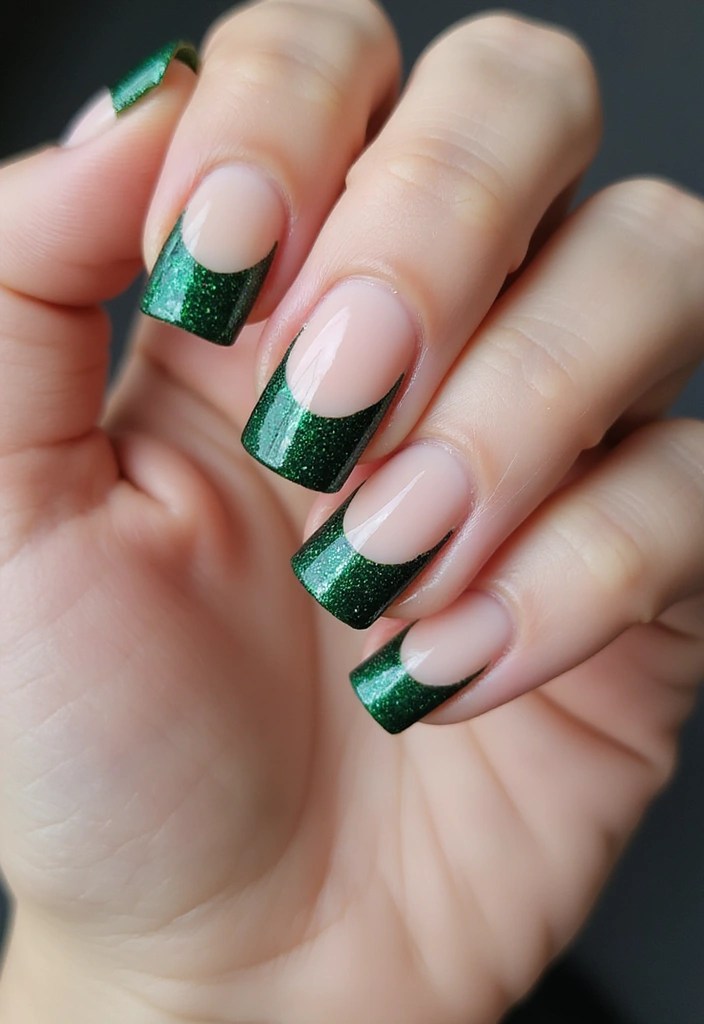
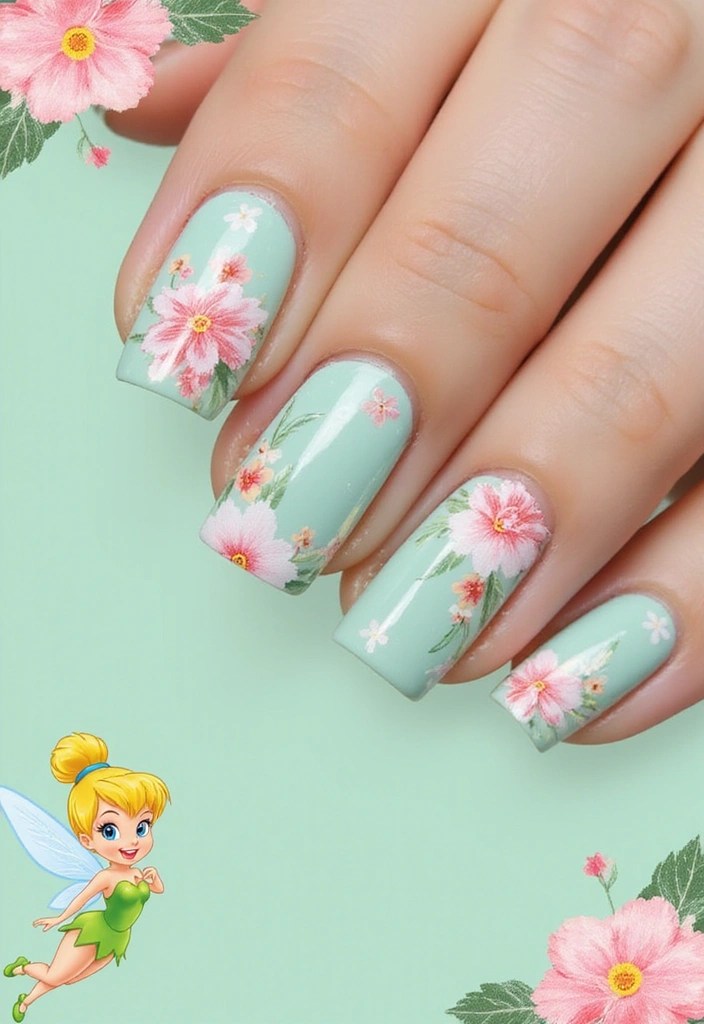
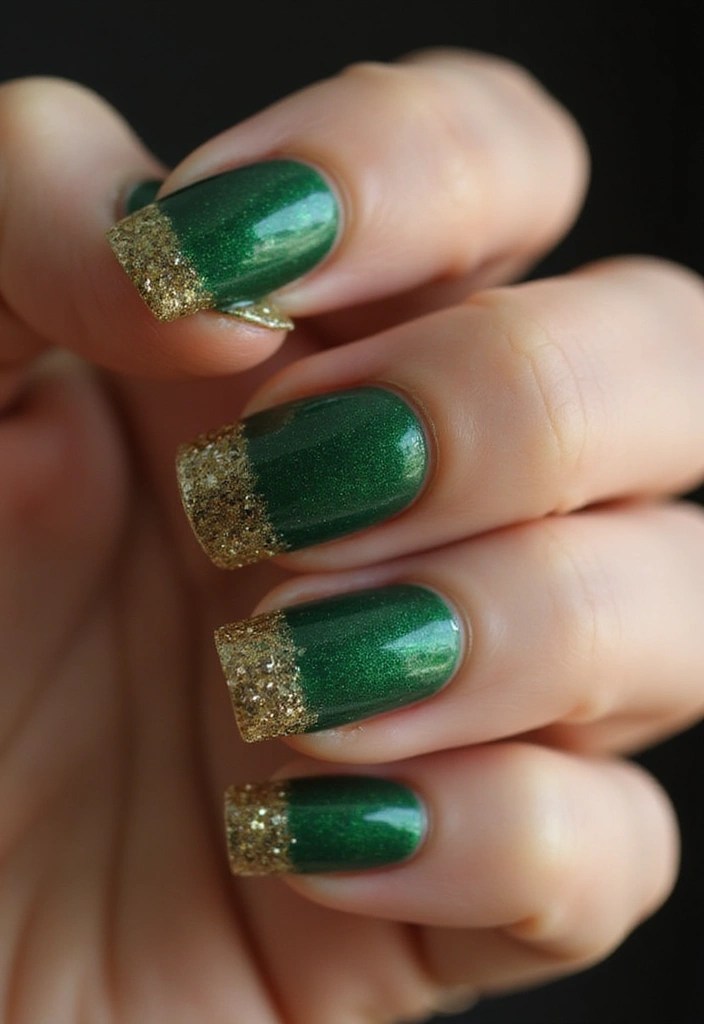
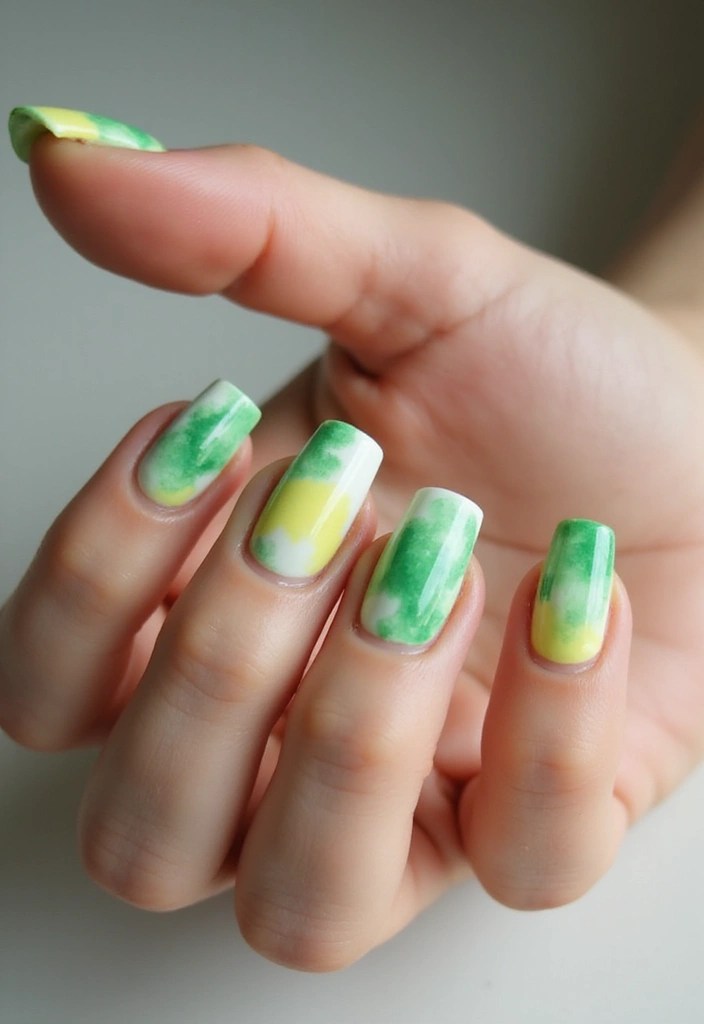
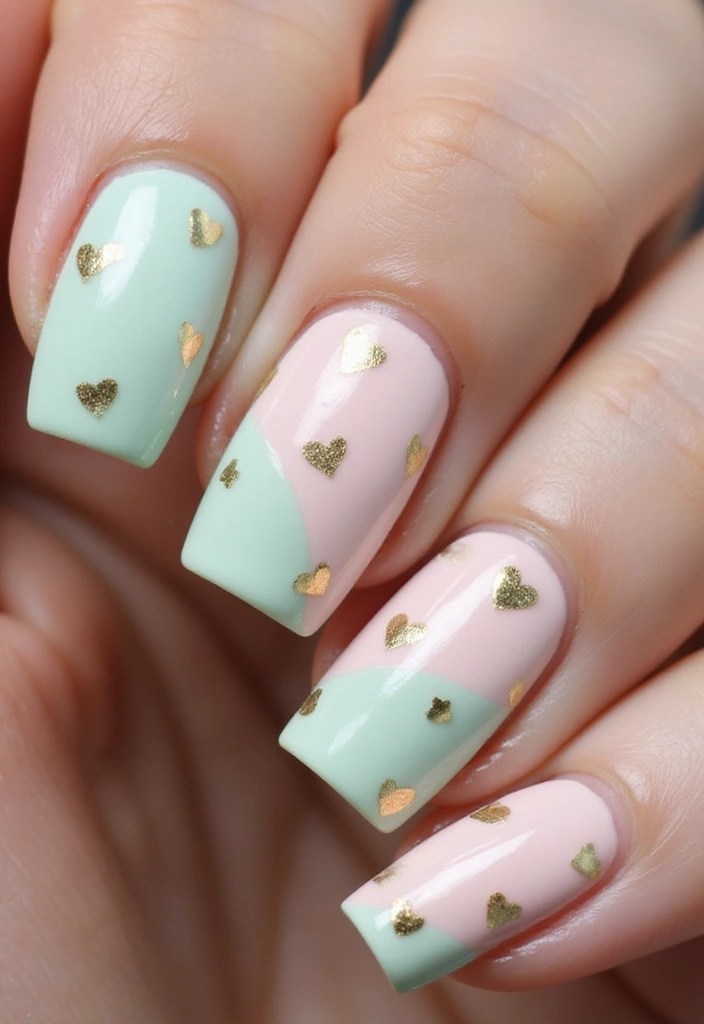
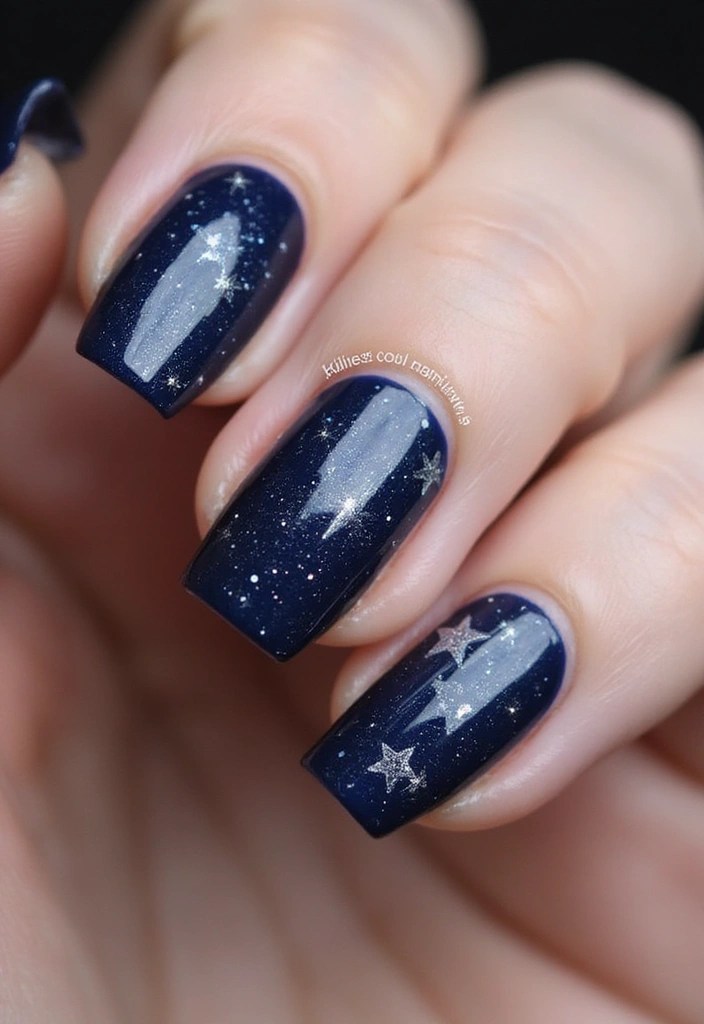
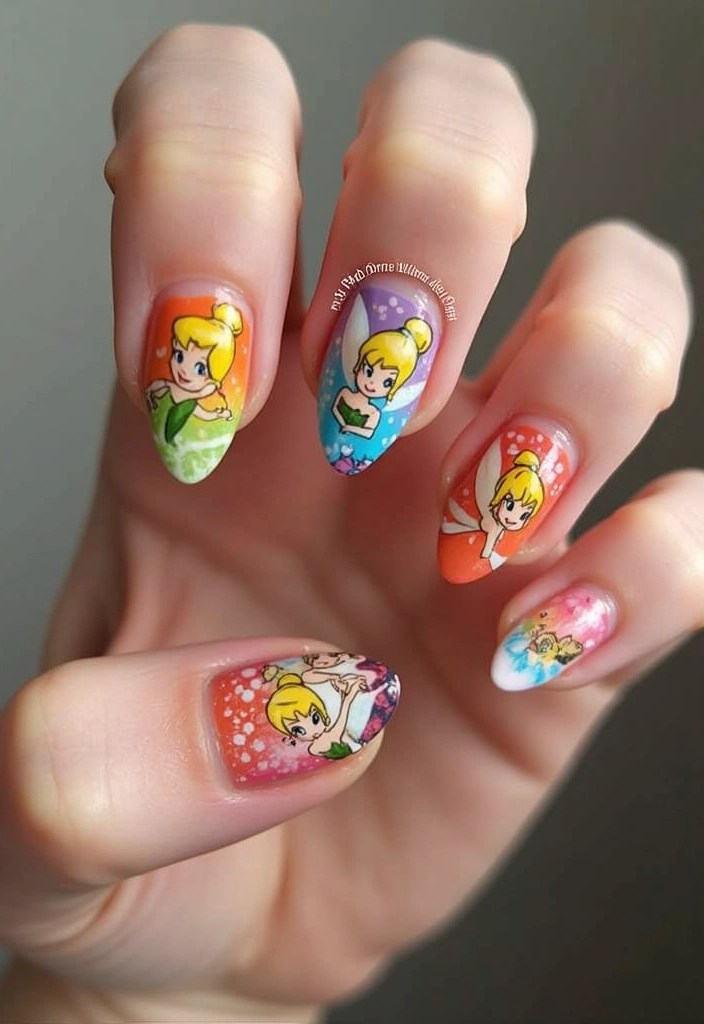
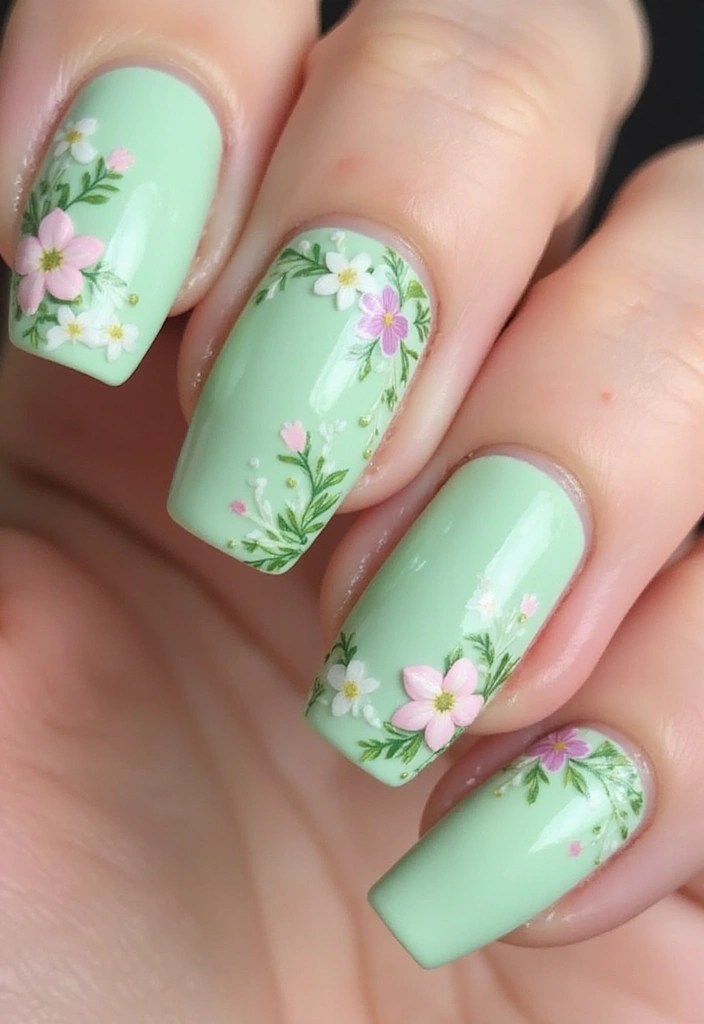
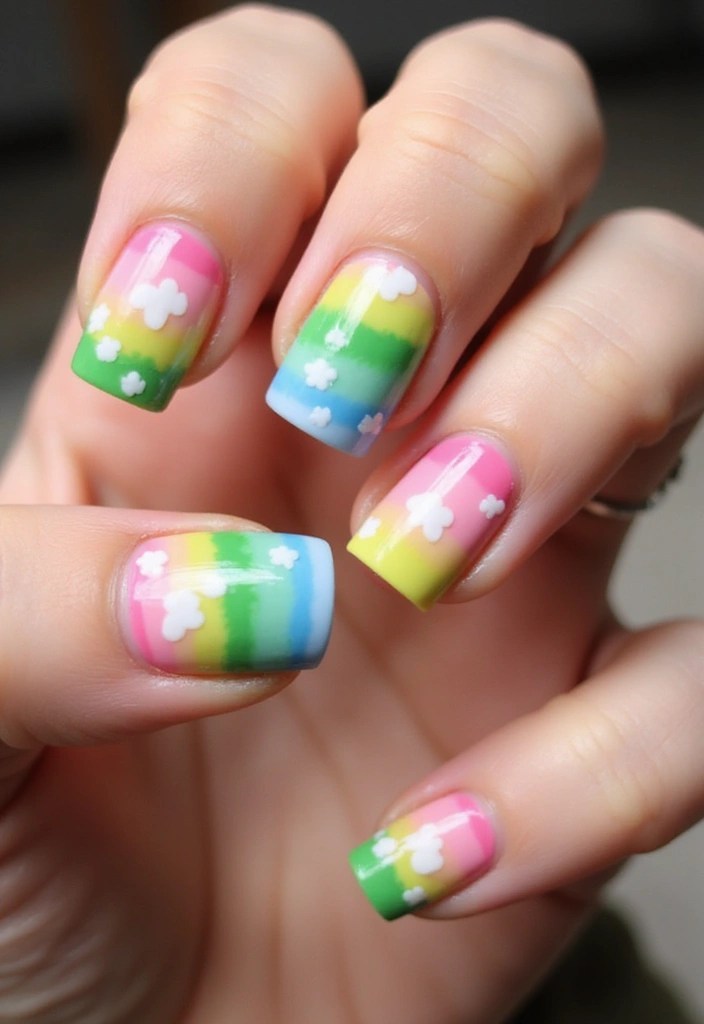
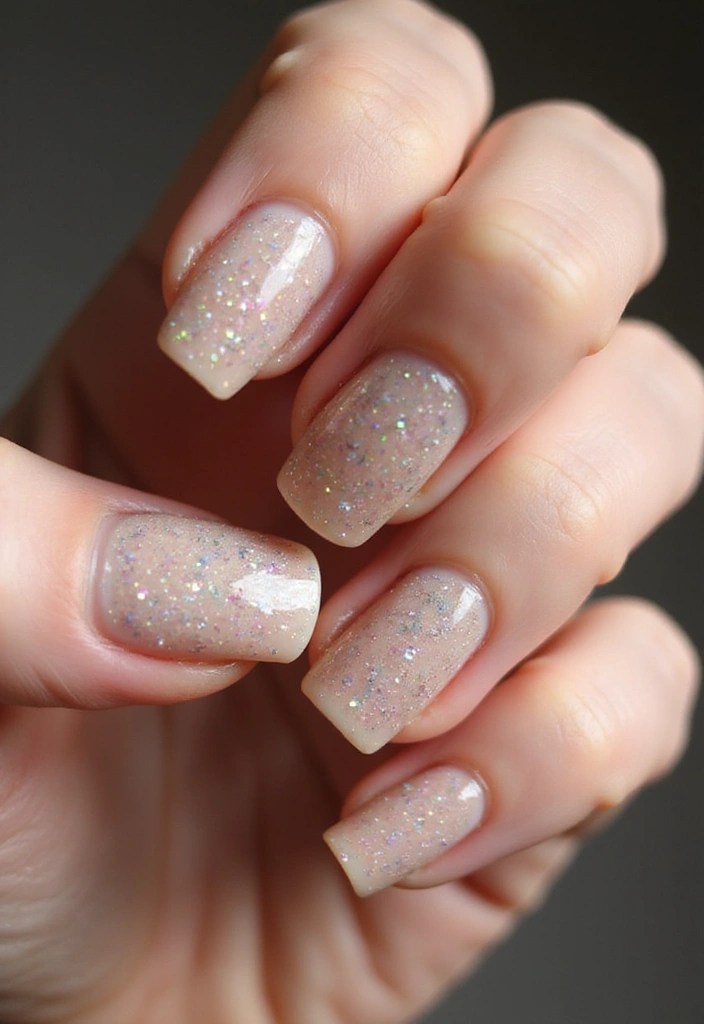
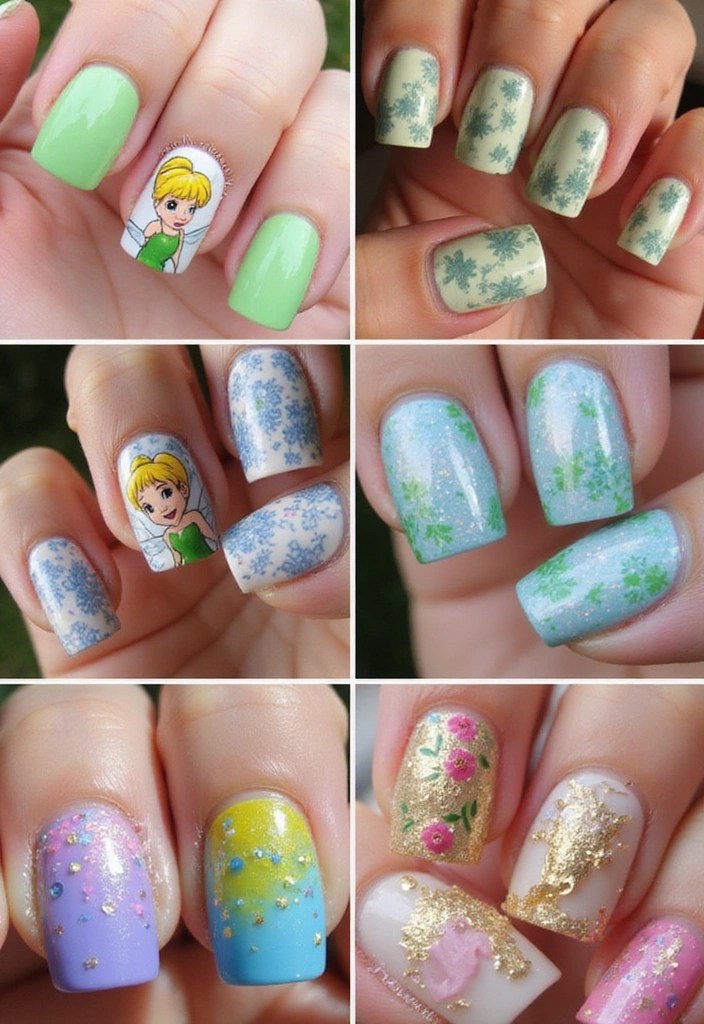

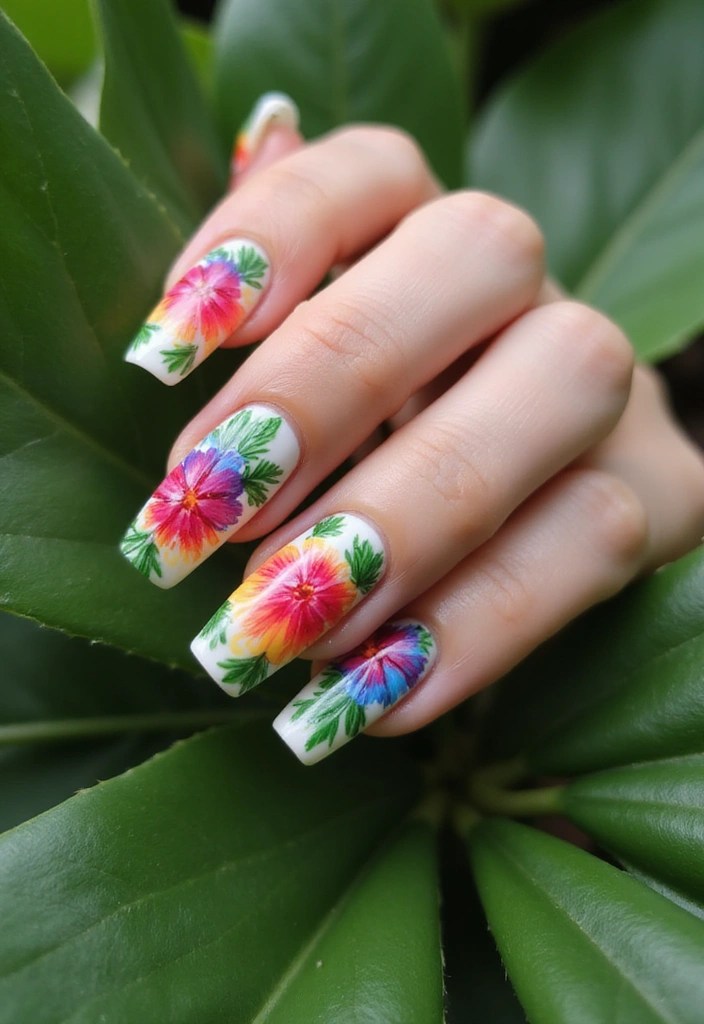


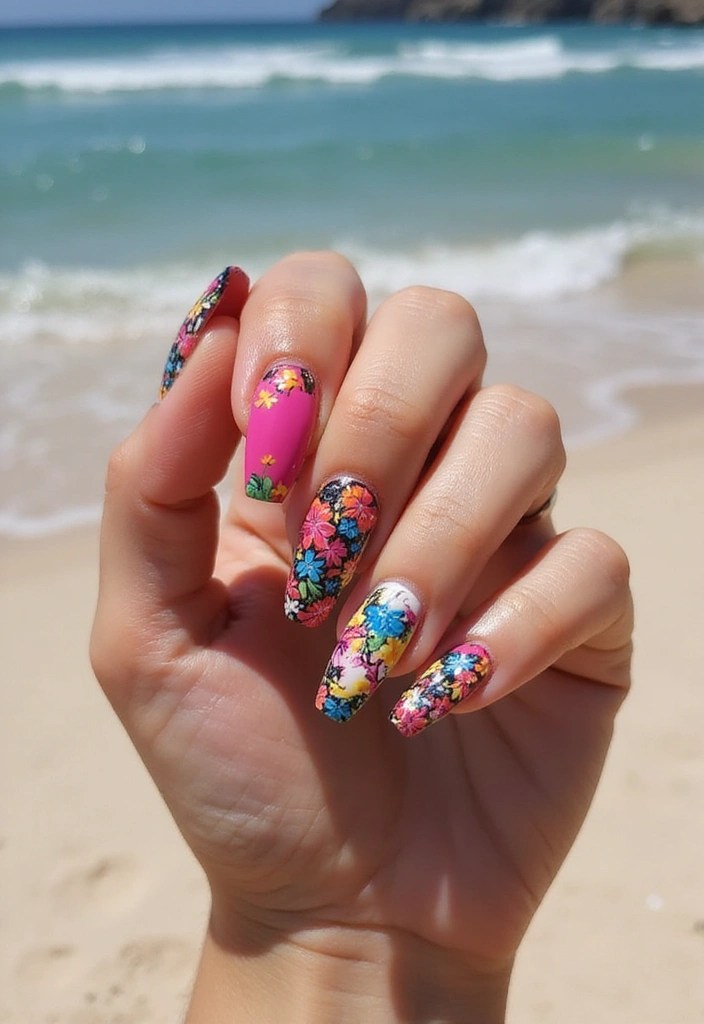


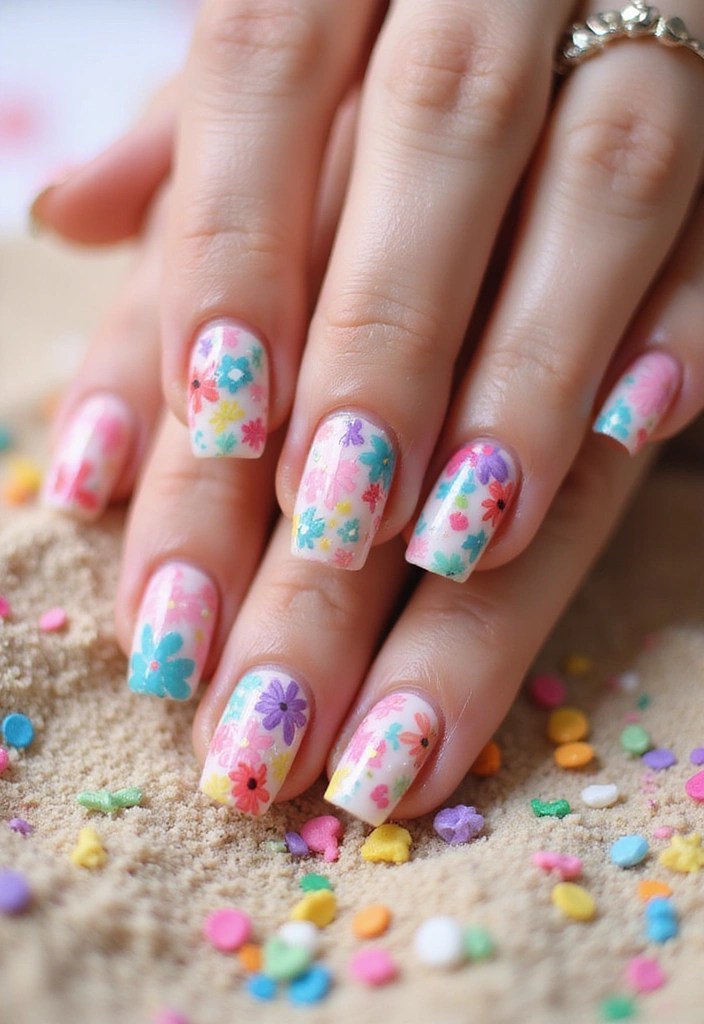
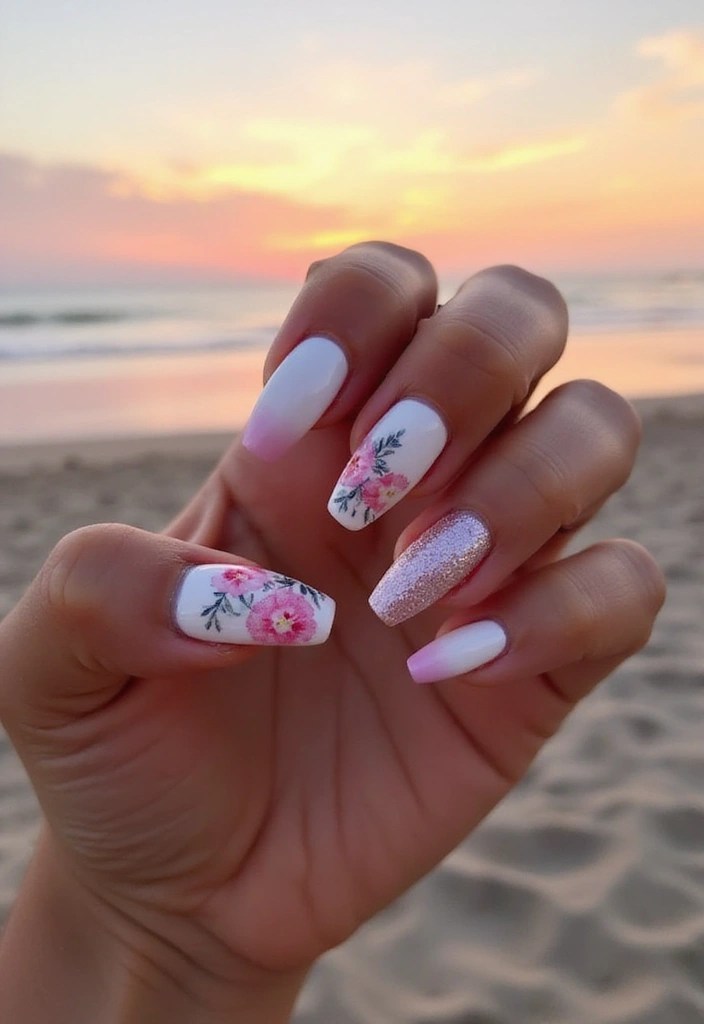
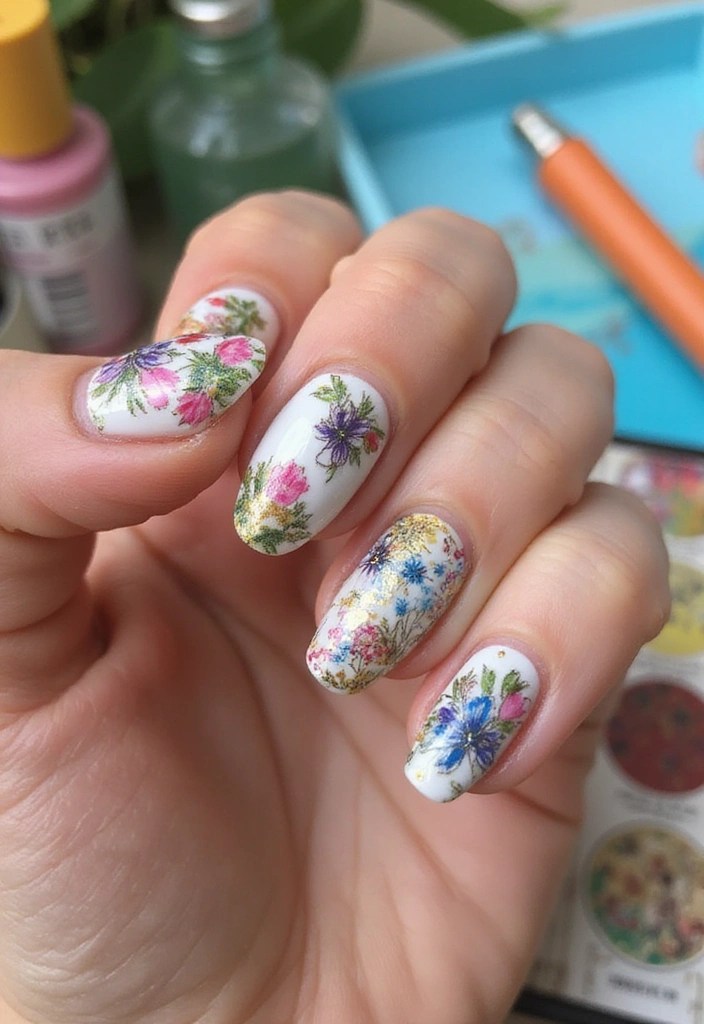
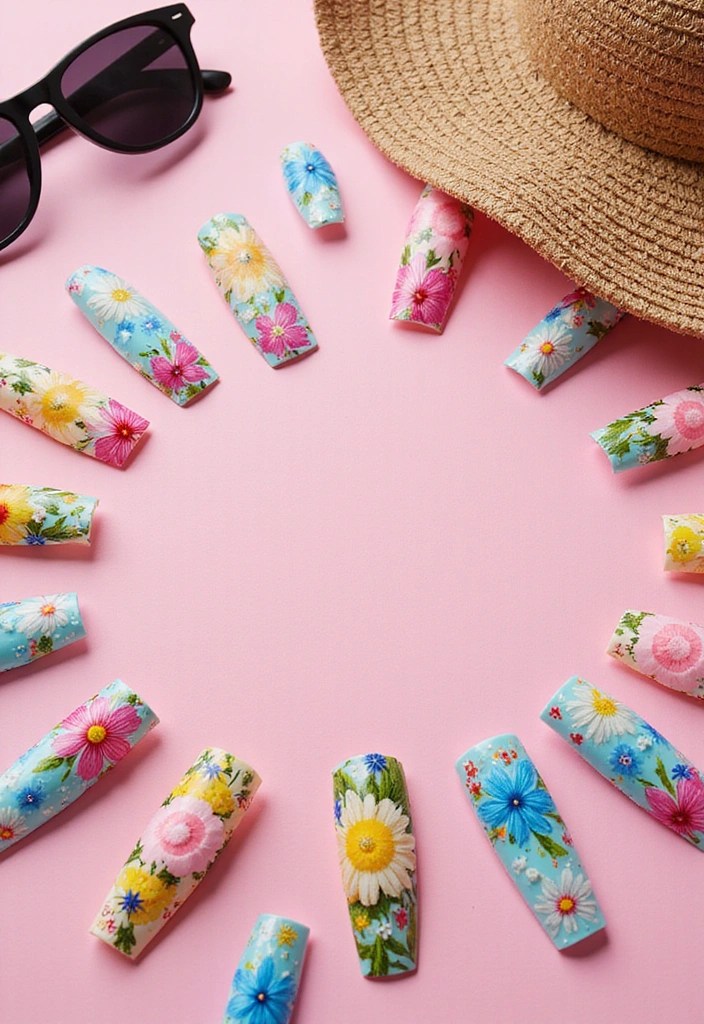
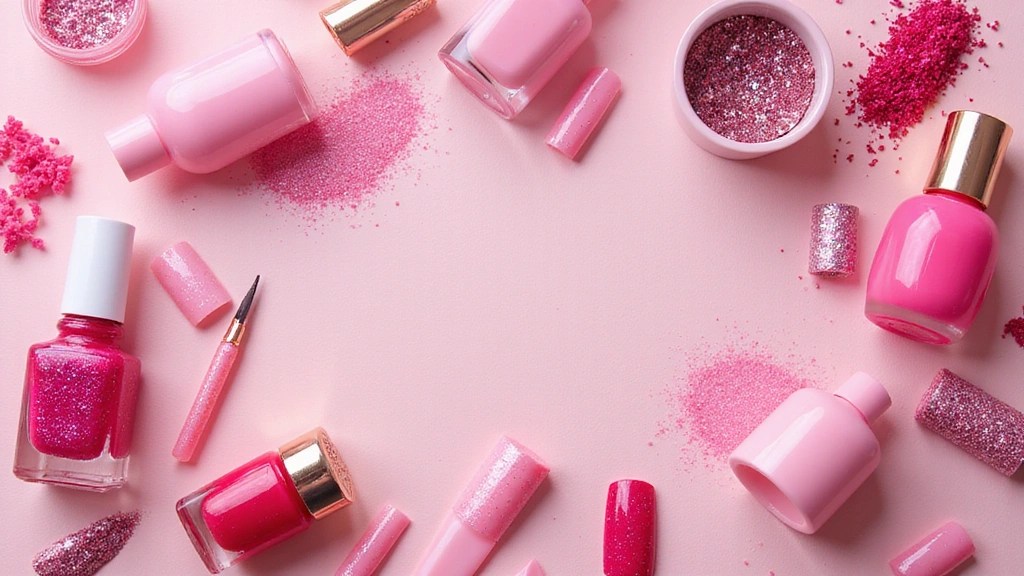
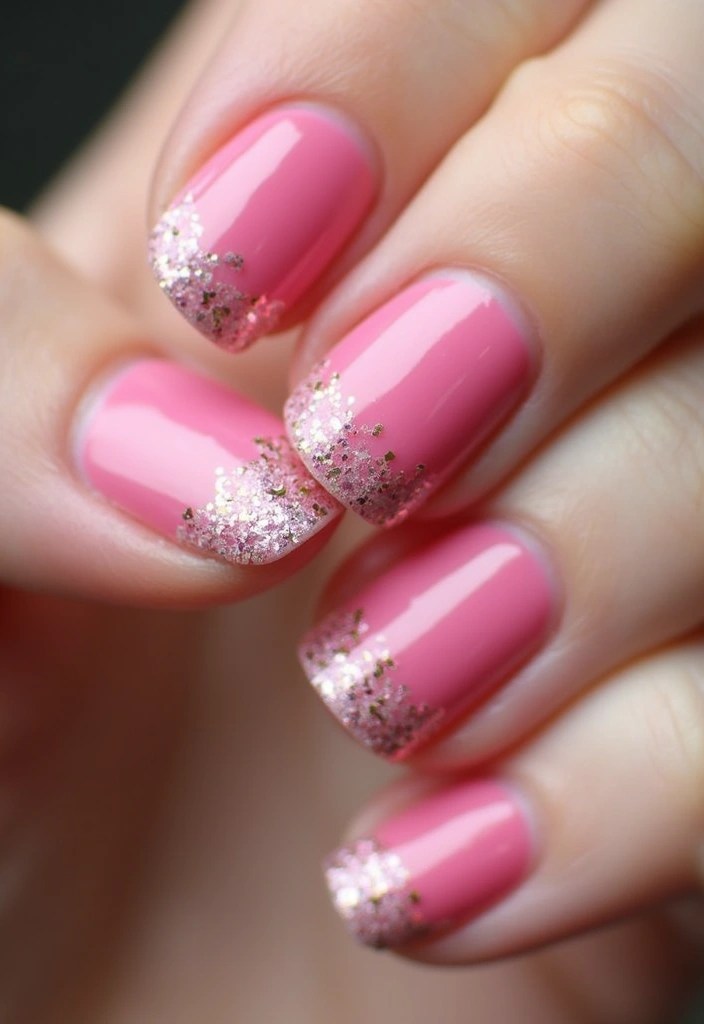
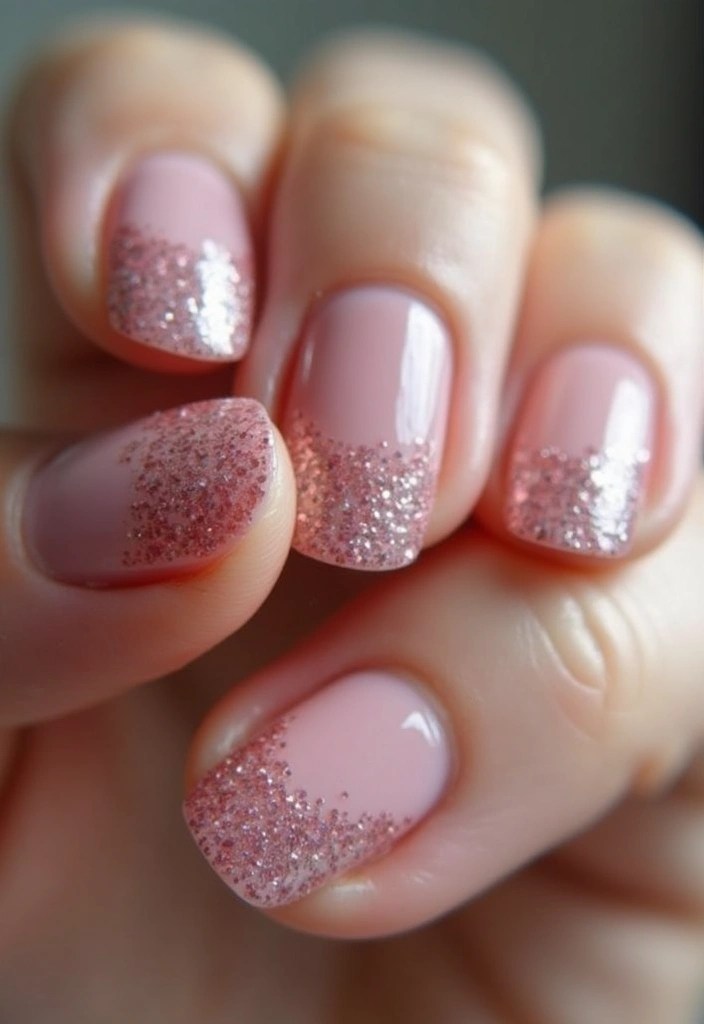
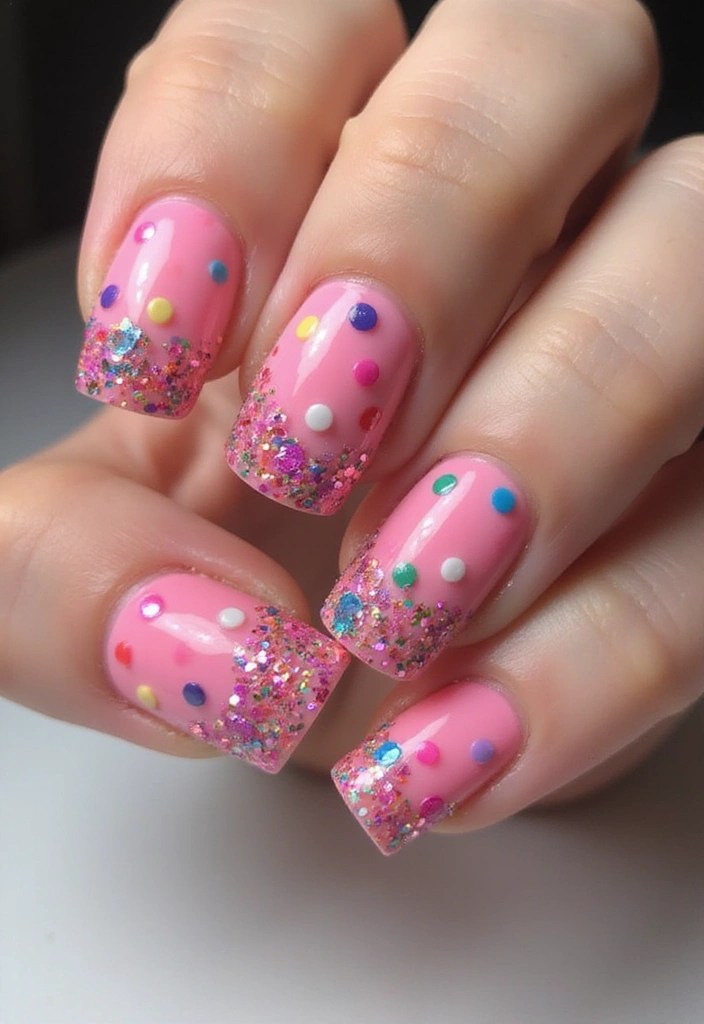
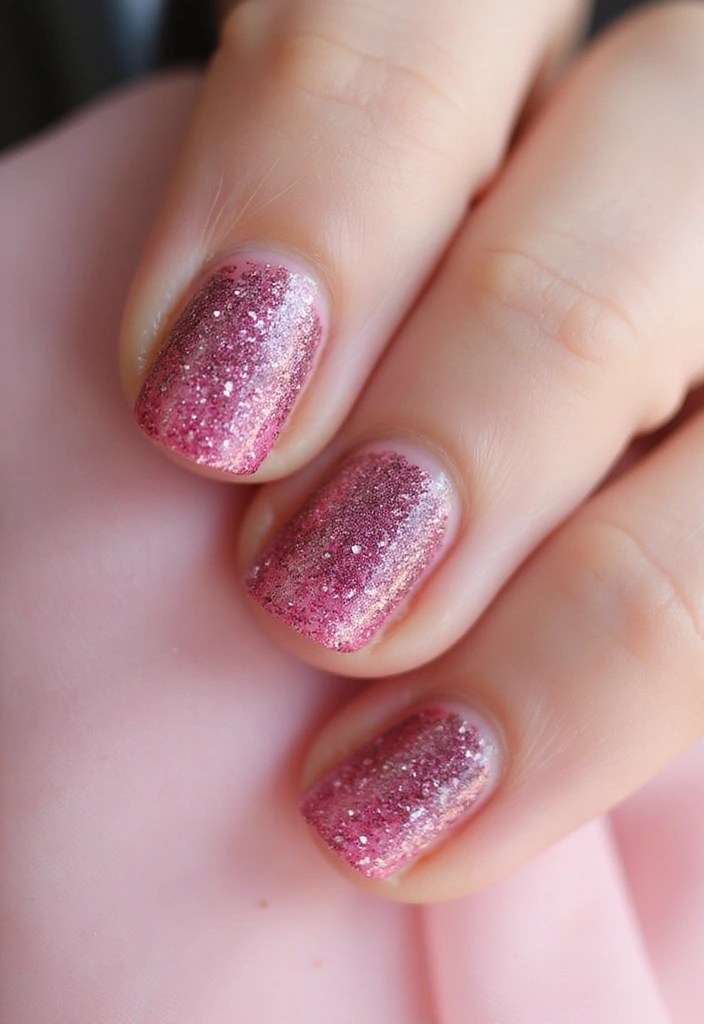
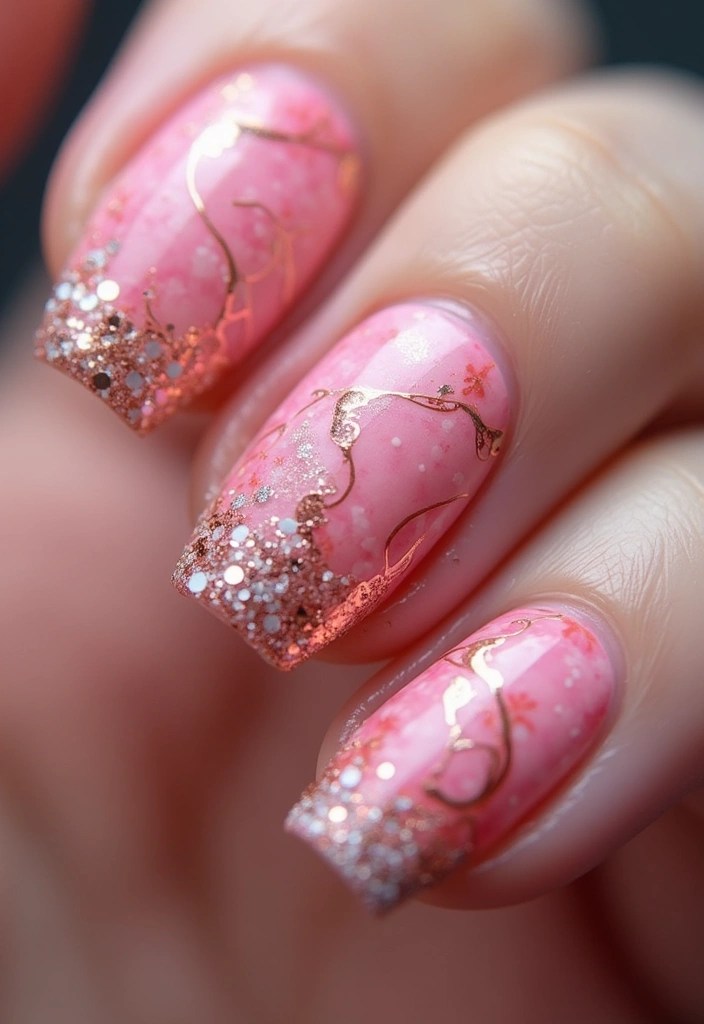
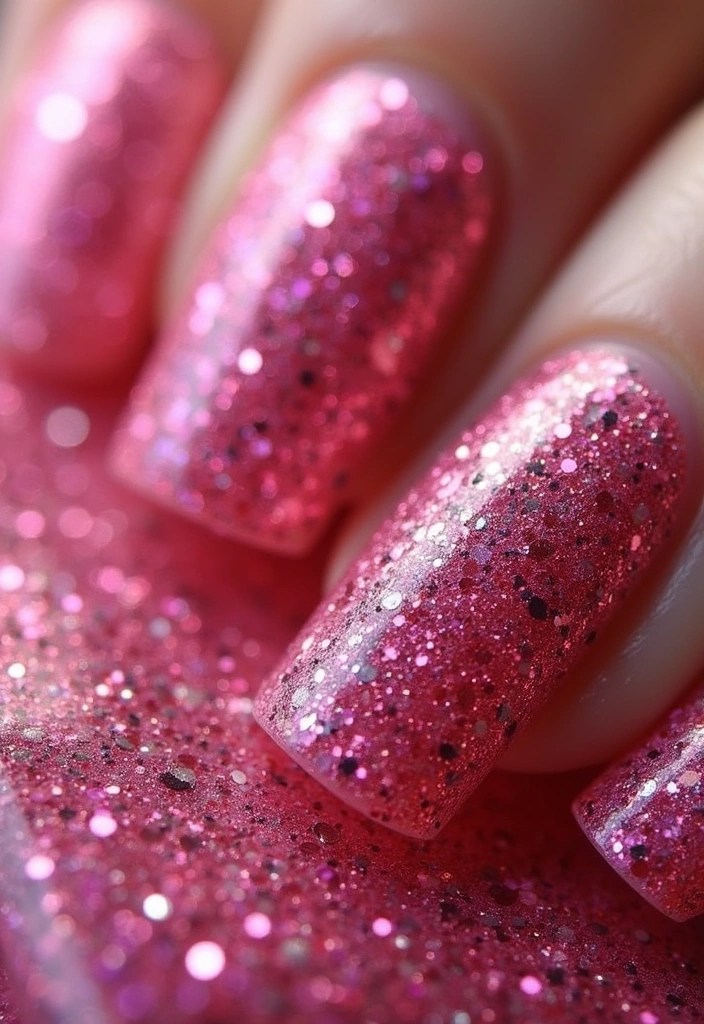

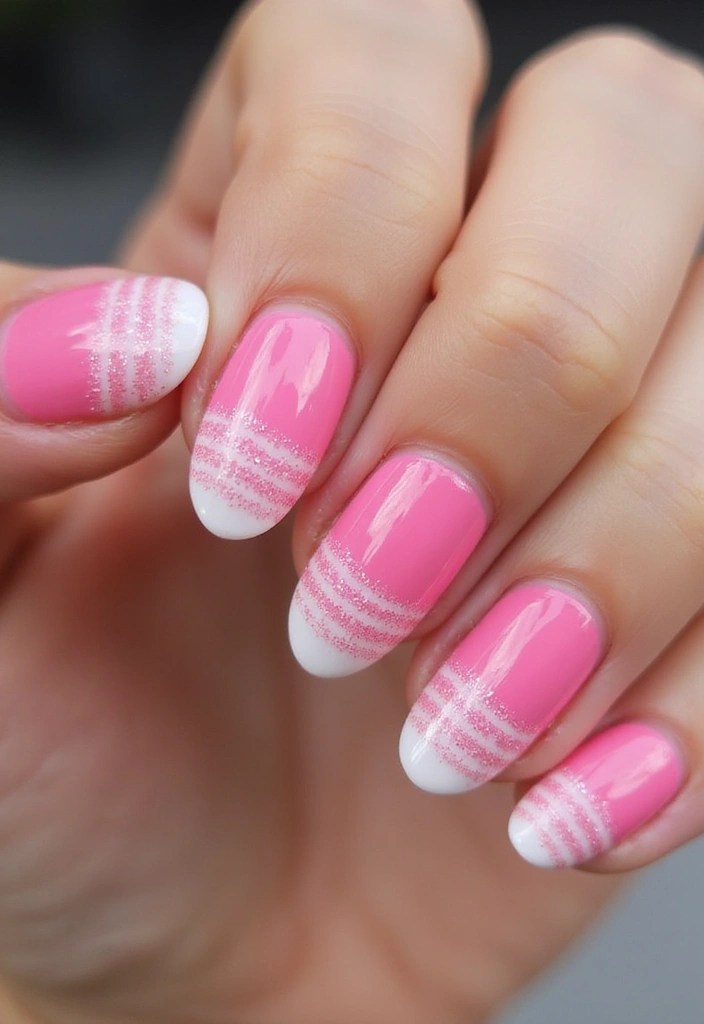
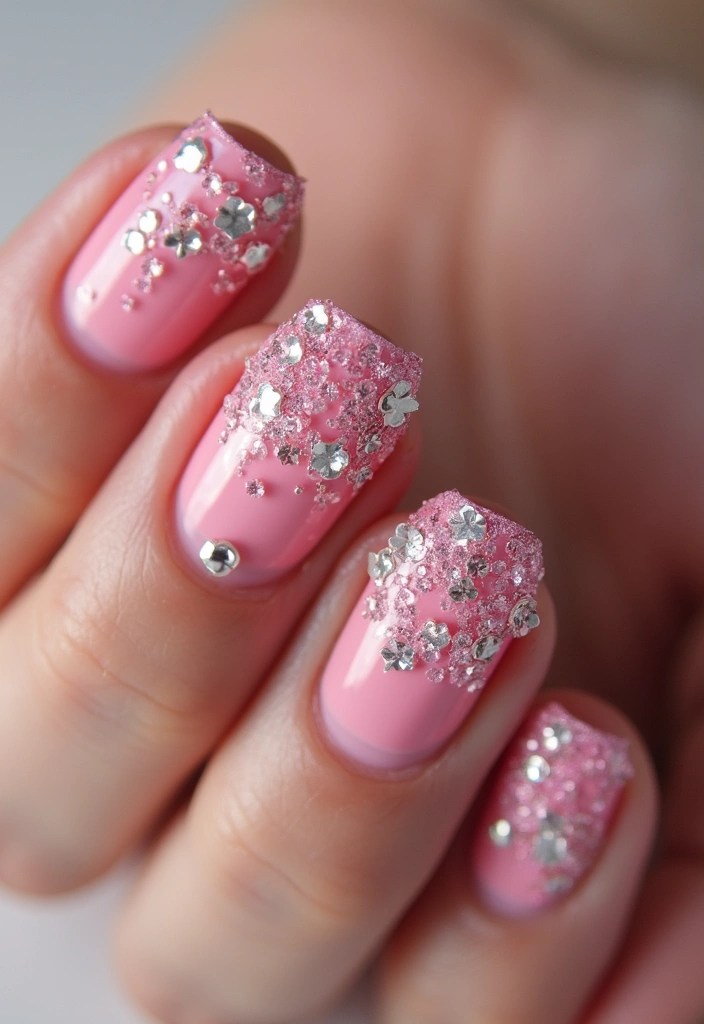

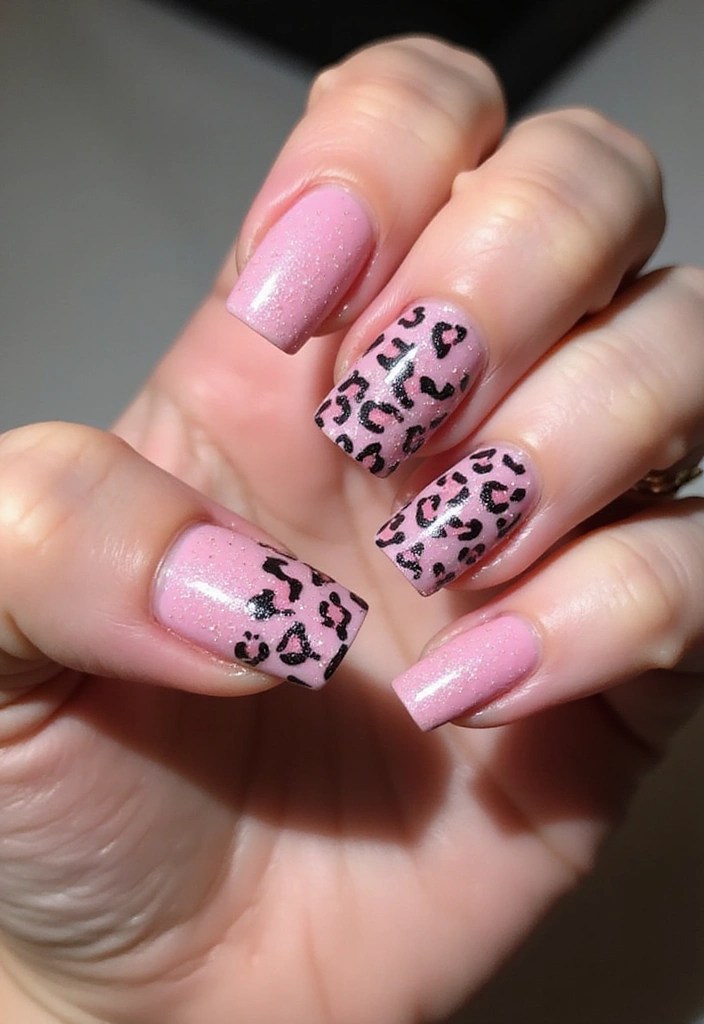
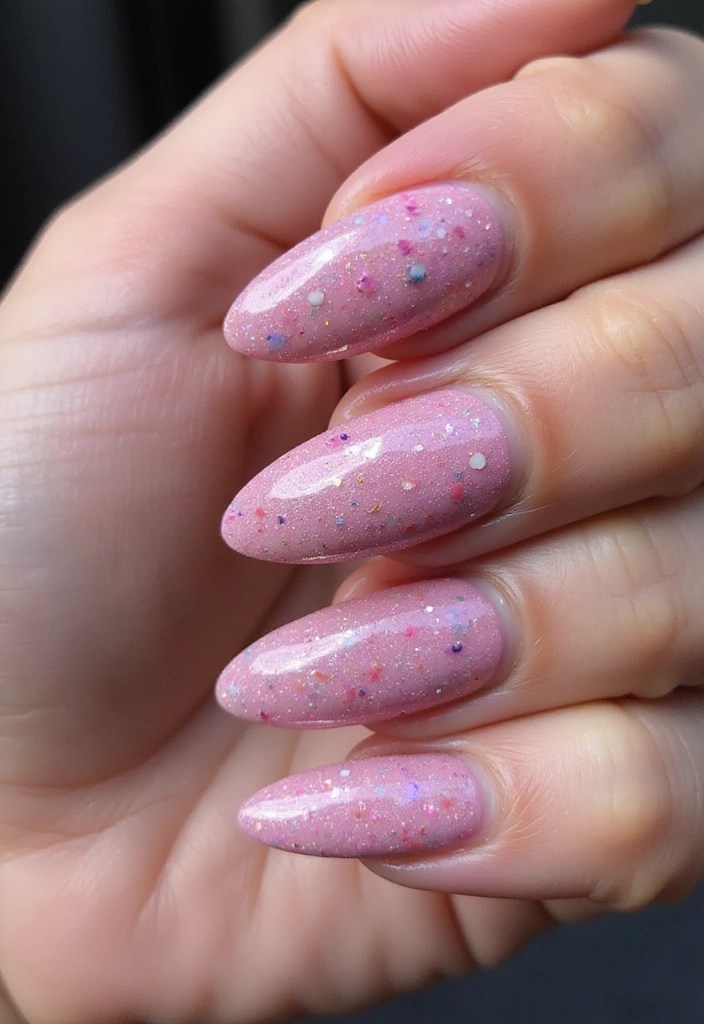
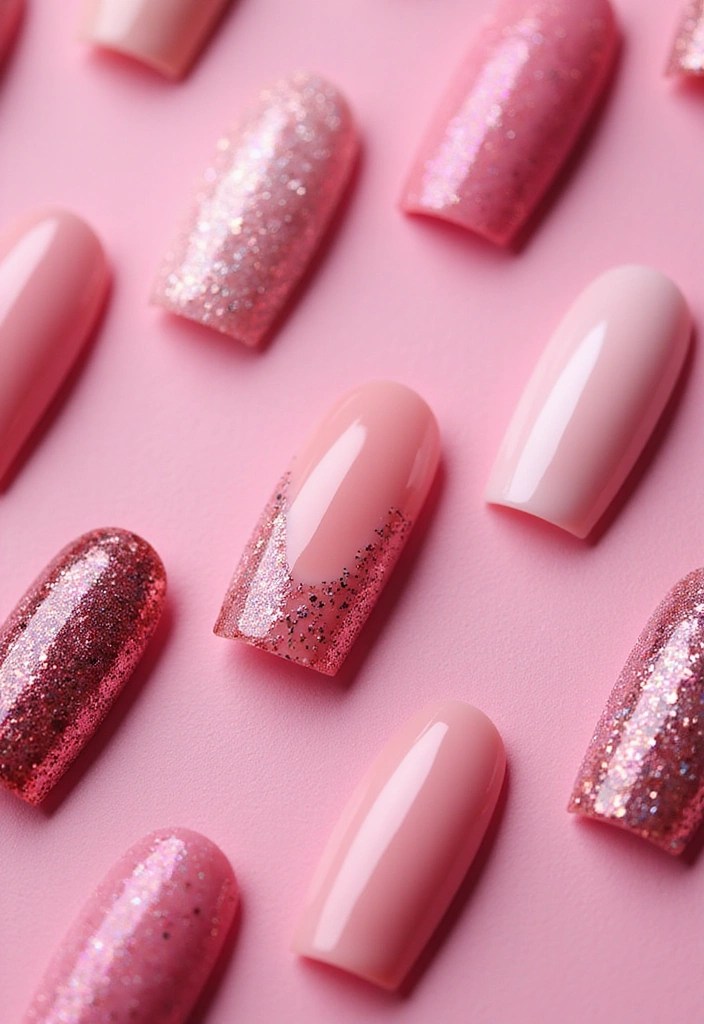
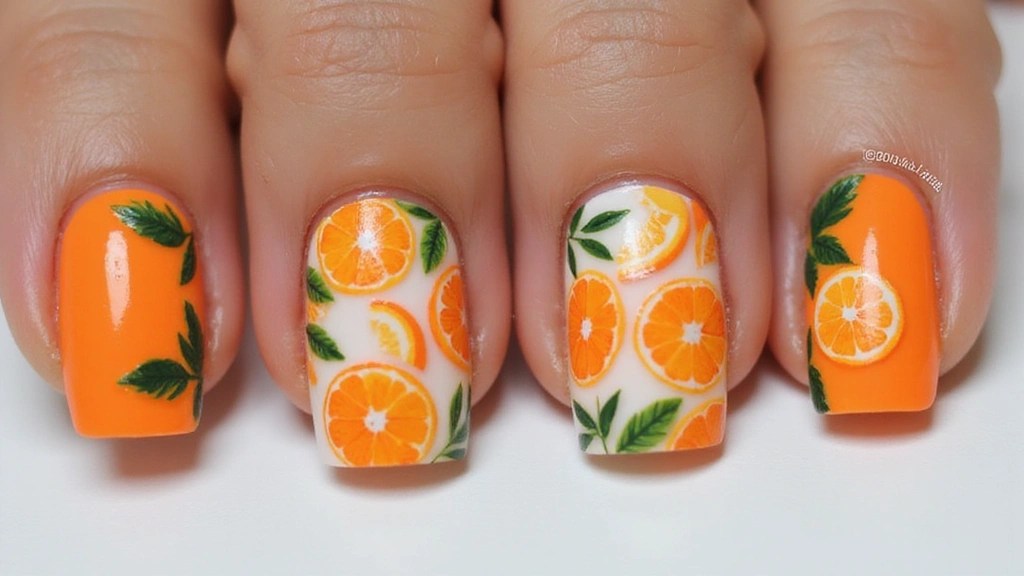
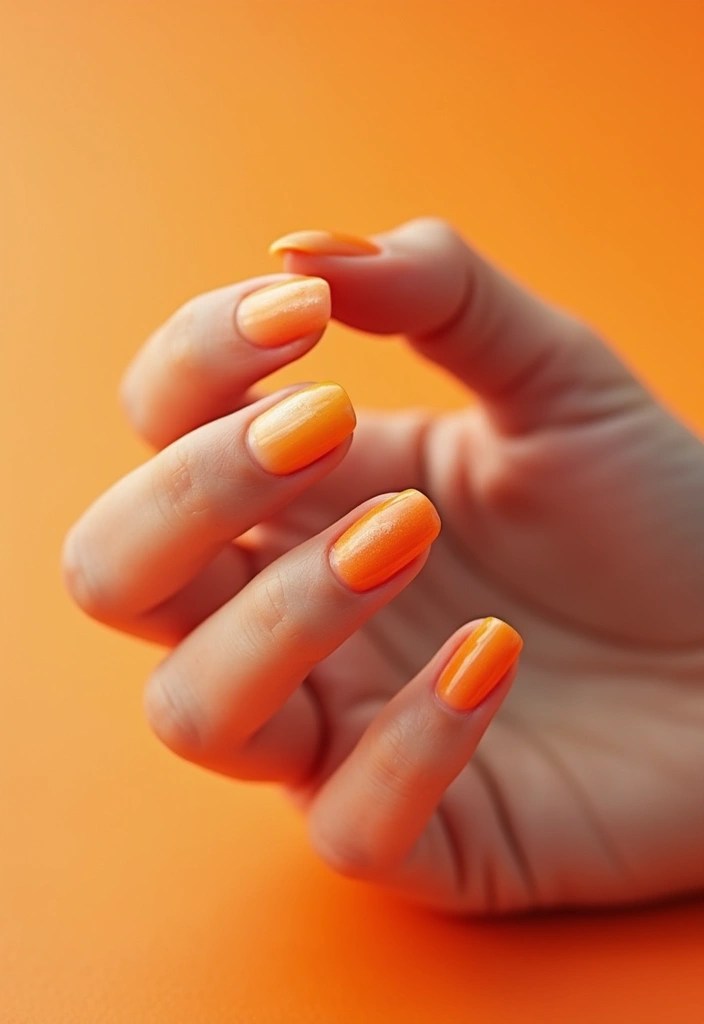
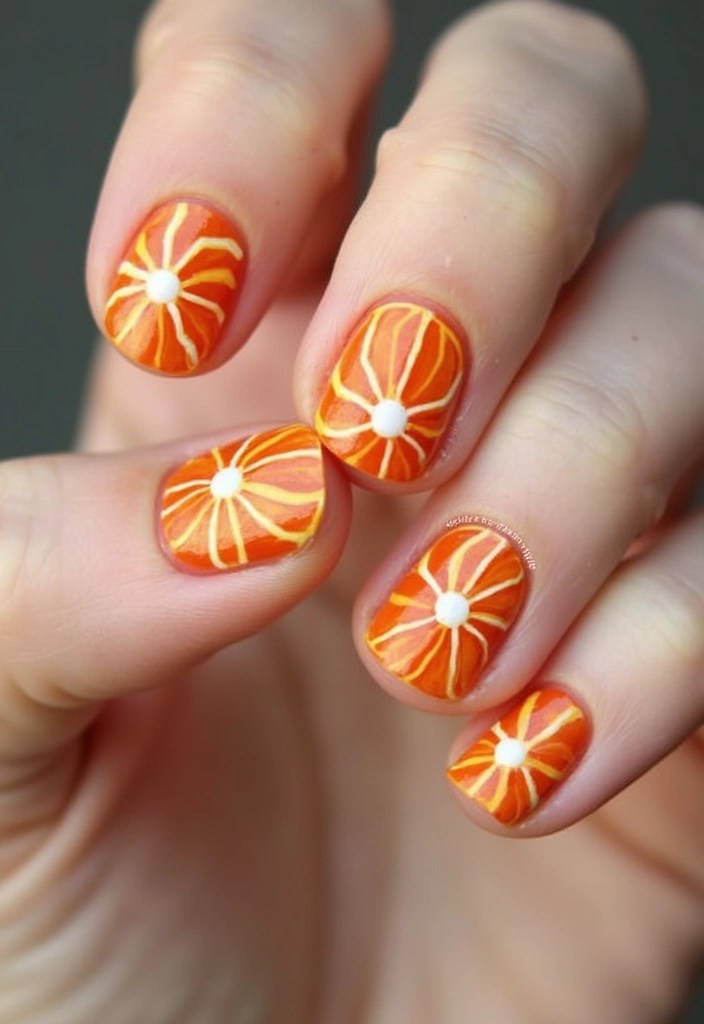
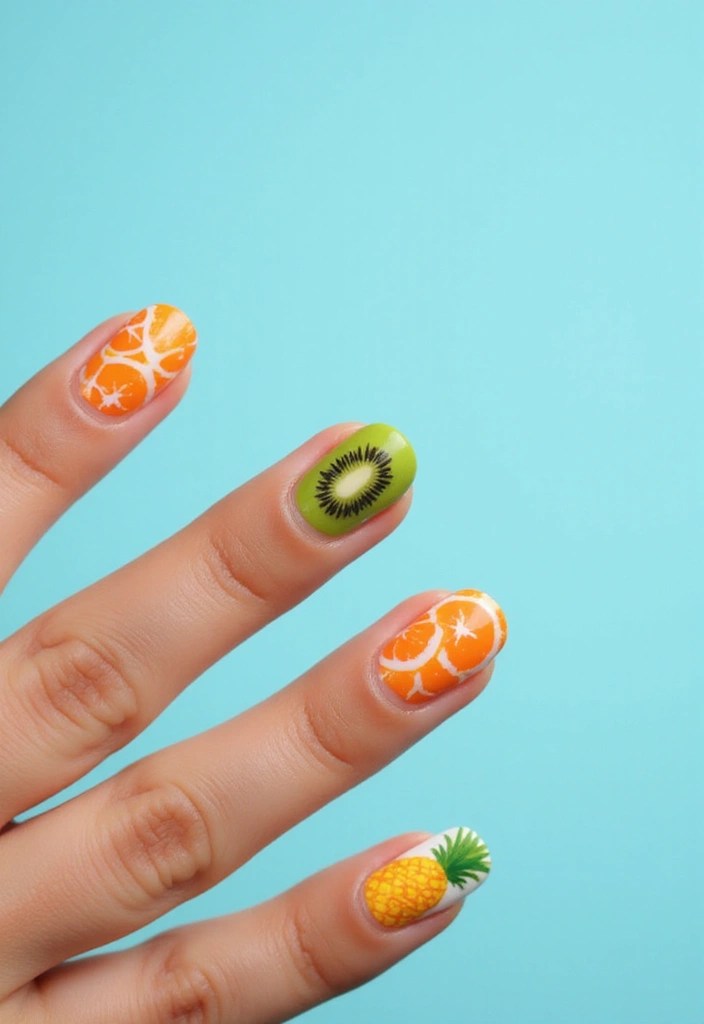
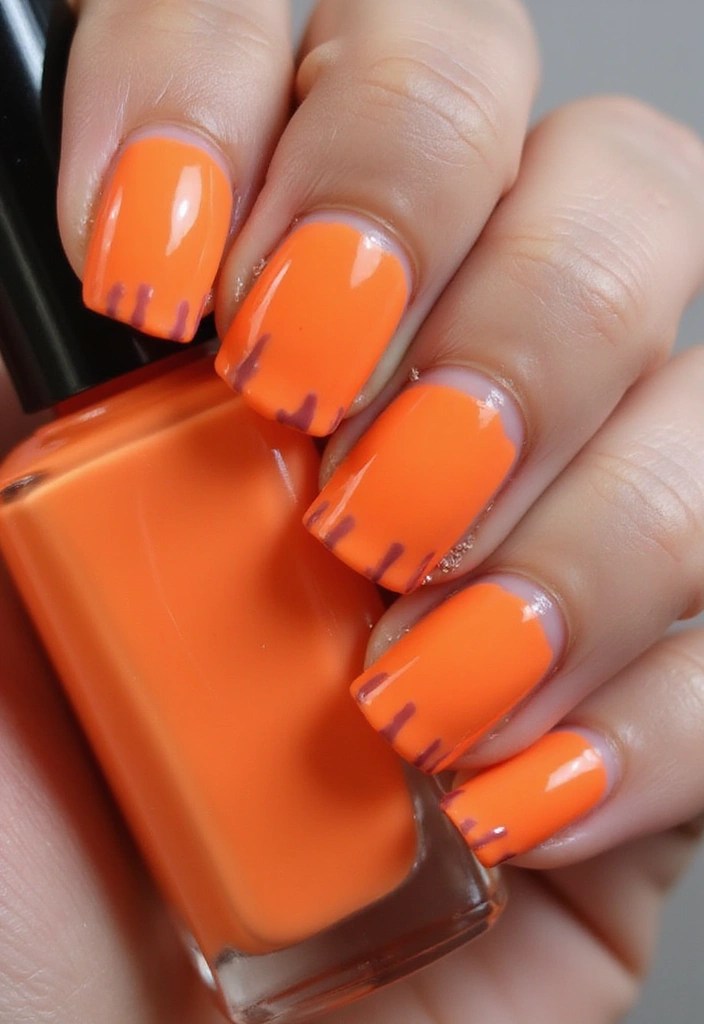
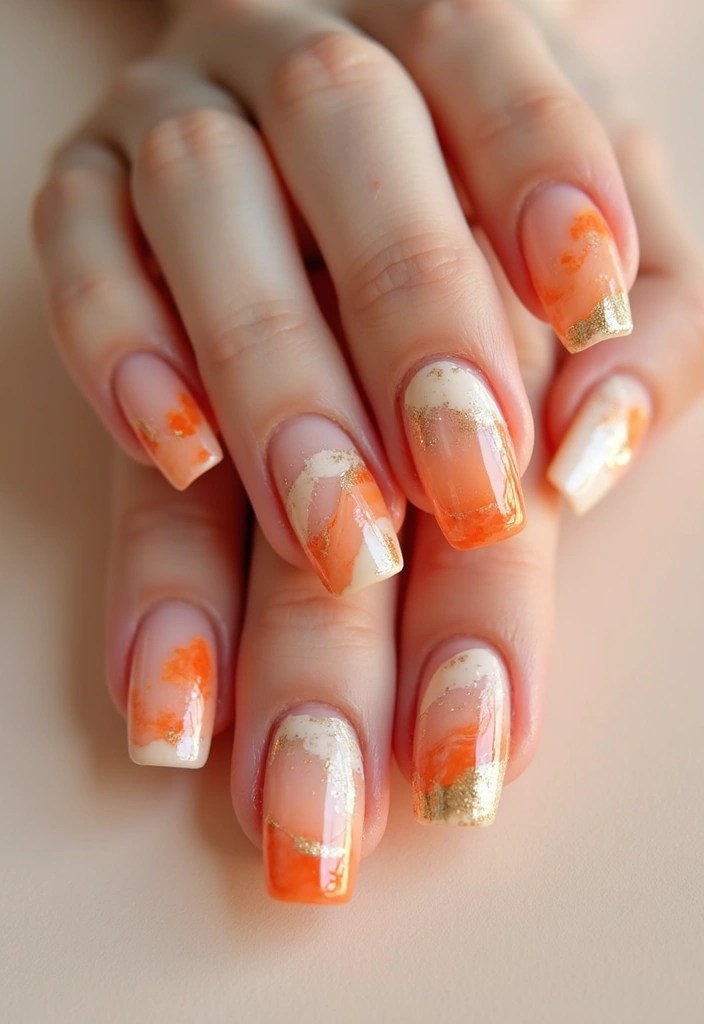
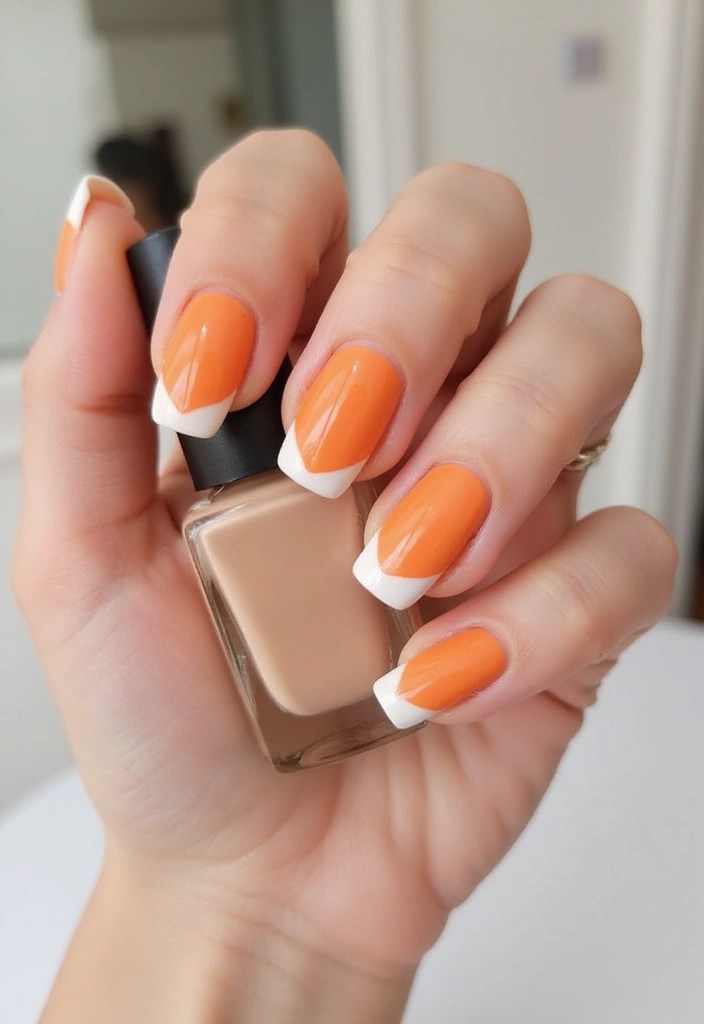
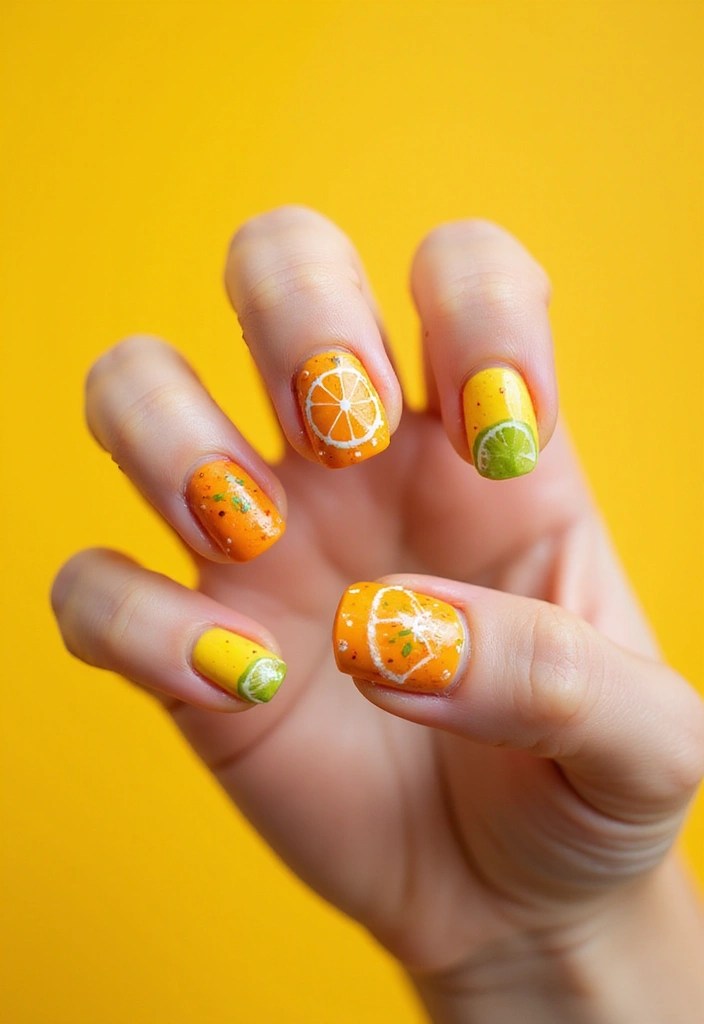
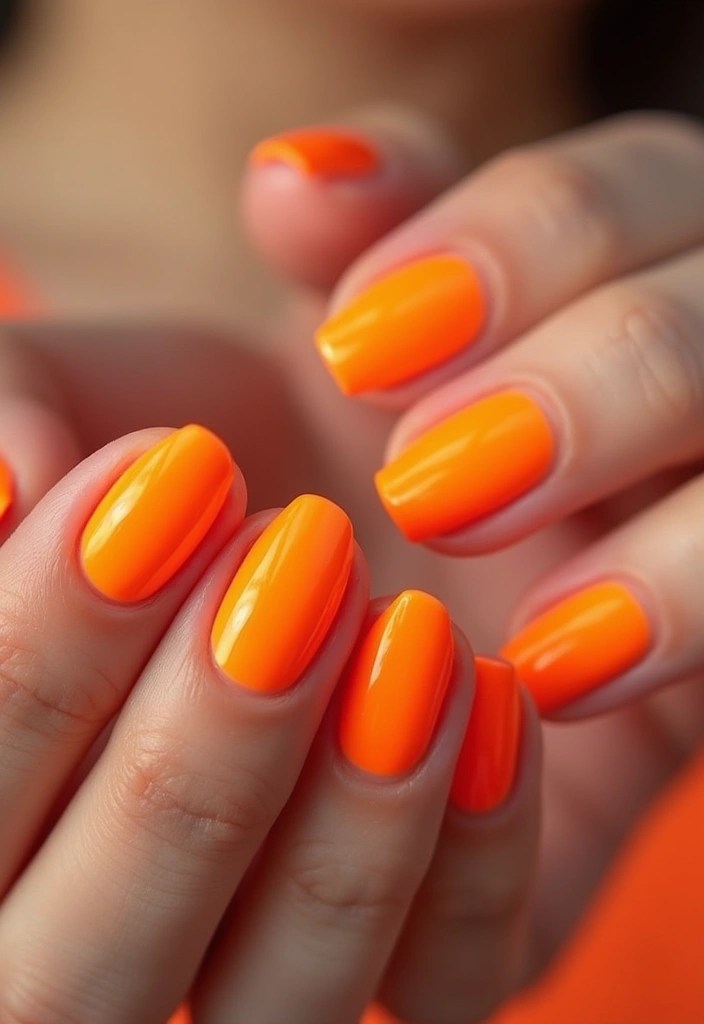

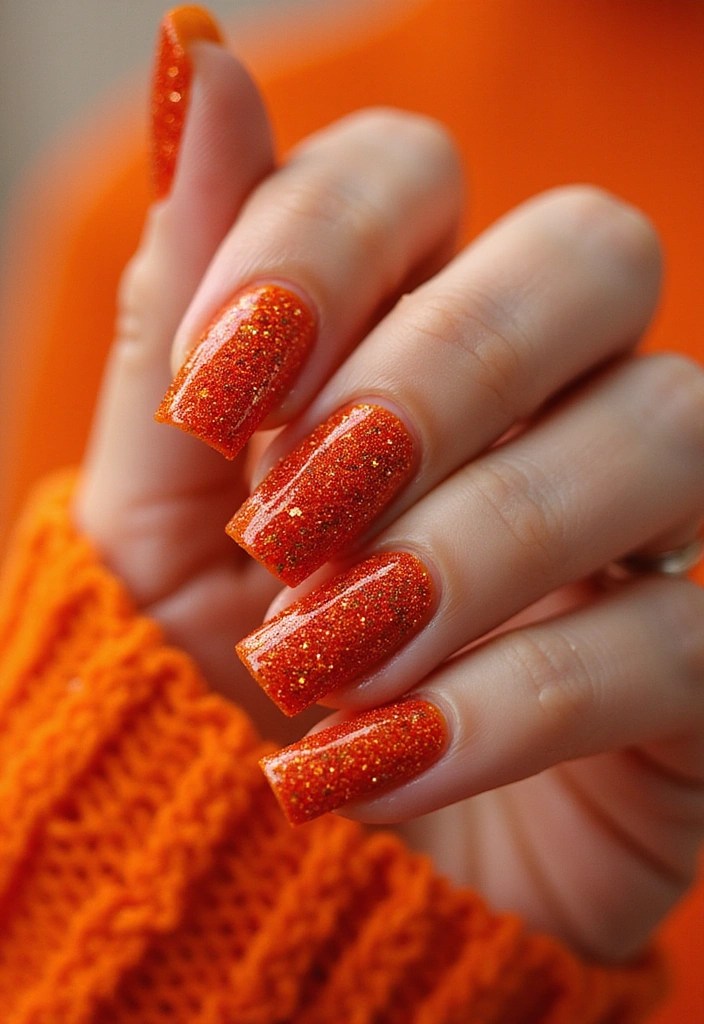

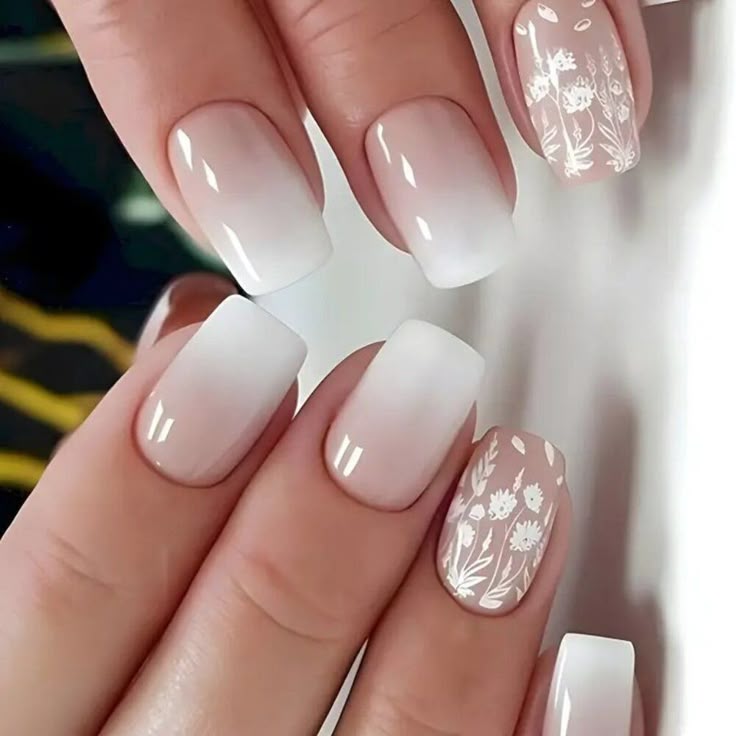

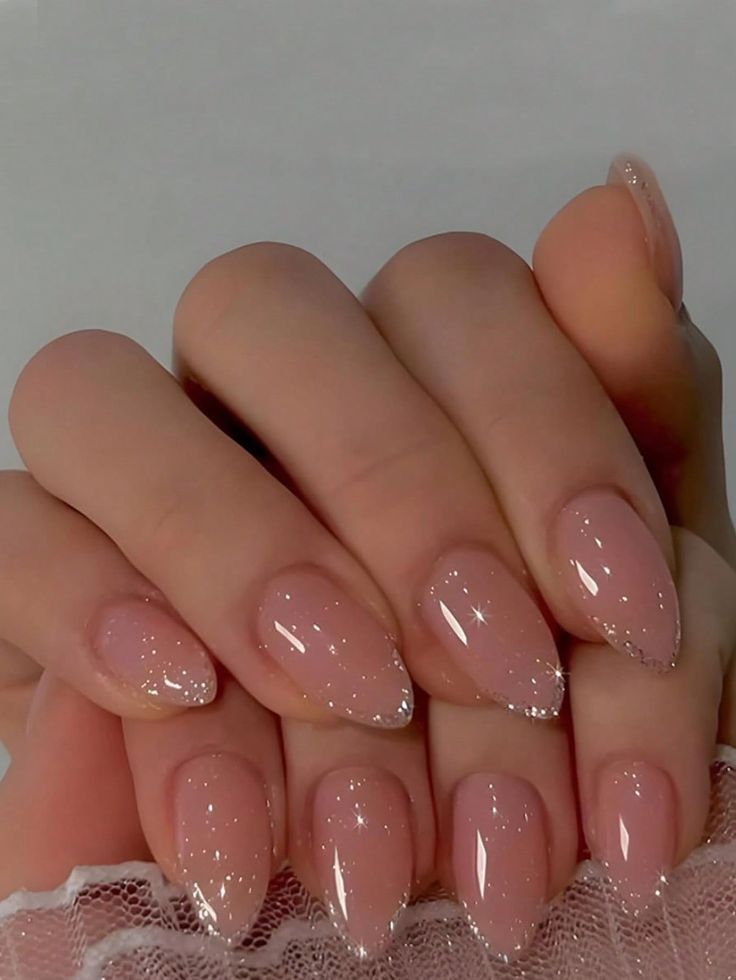
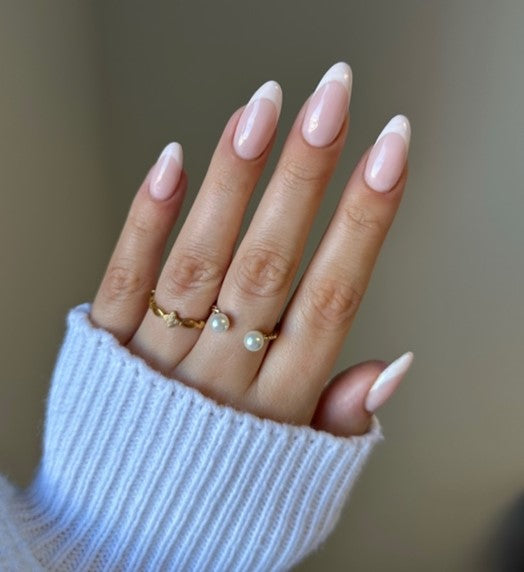
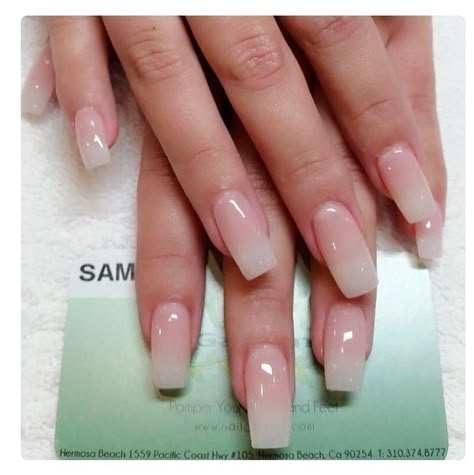
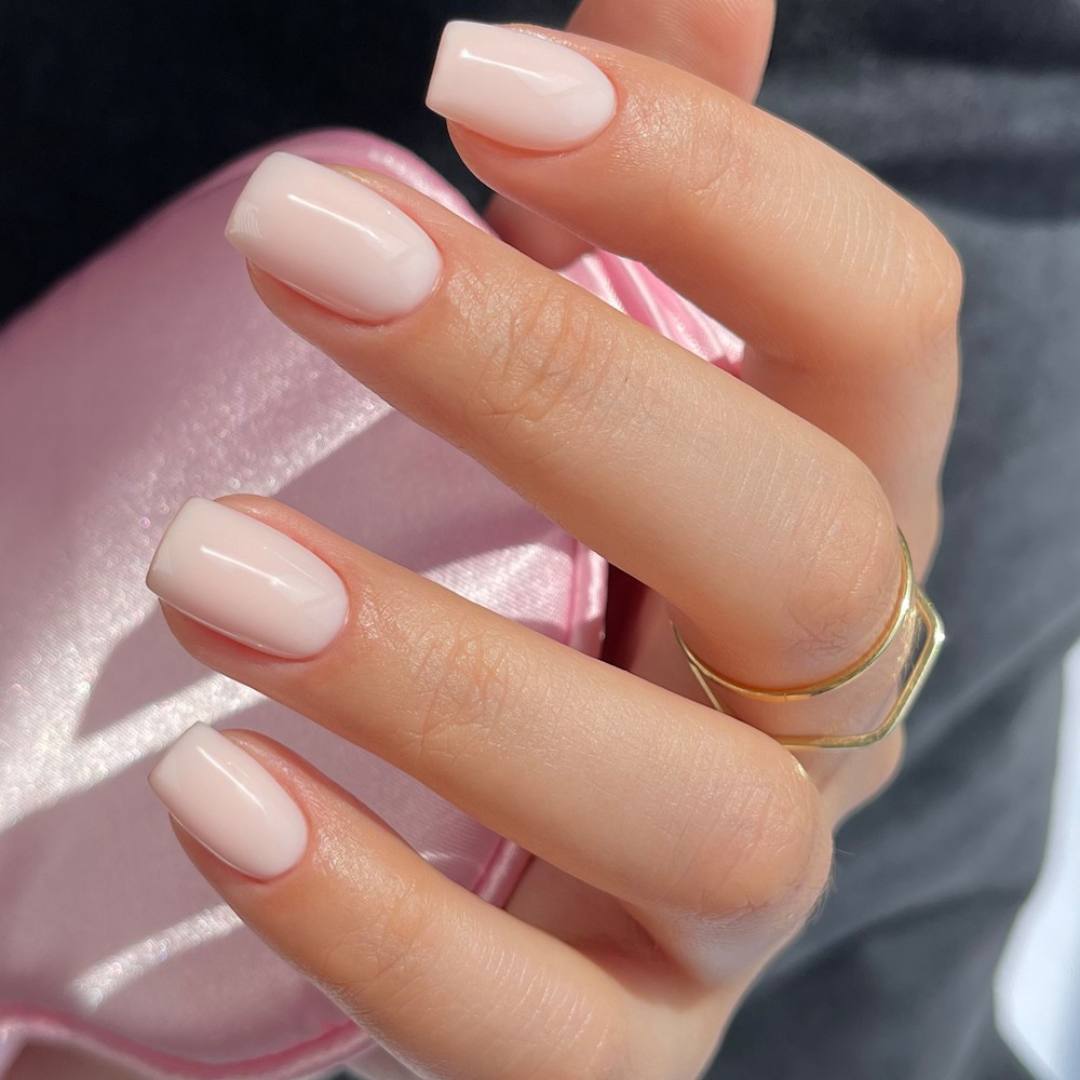
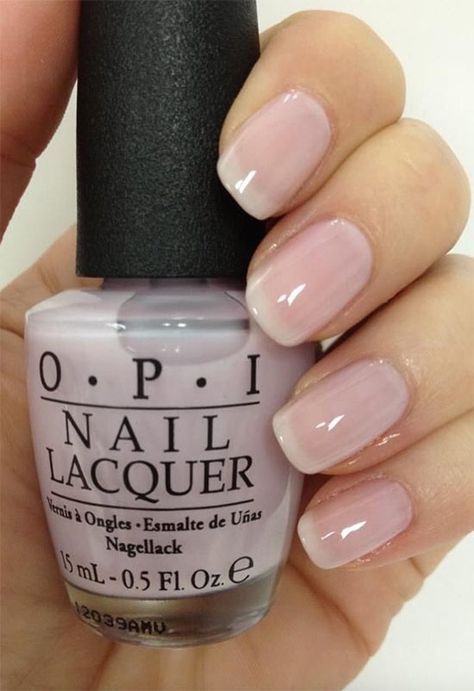
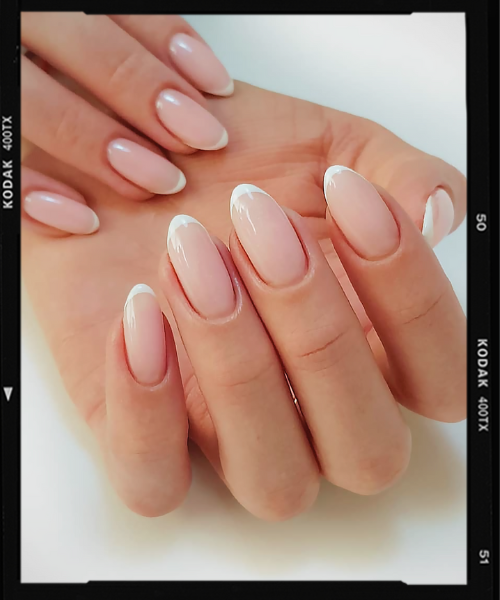
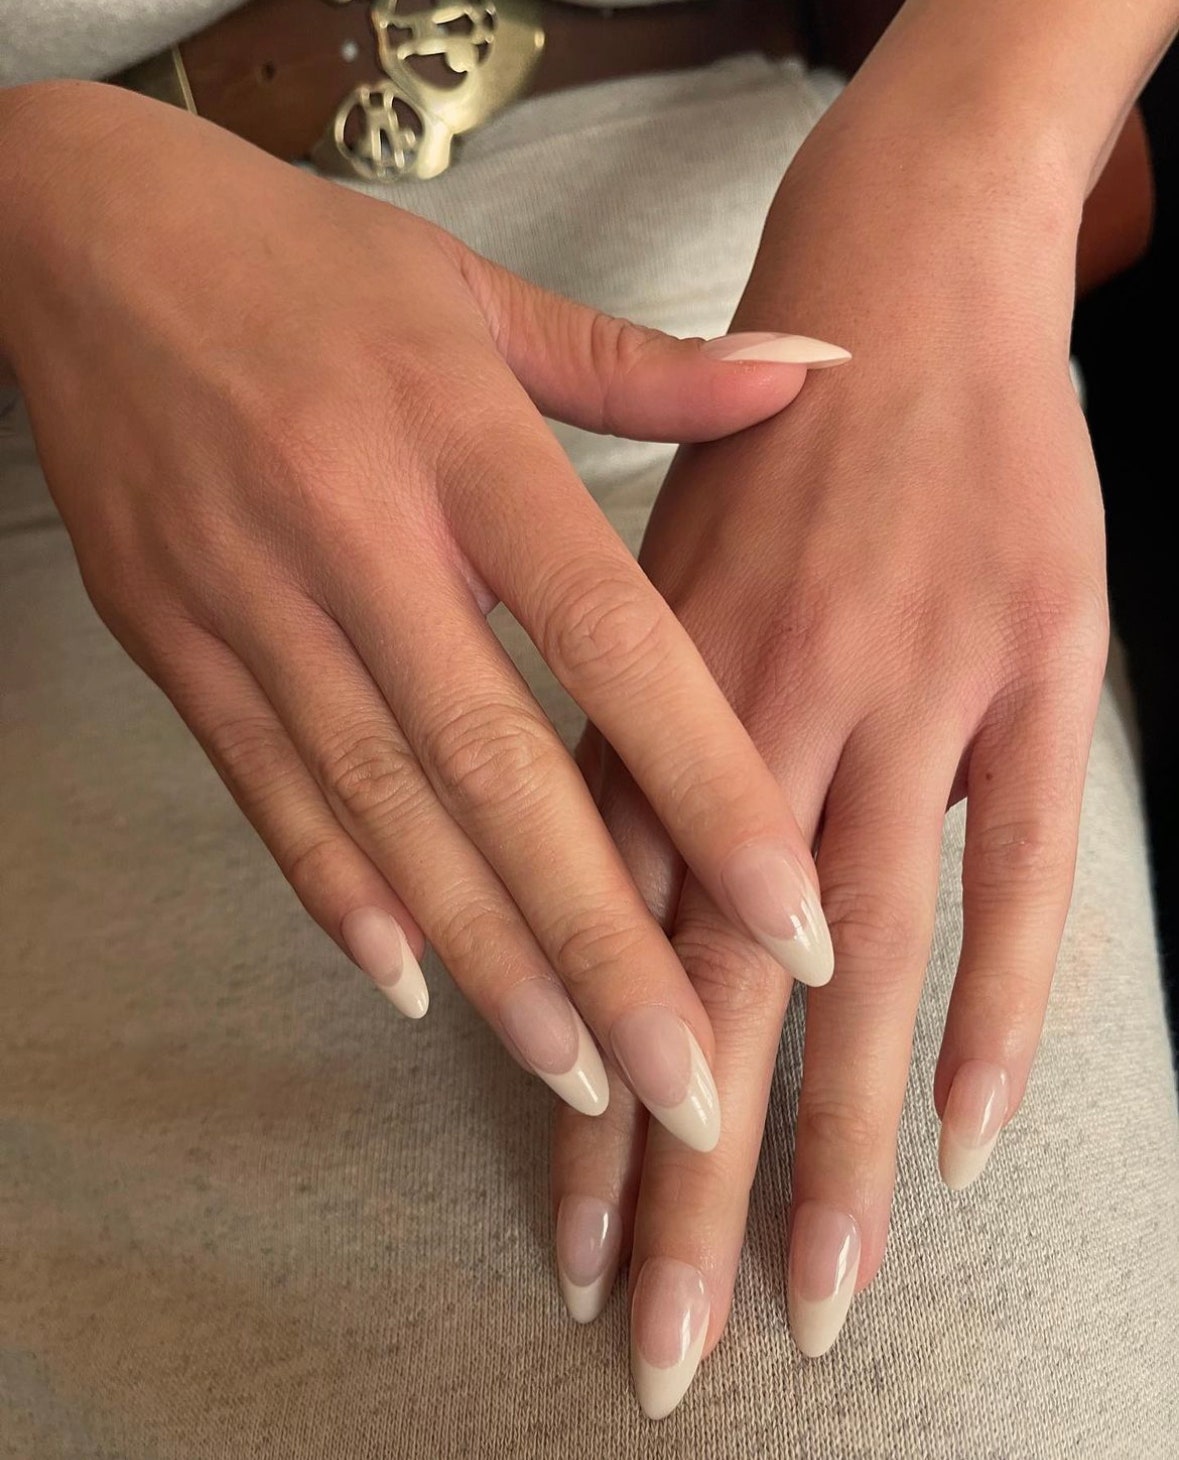
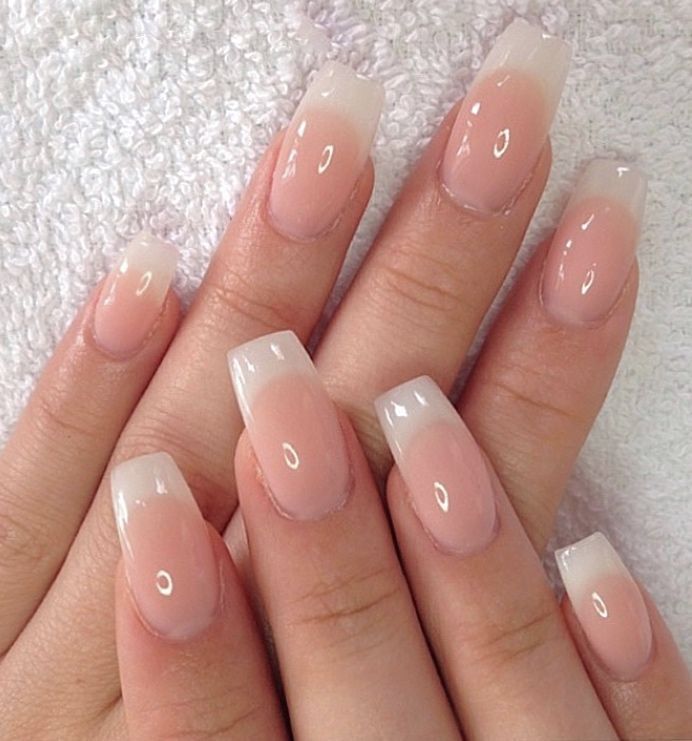
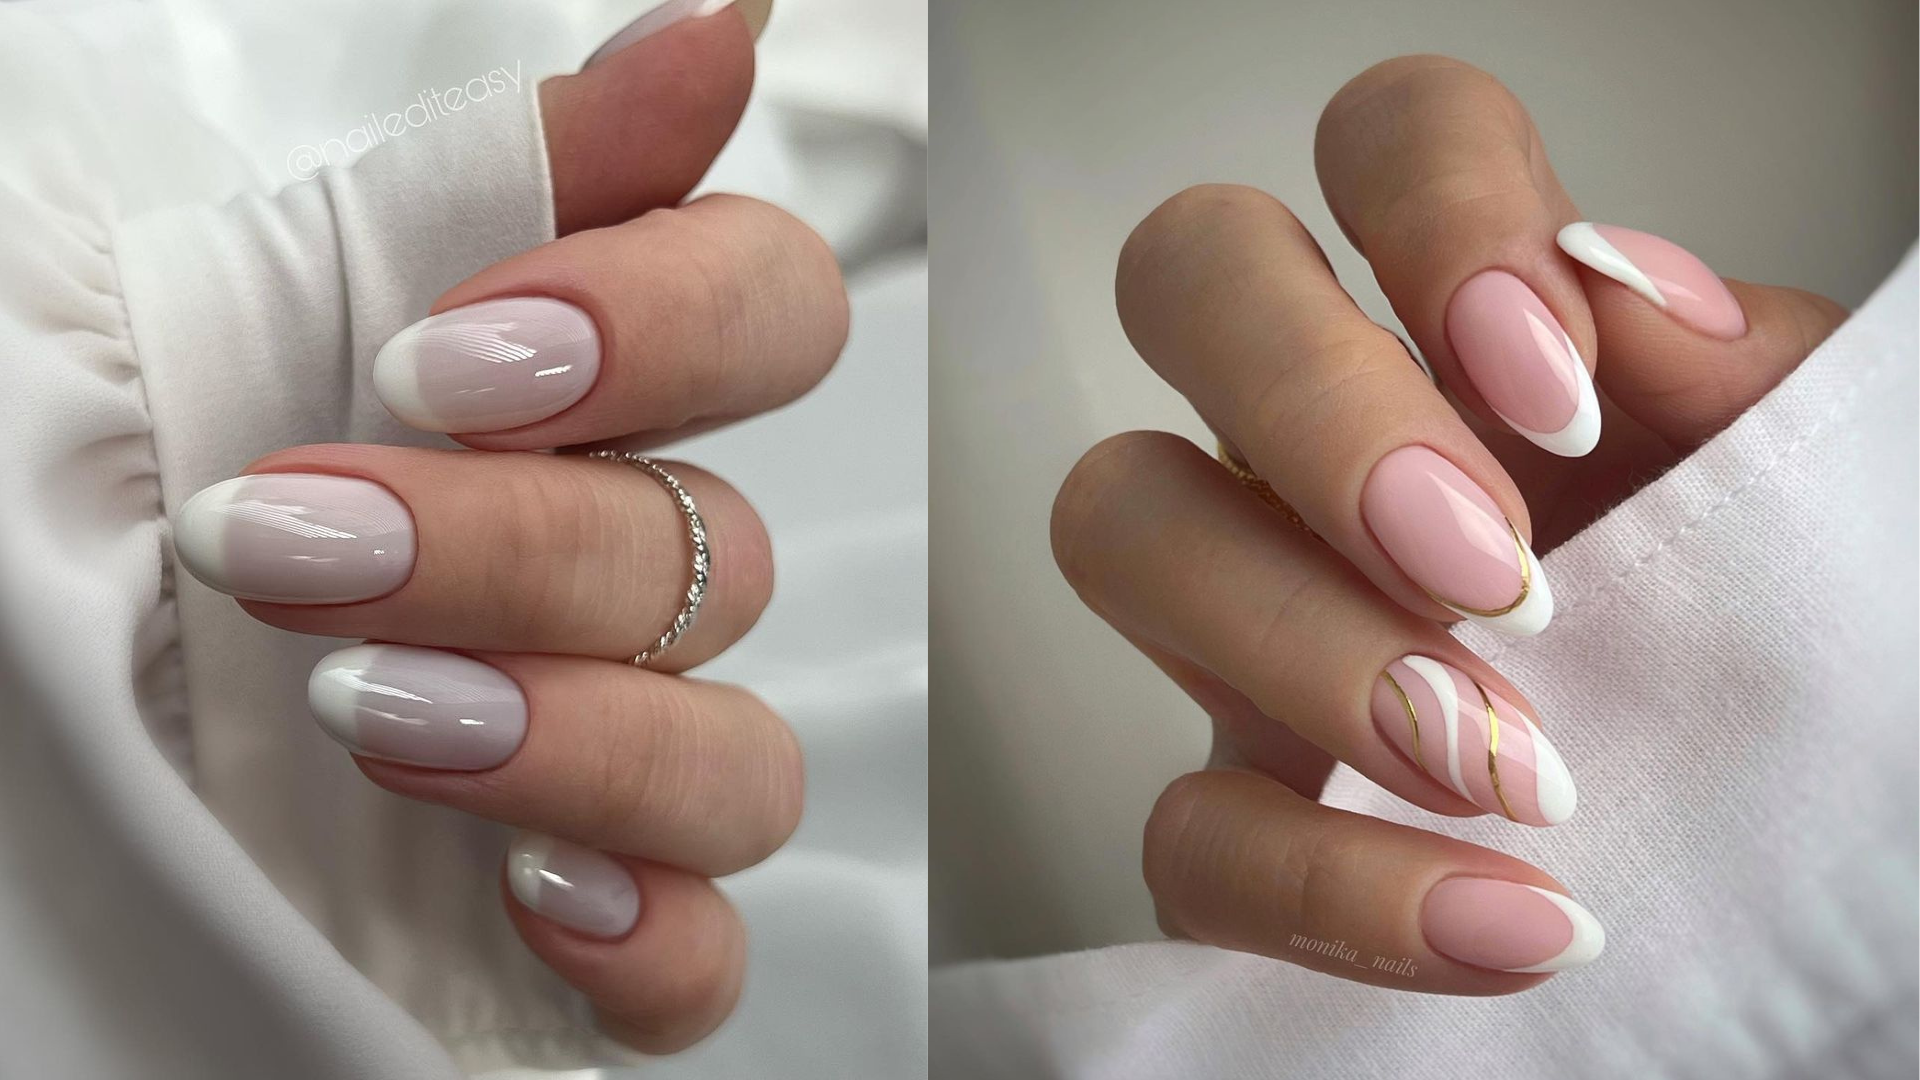
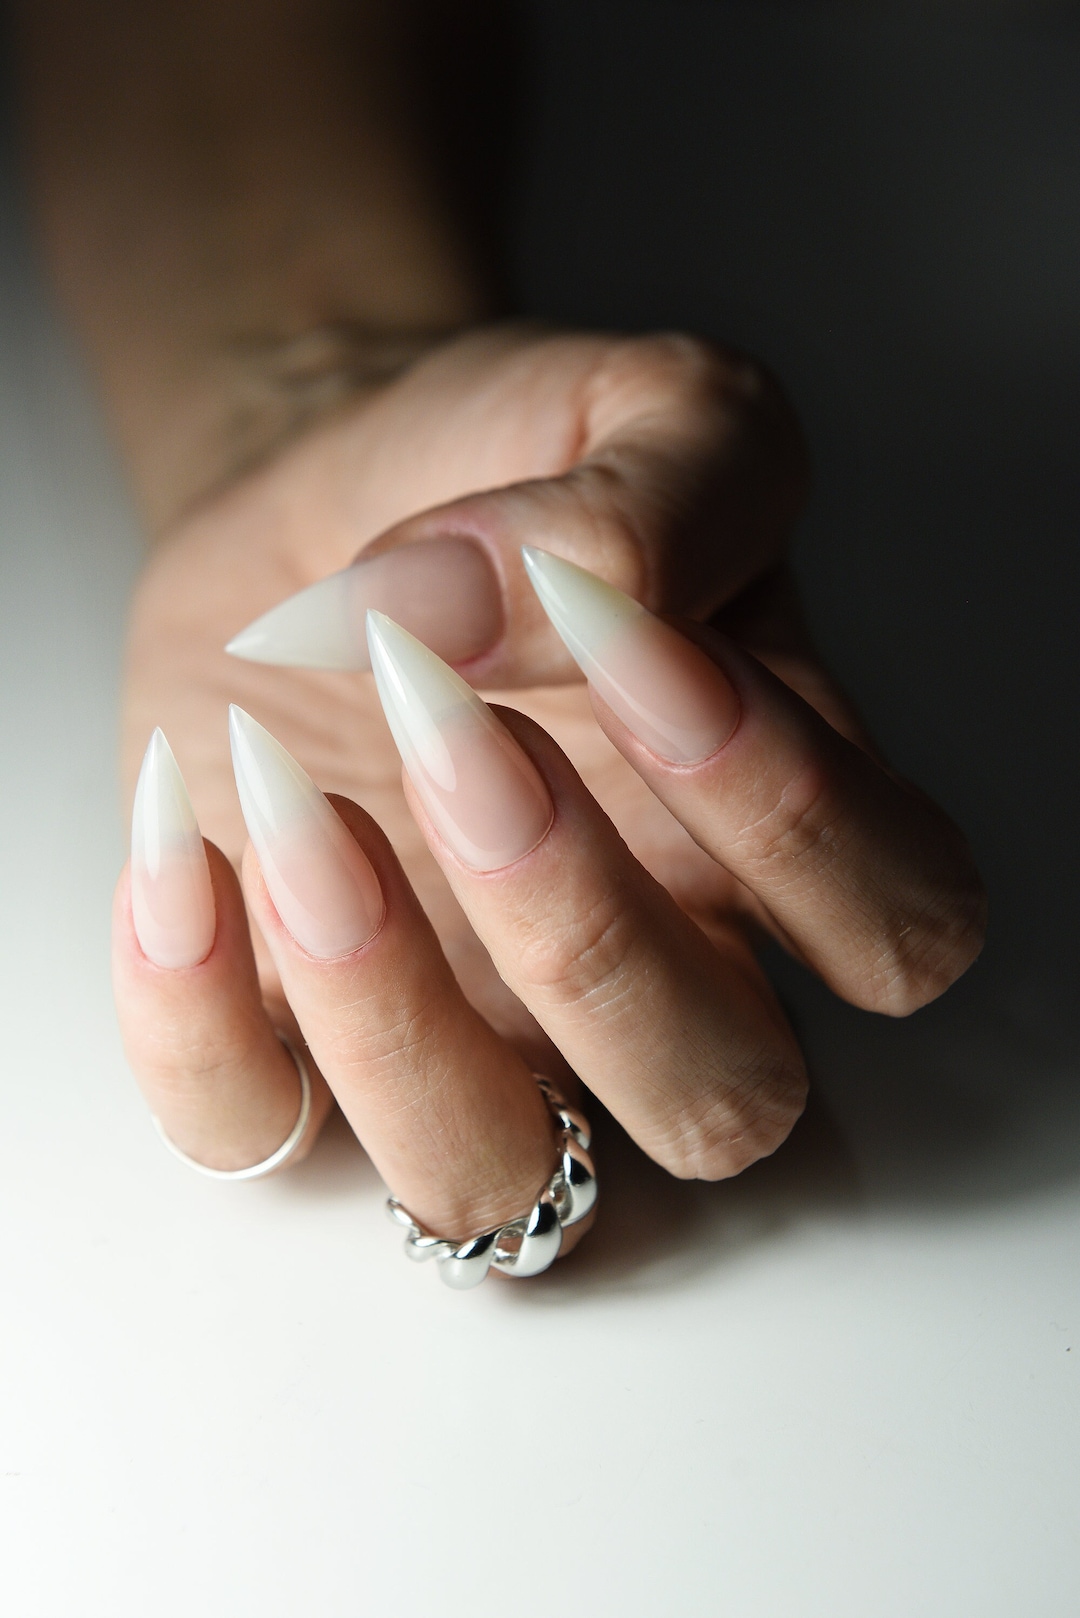
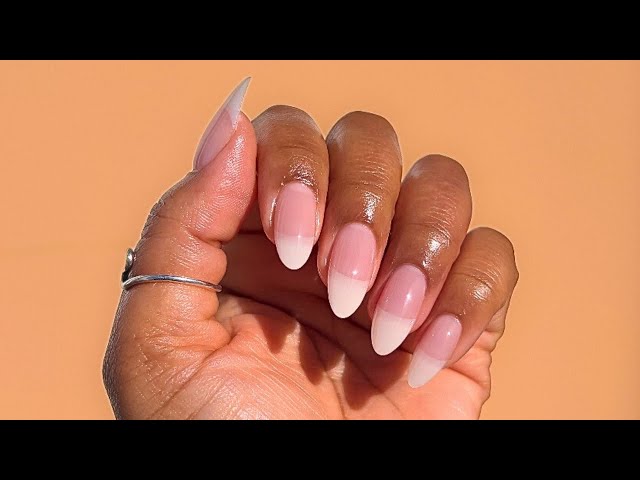
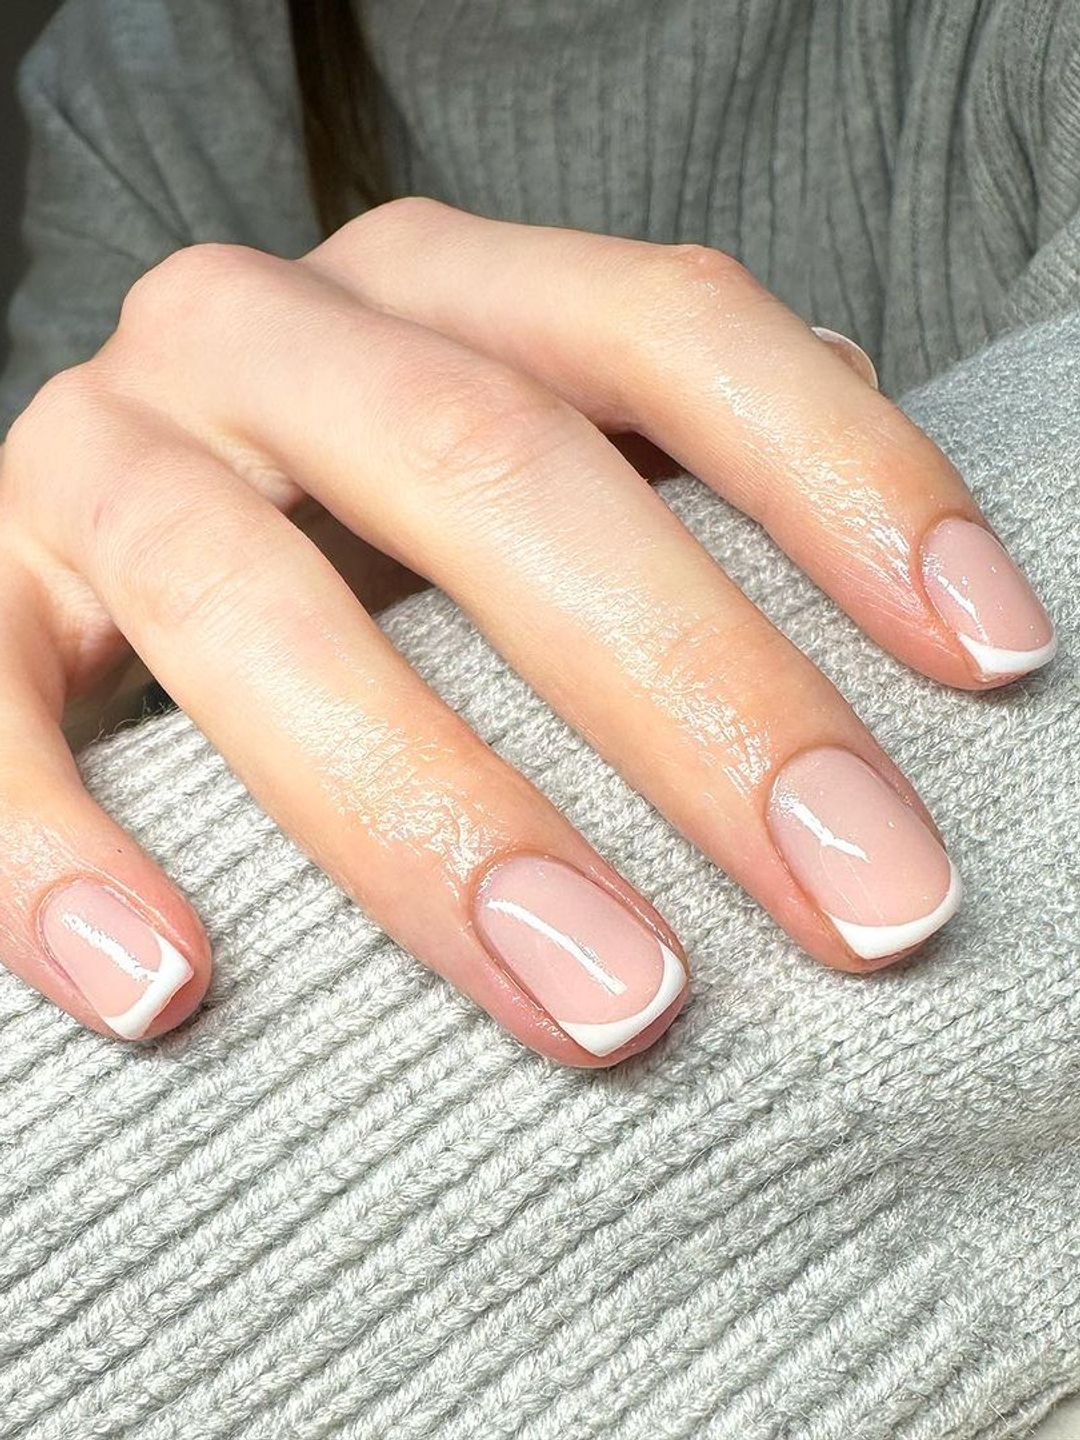


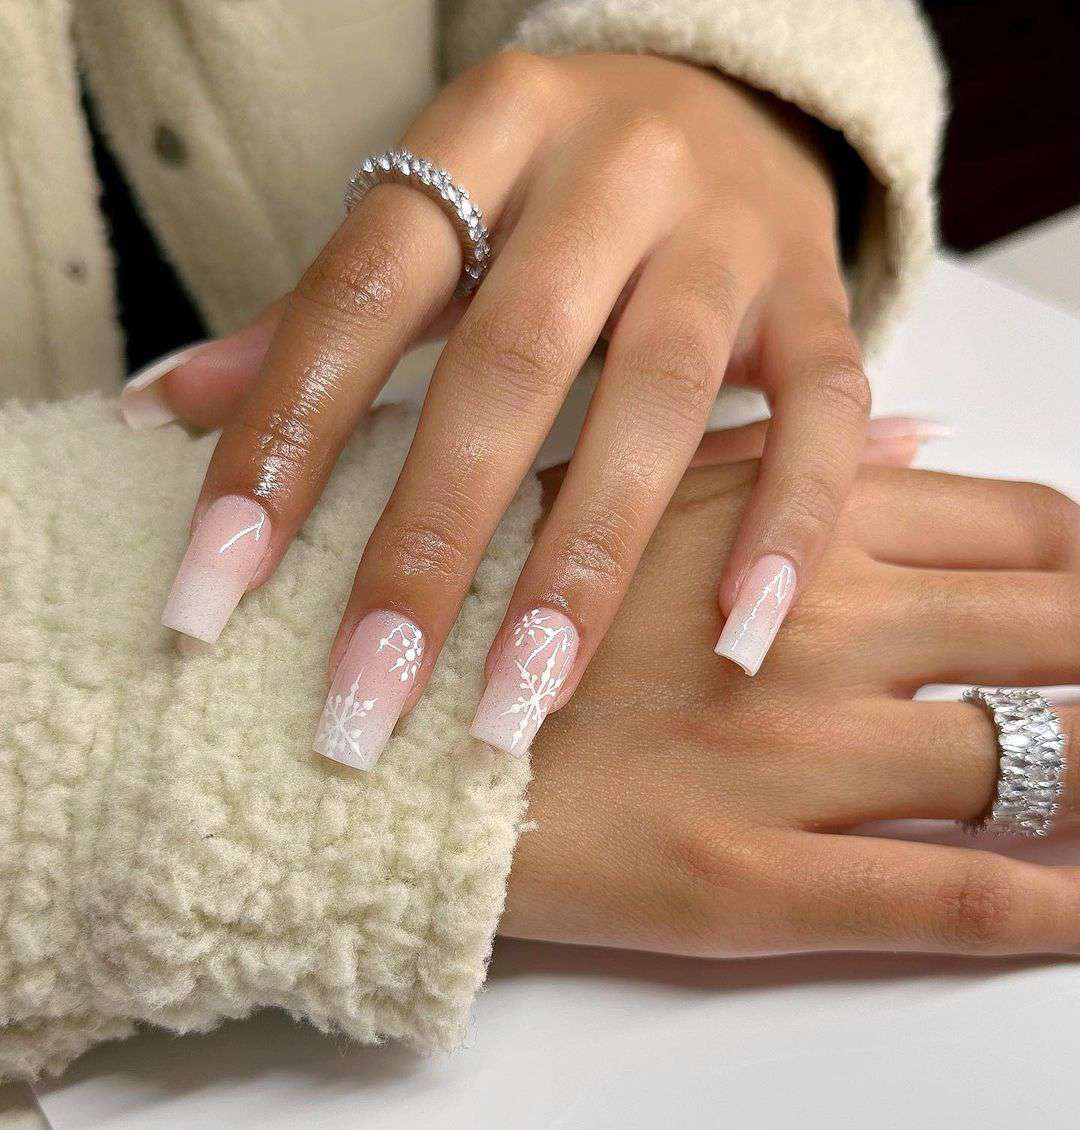
